Carol Santee

Carol is the co-author of the Big Book of Freezer Cooking and the author of 30 Day Gourmet’s Slow Cooker Freezer Favorites, Freezer Lunches To Go and Healthy Freezer Cooking eBooks. She is a computer information specialist and works for a computer software company.

Hamburger and Rice Soup

 Low Fat, Recipes, Soups & Sandwiches, Under 350 Calories  Comments Off on Hamburger and Rice Soup
Feb 012010
 
Share This Recipe

January was National Soup Month so I put together this soup recipe. It is hardy, thick and full of vegetables! We love soup in the wintertime. I always have my freezer full of single serving soups for lunches.

BReadBowl_08

Click here to go to a Printer Friendly Page Click here to go to a Printer Friendly Page
Advantage Cooking owners click here to download this recipe.

Recipes

1

2

3

4

5

6

Servings

8

16

24

32

40

48

Ingredients
Cooked ground beef

2-1/2 C.

5 C.

7-1/2 C.

10 C.

12-1/2 C.

15 C.

Sliced carrots

2 C.

4 C.

6 C.

8 C.

10 C.

12 C.

Chopped onions

1 C.

2 C.

3 C.

4 C.

5 C.

6 C.

Sliced celery

1 C.

2 C.

3 C.

4 C.

5 C.

6 C.

Diced green pepper (optional)

1/2 C.

1 C.

1-1/2 C.

2 C.

2-1/2 C.

3 C.

Minced garlic

2 t.

1 T. + 1 t.

2 T.

2 T. + 2 t.

3 T. + 1 t.

1/4 C.

Canned crushed tomatoes

28 oz.

56 oz.

84 oz.

112 oz.

140 oz.

168 oz.

Tomato sauce

1 C.

2 C.

3 C.

4 C.

5 C.

6 C.

Beef bouillon granules

1 T.

2 T.

3 T.

1/4 C.

1/4 C. + 1 T.

1/4 C. + 2 T.

Italian seasoning

1 t.

2 t.

1 T.

1 T. + 1 t.

1 T. + 2 t.

2 T.

Water

7 C.

14 C.

21 C.

28 C.

35 C.

42 C.

Black pepper

1/4 t.

1/2 t.

3/4 t.

1 t.

1-1/4 t.

1-1/2 t.

Uncooked brown rice (not instant)

3/4 C.

1-1/2 C.

2-1/4 C.

3 C.

3-3/4 C.

4-1/2 C.

Assembly Directions:
Combine ground beef, carrots, onion, celery, green pepper, garlic, tomatoes, tomato sauce, beef bouillon granules, Italian seasoning, water and black pepper in a large stock pot. Bring to a boil. Add brown rice. Return to boiling. Reduce heat to medium. Cover with lid and simmer for 45 minutes or until brown rice is tender. Remove from heat.

Freezing Directions:
Allow the soup to cool. Package the soup in meal sized portions. Large plastic freezer containers and freezer bags work well. Seal, label and freeze.

Serving Directions:
Thaw and reheat on stovetop or in a microwave oven.

Nutritional Info:
Per Serving: 252 Calories; 9g Fat (30.4% calories from fat); 16g Protein; 29g Carbohydrate; 4g Dietary Fiber; 40mg Cholesterol; 504mg Sodium.
Exchanges: 1 Grain (Starch); 1-1/2 Lean Meat; 3 Vegetable; 1/2 Fat.

Bread Bowls

 Breads and Breakfast, Recipes  Comments Off on Bread Bowls
Feb 012010
 
Share This Recipe

A couple of years ago I had soup in a bread bowl at a book club meeting. It was such a wonderful way to enjoy a good bowl of soup. I’ve always want to try making my own. These are simple to make if you are familiar with making bread. My husband did a great job cutting the tops. He used a pineapple corer to make the uniform sized opening. Or you can just slice off the top and hollow out the insides by hand.

BReadBowl_03

Click here to go to a Printer Friendly Page Click here to go to a Printer Friendly Page
Advantage Cooking owners click here to download this recipe.

Recipes

1

2

3

4

5

6

Servings

4

8

12

16

20

24

Ingredients
Warm water

1/2 C.

1 C.

1-1/2 C.

2 C.

2-1/2 C.

3 C.

Warm water

1/2 C.

1 C.

1-1/2 C.

2 C.

2-1/2 C.

3 C.

Sugar

2 T.

1/4 C.

1/4 C. + 2 T.

1/2 C.

1/2 C. + 2 T.

3/4 C.

Active dry yeast

1 packet

2 packets

3 packets

4 packets

5 packets

6 packets

Butter or margarine, melted

1/4 C.

1/2 C.

3/4 C.

1 C.

1-1/4 C.

1-1/2 C.

Egg

1

2

3

4

5

6

Salt

1 t.

2 t.

1 T.

1 T. + 1 t.

1 T. + 2 t.

2 T.

Flour

3 C.

6 C.

9 C.

12 C.

15 C.

18 C.

Egg white

1

2

3

4

5

6

Water

1 T.

2 T.

3 T.

1/4 C.

1/4 C. + 1 T.

1/4 C. + 2 T.

Assembly Directions:
In a large bowl or in a mixer bowl using dough hook, stir together water, milk, and sugar until sugar is dissolved. Add yeast and let stand 5 to 10 minutes or until the yeast is foamy. Add melted butter, egg, and salt. Stir in as much flour as you can. Dough should be smooth and elastic (not wet). Shape into a dough ball and place in a lightly oiled bowl. Cover and let rise in a warm place until double in size (about 1 to 1-1/2 hours). For each recipe, punch down and divide into 4 equal portions.

Spray a baking sheet with cooking spray. Place the 4 balls on each baking sheet. Cover and let rise until doubled (about 30 minutes to 1 hour). Beat egg white in water. Using a pastry brush, lightly coat each bread bowl with egg and water mixture. Bake at 350 degrees for 20 to 25 minute or until golden brown. Remove from pans and cool on a wire rack.

Freezing Directions:
Place bread bowls in a freezer bag or container. Seal, label and freeze.

Serving Directions:
Thaw the bread bowls overnight. Using a long sharp knife, cut a thin slice off the top of the bread. Hollow out the bottom half of the bread creating a bowl. Fill with any thick and hardy soup such as chili or stew.

Nutritional Info:
Per Serving: 508 Calories; 14g Fat (25.2% calories from fat); 14g Protein; 80g Carbohydrate; 3g Dietary Fiber; 49mg Cholesterol; 713mg Sodium.
Exchanges: 5 Grain (Starch); 1/2 Lean Meat; 2-1/2 Fat; 1/2 Other Carbohydrates.

November 2009 Chewin’ the News with Carol

 2009, Chewin' the News  Comments Off on November 2009 Chewin’ the News with Carol
Nov 012009
 

Kitchen Fun With Carol

Carol2009cropHello everyone! It is amazing to me how fast time flies by. My twin boys started college this fall. Josh is studying Mechanical Engineering at Marion Technical College and Steven is studying Industrial and Graphic Design at The Ohio State University. We are so proud of them!

As Nanci mentioned in her newsletter, we have been very busy working on the new website, cooking like crazy testing new recipes, and taking lots of pictures for the new manual. Some days it felt like I was living the movie Julie and Julia! (I can relate to the scene where she sat on the kitchen floor and cried. I tried some recipes four or five times before they were just right.) We are in the final stages of putting the recipes together and I think you will enjoy them! I know that we have already added some new favorites to our family’s monthly menu.

Family Traditions
This time of the year is so special to me. It is wonderful to spend time with friends and family. There are so many special memories that revolve around food. For example, I love the potluck that our small group always has before the holidays. Sometimes we have a “theme dinner” and have everyone bring a dish that goes with the theme. You never know what you are going to get but it so fun sharing. We have also done a progressive dinner where each person hosts a certain course of the meal. We travel house to house to sample each other’s cooking. Some other traditions include making loaves of banana bread and spiced nuts for my Dad at Christmas, my sister-in-law and I competing for bragging rights over who makes the best apple pie, and my mom always making a batch of Cherry Noels just for me every year. My kids always make cinnamon rolls for breakfast on Christmas morning. I also enjoy spending a day with my girlfriends or my kids making all kinds of different cookies. In the past, my kids have invited their friends over to the house to make iced sugar cookies together. I make the dough and they take it from there. It is such a fun activity and even teenagers enjoy decorating sugar cookies. There are so many good memories.

Chocolate Pecan Pumpkin Bread

Chocolate Pecan Pumpkin Bread

Every family has their favorite recipes that you just can’t do without for the holidays. We sat around the table at my mom’s house and discussed what everyone was bringing to the meal. It was a fun conversation! It was great to hear what recipes everyone “had” to have to make it Thanksgiving. This year I am in charge of breads and the veggie platter with Grandma’s recipe for the dip. I am thinking about bringing Crescent Rolls and Hot Rolls. (I might try making wheat instead of white this year.) They are super easy to make. I am also bringing some Chocolate Pecan Pumpkin Bread (one of the recipes from the new manual) and some Pumpkin Butter. The recipe for the Pumpkin Butter is below.

We always try to plan a craft project for the kids. One of my favorite places for ideas is Family Fun magazine’s web site, familyfun.go.com. Take a look at their Thanksgiving craft page, familyfun.go.com/thanksgiving/thanksgiving-craft-decorations. The tabletop luminaries look great! This would be such a great idea for Christmas as well. Just replace the turkey with Christmas trees, ornaments, or snowflakes.

Bonus Recipes From Carol

AppleCrumblePie_015Apple Crumble Pie

This is one of my all time favorite pies. I like how it forms the crumbles form a crisp topping and the spice mix is great! Here are three of my secrets that I have learned making this pie:

  • Each apple variety is good for different things so pick a variety good for what you are making. I used Gala apples to make my pie. They are good for both baking and freezing.
  • After you pour the apple mixture into the crust, press it firmly down into the crust. You want the apple mixture to be as compact as possible.
  • Also, make sure you limit the amount of liquid used in the fruit mixture. This helps the pie setup properly during baking.

Good luck baking the perfect Apple Crumble Pie!

Pumpkin Butter

Pumpkin Butter

Pumpkin Butter
I always make apple butter in the fall. This year I tried pumpkin butter. It is a great change of pace for the fall. This recipe is especially good on toast and on muffins. It is also a quick and easy hostess gift if you are visiting someone else this holiday. One batch will make three pint size gift jars. Look for the decorative pint jars at your local store.
FYI – I just read an article in our local newspaper this morning about a pumpkin shortage. They are reporting that there will not be much pumpkin availability after November. So if you want to make your favorite pumpkin recipes throughout the winter you need to stock up on canned pumpkin now!


Closing Comments From Carol

Happy Thanksgiving, everyone! I hope you enjoy the recipes and this holiday season. Enjoy this time with your family and friends. I am looking for your favorite holiday recipes.

You can post your recipes on the 30 Day Gourmet Facebook® fan page or click here to send me an email. Or do you have any other topics that you would like me to cover? Click here to send me an email. I enjoy hearing from you!

Have fun in your kitchen!

Carol

Nov 012009
 
Share This Recipe

I always make apple butter in the fall. This year I tried pumpkin butter. It is a great change of pace for the fall. This recipe is especially good on toast and on muffins. It is also a quick and easy hostess gift if you are visiting someone else this holiday. One batch will make three pint size gift jars. Look for the decorative pint jars at your local store.

PumpkinButter_018crop

Click here to go to a Printer Friendly Page Click here to go to a Printer Friendly Page
Advantage Cooking owners click here to download this recipe.

Recipes

1

2

3

4

5

6

Servings

36

72

108

144

180

216

Makes

3 C.

6 C.

9 C.

12 C.

15 C.

18 C.

Ingredients
Pumpkin puree

2 C.

4 C.

6 C.

8 C.

10 C.

12 C.

Powdered pectin

2 T.

1/4 C. + 2 T.

1/2 C. + 1 T.

3/4 C.

3/4 C. + 3 T.

1 C. + 2 T.

Cinnamon

1 t.

2 t.

1 T.

1 T. + 1 t.

1 T. + 2 t.

2 T.

Allspice

1/2 t.

1 t.

1-1/2 t.

2 t.

2-1/2 t.

1 T.

Sugar

2 C.

4 C.

6 C.

8 C.

10 C.

12 C.

Assembly Directions:
In a medium saucepan, combine pumpkin, pectin, cinnamon, and allspice. Heat over medium heat stirring occasionally until pumpkin mixture begins to steam and bubbles start to form. Add sugar and mix well. Bring to a full boil stirring constantly. Continue to boil for one minute. Remove from heat.

Freezing Directions:
Spoon pumpkin butter into freezer containers. Seal, label, and freeze. The pumpkin butter can be frozen up to three months.

Servings Directions:
Thaw in the refrigerator. Pumpkin butter can be stored in the refrigerator up to three weeks.

Nutritional Info:
Per Serving: 52 Calories; trace Fat (0.8% calories from fat); trace Protein; 13g Carbohydrate; 1g Dietary Fiber; 0mg Cholesterol; 3mg Sodium.
Exchanges: 1 Other Carbohydrates.

Apple Crumble Pie

 Recipes, Snacks and Desserts, Under 350 Calories  Comments Off on Apple Crumble Pie
Nov 012009
 
Share This Recipe

This is one of my all time favorite pies. I like how it forms the crumbles form a crisp topping and the spice mix is great! Here are three of my secrets that I have learned making this pie:

  • Each apple variety is good for different things so pick a variety good for what you are making. I used Gala apples to make my pie. They are good for both baking and freezing.
  • After you pour the apple mixture into the crust, press it firmly down into the crust. You want the apple mixture to be as compact as possible.
  • Also, make sure you limit the amount of liquid used in the fruit mixture. This helps the pie setup properly during baking.

Good luck baking the perfect Apple Crumble Pie!

AppleCrumblePie_015
Click here to go to a Printer Friendly Page Click here to go to a Printer Friendly Page
Advantage Cooking owners click here to download this recipe.

Recipes

1

2

3

4

5

6

Servings

8

16

24

32

40

48

Ingredients
Chopped apple

6 C.

12 C.

18 C.

24 C.

30 C.

36 C.

Lemon juice

1 T.

2 T.

3 T.

1/4 C.

1/4 C. + 1 T.

1/4 C. + 2 T.

Sugar

1/2 C.

1 C.

1-1/2 C.

2 C.

2-1/2 C.

3 C.

Flour

2 T.

1/4 C.

1/4 C. + 2 T.

1/2 C.

1/2 C. + 2 T.

3/4 C.

Cinnamon

1/2 t.

1 t.

1-1/2 t.

2 t.

2-1/2 t.

1 T.

Pie crust

1

2

3

4

5

6

Crumble Topping
Flour

1/2 C.

1 C.

1-1/2 C.

2 C.

2-1/2 C.

3 C.

Sugar

1/2 C.

1 C.

1-1/2 C.

2 C.

2-1/2 C.

3 C.

Cinnamon

1/2 t.

1 t.

1-1/2 t.

2 t.

2-1/2 t.

1 T.

Ground ginger

1/4 t.

1/2 t.

3/4 t.

1 t.

1-1/4 t.

1-1/2 t.

Ground nutmeg

1/8 t.

1/4 t.

3/8 t.

1/2 t.

1/2 t. + 1/8 t.

3/4 t.

Butter or margarine

1/4 C.

1/2 C.

3/4 C.

1 C.

1-1/4 C.

1-1/2 C.

Assembly Directions:
Place apples in a large mixing bowl. Sprinkle with lemon juice. Add sugar, flour, and cinnamon and toss to coat. Pour apple mixture into a pie crust. Press down on apple mixture with the back of a wooden spoon or spatula until apples are compacted.

In a separate bowl, combine the flour, sugar, cinnamon, ginger, and all spice. Stir to mix. Cut in the butter until crumbly using a pastry knife or a fork. Sprinkle mixture over the apples.

Freezing Directions:
Cover the pie with aluminum foil. Place pie in a gallon freezer bag. Seal, label, and freeze.

Servings Directions:
Preheat oven to 425 degrees. Remove pie from freezer bag leaving aluminum foil in place. Bake pie for 15 minutes. Reduce heat to 375 degrees. Bake for 30 minutes. Remove aluminum foil and bake for an additional 15 to 30 minutes or until crust is brown and pie is bubbly. Serve warm.

Notes:
To serve the pie immediately after assembling, preheat the oven to 375 degrees. Cover the edges of the crust with aluminum foil. Bake for 30 minutes. Remove the foil and bake for an additional 30 minutes. Remove from oven and serve warm.

Nutritional Info:
Per Serving: 340 Calories; 12g Fat (31.4% calories from fat); 3g Protein; 57g Carbohydrate; 4g Dietary Fiber; 0mg Cholesterol; 213mg Sodium.
Exchanges: 1 Grain (Starch); 1 Fruit; 2-1/2 Fat; 1-1/2 Other Carbohydrates.

August 2009 Chewin’ the News

 2009, Chewin' the News  Comments Off on August 2009 Chewin’ the News
Aug 012009
 

Kitchen Fun With Carol

OhioStateFair_032aSummer Produce

Hello everyone! I hope everyone is having a wonderful summer. My summer has been fun so far but I have to admit that I am looking forward to the crisp, cool autumn days ahead.

It has been exciting here over the last month. This year I decided to enter a recipe contest. As you know, I create recipes all the time that I share with all of the wonderful 30 Day Gourmet cooks but I have never entered an official recipe contest before now. I am a member of the Ohio Farm Bureau (not that I live on a farm but I garden, can, and I greatly appreciate the local farmers). The Ohio Farm Bureau partnered with Bob Evans to sponsor a recipe contest. The recipe had to use one Bob Evans product and at least one locally grown product. I submitted a recipe for Tuscan White Bean Soup. To my surprise I was selected as a finalist in the contest! I got to go to the Ohio State Fair to find out who had won the contest. I did not win but it is an honor to be first runner-up in my category. Here’s a picture of my recipe:
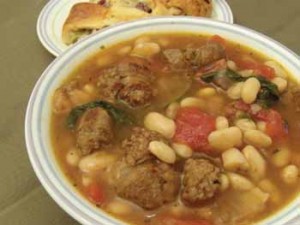
Tuscan White Bean Soup

Tuscan White Bean Soup

The garden is starting to produce lots of vegetables and I have been freezing and canning. I tried a freezer pizza sauce recipe this year that is good. I have also canned some using my regular pizza sauce recipe. I found blueberries at the local market for $1 a pound so I froze 12 pounds in 1 cup portions for muffins and pancakes. My zucchini patch exploded all at once so I grated some, made some Zucchini Carrot Muffins, and I am testing freezing sliced zucchini for stir fry recipes and soups.
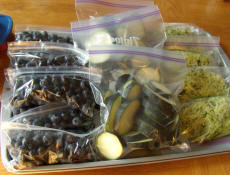
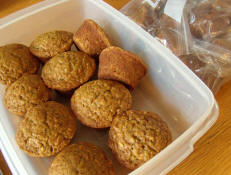
FreezingProduce   FreezingMuffins

Last month a reader sent me a great email about saving money using seasonal produce.

We are really trying to cut back financially and still eat healthily…not just boxes of hamburger helper and taco box kits, etc.. =)

We are going to the Farmer’s Market to get fresh fruits and veggies. It’s cheaper and healthier to buy these directly from the farmer when they are “in season.” However, I am quickly running out of ideas on how to use these items and healthy recipes I can use to freeze these for later use when they are no longer “in season” and will cost more to buy.

I would love to see a section on your website for “in season” cooking. Where the recipes are separated out according to the “seasons” so that myself and others can cook and freeze meals according to what fruits and veggies are in season now, at a cheaper price. So in October I can click on recipes for meals that can be made with October’s in season fruits and veggies or like are in season now in July–blueberries and zucchini, for example. I think lots of people would enjoy it and it would save people lots of money on their food bills.

Thanks for the chance to make this request!

Wendi

This is a great idea! I did some research on the subject. The USDA’s web site has a general list of produce by season. Click here to view the seasonal lists. Produce availability varies by region so the exact produce that is available in your area may be be different from this this but it is a good place to start. For the state of Ohio, the Ohio Farm Bureau produces a list of what is available. Click here to view this list. Each state has its own web site with this information. An interesting site I found is www.pickyourown.org. This web site has harvest calendars for a majority of the states as well as farms where you can pick your own fruits and vegetables.

Based on the USDA’s Summer Produce list, here are some 30 Day Gourmet recipes to make this summer using fresh in season produce.

Apricots, peaches, nectarines, plums

Bananas, kiwi

Beets, radishes, bell peppers, okra, peas

Blueberries, blackberries, cherries, grapes, raspberries, strawberries, cantaloupe, honeydew melon, watermelon

Corn, Cucumbers, eggplant, garlic

Green beans, lima beans, mushrooms

Summer squash, zucchini, tomatoes

Freezer Cook of the Month Contest Winner

Our Freezer Cook of the Month is Julie from Noblesville, IN. Julie tells us about how she adapted the 30 Day Gourmet method to her particular situation.

Let’s hear Julie’s story:

Right now I am 38 1/2 weeks pregnant, and am not physically up to a big cooking day. So, instead, I have been doubling one recipe a week for the last couple of months, in order to have a week or two of meals available after the birth of our 5th child. I have soups, bean dishes, Master Meat Mix, onion burgers, and two kinds of chili waiting for us when I return from the hospital. I am sure that our friends will help us out with meals, but it is good to know that I have meals in the freezer for when those “friend” meals run out. I planned really hearty meals to help energize me and build up my milk supply for my brand new little daughter.

My son’s birthday is 5 days before my due date, so as an added plan-ahead measure, I made him an ice cream cake for his birthday. It is in the freezer, waiting to be thawed a bit on his birthday just in case I happen to have his little sister and have to be away on his big day!! What would I do without my freezer??? This way Grandma and Grandpa can celebrate his birthday with him, and the cake is ready to go!

Julie

It is great to hear how you can adapt freezer cooking to fit your life style! So, how do you make 30 Day Gourmet work for you? How do you use it to help you deal with a challenge in your life? How do you use it to help others? Do you have a funny cooking story or a recipe to share? You can post your recipes on the 30 Day Gourmet Facebook® fan page or click here to send me an email.

Bonus Recipes
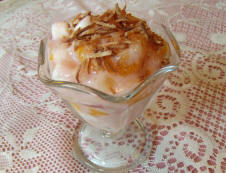
AmbrosiaSaladAmbrosia Salad

I like to have fruit salads in the freezer during the summer months for a quick, cool dessert. I like the toasted coconut on this recipe. It makes it look very pretty. A defrosting tip for this recipe – don’t defrost it in the microwave. The marshmallows melt and it ruins the look of the dessert. (It still tastes great!)
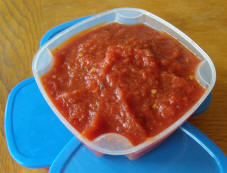


PizzaSauceFreezer Pizza Sauce

I always like having homemade pizza sauce on hand. You can definitely save money by making your own pizza instead of buying it from your local pizza shop. If you don’t have a garden you can always buy tomatoes at you local farmer’s market at a very good price. In our area they usually start picking in August. Our local farmer’s market sells them by the bushel so if my garden does not produce all that I need, I just buy a bushel or two to fill in.


Closing Comments from Carol

I hope you enjoy the recipes and the rest of your summer. Enjoy all the great summertime fresh produce before the cool fall weather settles in around your neighborhood. I am looking for your favorite back to school recipes. You can post your recipes on the 30 Day Gourmet Facebook® fan page or click here to send me an email.

Or do you have any other topics that you would like me to cover? Click here to send me an email. I enjoy hearing from you!

Have fun in your kitchen!

Carol


Aug 012009
 
Share This Recipe

I always like having homemade pizza sauce on hand. You can definitely save money by making your own pizza instead of buying it from your local pizza shop. If you don’t have a garden you can always buy tomatoes at you local farmer’s market at a very good price. In our area they usually start picking in August. Our local farmer’s market sells them by the bushel so if my garden does not produce all that I need, I just buy a bushel or two to fill in.

PizzaSauce

Click here to go to a Printer Friendly Page Click here to go to a Printer Friendly Page
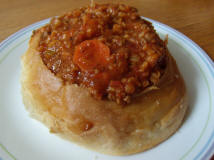
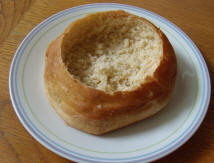
Advantage Cooking owners click here to download this recipe.

Recipes

1

2

3

4

5

6

Servings

16

32

48

64

80

96

Makes

4 C.

8 C.

12 C.

16 C.

20 C.

24 C.

Ingredients
Fresh tomatoes; peeled, cored and pureed OR

3-1/2 C.

7 C.

10-1/2 C.

14 C.

17-1/2 C.

21 C.

Canned crushed tomatoes

28 oz.

56 oz.

84 oz.

112 oz.

140 oz.

168 oz.

Tomato paste

6 oz.

12 oz.

18 oz.

24 oz.

30 oz.

36 oz.

Dried basil

1 t.

2 t.

1 T.

1 T. + 1 t.

1 T. + 2 t.

2 T.

Dried oregano

3/4 t.

1-1/2 t.

2-1/4 t.

1 T.

1 T. + 3/4 t.

1 T. + 1-1/2 t.

Garlic powder

1/2 t.

1 t.

1-1/2 t.

2 t.

2-1/2 t.

1 T.

Onion powder

1 t.

2 t.

1 T.

1 T. + 1 t.

1 T. + 2 t.

2 T.

Salt (optional if using canned tomatoes)

1-1/2 t.

1 T.

1 T. + 1-1/2 t.

2 T.

2 T. + 1-1/2 t.

3 T.

Sugar

1-1/2 t.

1 T.

1 T. + 1-1/2 t.

2 T.

2 T. + 1-1/2 t.

3 T.

Assembly Directions:
In a large saucepan, combine all ingredients and bring to a boil, stirring frequently. Reduce heat and simmer for 45 minutes.

Freezing Directions:
Allow to cool. Place sauce in freezer containers or freezer bags. Seal, label and freeze.

Serving Directions:
Thaw over night in the refrigerator.

Comments:
The amounts of the seasonings are just a starting place for the recipe. Feel free to adjust the seasonings to your tastes. The sugar will reduce the acidity of the sauce. Oregano can have a bitter flavor. Adjust it to your tastes. If you are using canned tomatoes that contain salt, you may not need to add any salt to the sauce.

Nutritional Info:
Based on using fresh tomatoes and salt as indicated in recipe.
Per Serving: 21 Calories; trace Fat (8.0% calories from fat); 1g Protein; 5g Carbohydrate; 1g Dietary Fiber; 0mg Cholesterol; 288mg Sodium.
Exchanges: 1 Vegetable.

Aug 012009
 
Share This Recipe

I like to have fruit salads in the freezer during the summer months for a quick, cool dessert. I like the toasted coconut on this recipe. It makes it look very pretty. A defrosting tip for this recipe – don’t defrost it in the microwave. The marshmallows melt and it ruins the look of the dessert. (It still tastes great!)

AmbrosiaSalad

Click here to go to a Printer Friendly Page Click here to go to a Printer Friendly Page
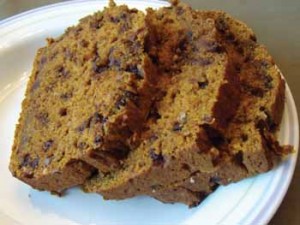
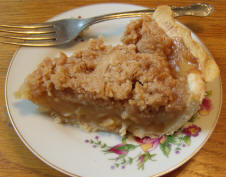
Advantage Cooking owners click here to download this recipe.

Recipes

1

2

3

4

5

6

Servings

8

16

24

32

40

48

Makes

4 C.

8 C.

12 C.

16 C.

20 C.

24 C.

Ingredients
Miniature marshmallows

1 C.

2 C.

3 C.

4 C.

5 C.

6 C.

Canned crushed pineapple, drained

20 oz.

40 oz.

60 oz.

80 oz.

100 oz.

120 oz.

Banana, sliced

1

2

3

4

5

6

Canned mandarin oranges, drained

11 oz.

22 oz.

33 oz.

44 oz.

55 oz.

66 oz.

Reduced fat/sugar strawberry yogurt

3/4 C.

1-1/2 C.

2-1/4 C.

3 C.

3-3/4 C.

4-1/2 C.

Toasted coconut flakes

1/4 C.

1/2 C.

3/4 C.

1 C.

1-1/4 C.

1-1/2 C.

Assembly Directions:
Mix all ingredients except coconut in a large mixing bowl.

Freezing Directions:
Divide yogurt mixture into meal size containers. Place toasted coconut flakes in a small container or freezer bag. Seal, label and freeze.

Serving Directions:
Thaw in refrigerator. Place in serving dishes. Sprinkle with toasted coconut.

Comments:
To toast coconut, preheat oven to 350 degrees. Spread out coconut flakes on a baking sheet. Bake for 5 minutes or until coconut is a rich brown color.

Nutritional Info:
Per Serving: 119 Calories; 1g Fat (9.4% calories from fat); 2g Protein; 27g Carbohydrate; 1g Dietary Fiber; trace Cholesterol; 22mg Sodium.
Exchanges: 1-1/2 Fruit.

July 2009 Chewin’ the News with Carol

 2009, Chewin' the News  Comments Off on July 2009 Chewin’ the News with Carol
Jul 092009
 

Kitchen Fun with Carol

Carol2009cropHello everyone! I hope you had a wonderful Fourth of July holiday. We cooked out on the grill a lot over the weekend. We had steaks, grilled chicken, brats, hot dogs and grilled corn. You name it and we probably made it over the weekend. What fun!

Have you ever grilled corn on the cob? We have tried several different methods and they all seem to have great results. One of our favorites is to grill the corn right in the husks. Take the corn and soak it in the sink for at least 15 minutes before cooking it. We usually soak it for a half an hour. This gives the husks a little more moisture for steaming the corn inside the husks. Heat your grill to a medium heat. Place the husks on the grill and let them cook. You need to turn them about every 5-10 minutes so the corn inside does not char. When the husks are charred, the corn is done. Remove it from the grill with tongs. We use a dish towel to grab the husks and pull them off the corn cobs. Once all the husks and silk strands have been removed from the corn, run them under warm water to finish removing any stray silk strands and any ash that got on the cobs. Now you are ready to eat! Give it a try. It’s a fun way to cook corn.

Lessons Learned in My Summer Cooking Session
In many ways my cooking day was very similar to Nanci’s. I have been working on my summer menu. I try to have a lot of marinades in the freezer for those days it is just too hot to cook inside. I also like to have a lot of meals that are quick to make so you can “dine and dash” off to your next activity. It is a great way to save money if you know you can have dinner on the table quickly. You can just throw something together and not spend money on fast food. We have done this several times this summer and we are already seeing the financial benefits.

I also used meat that was on sale for my cooking day but some of it was purchased on sale a month or two ago and placed in the freezer for this cooking day. I am always watching for a great deal on meat. As a part of my weekly food budget I am constantly accumulating meat in the freezer for my next cooking day. I also stock up on dry goods, such as pastas, flour and sugar. For example, I will stock up on boneless, skinless chicken breasts if I find them for 1.80 a pound or less or chuck roast for 1.99 a pound. I also had frozen ground chuck (on sale for 1.25 a pound) and sausage (1.49 a pound) that I thawed in the refrigerator a day or two before my cooking day.

A common question I get about marinade is whether you can add marinade to frozen meats. The answer is a definiteYES! I buy a lot of boneless, skinless chicken breast that is frozen. It is perfect for marinades. Frozen marinades begin to work on the meat once it begins to thaw so adding marinade to frozen meat does not harm the meat or affect the end flavor of the recipe.

In the past I have described how I usually go through my previous years menus to decide what to make each season. This time I focused on what I had in my pantry, freezer and refrigerator instead. I wanted to use up my stock in order to save money so I picked recipes that would use the ingredients that I already had on hand. The Advantage Cooking Software can help with this as well. Let’s say you got a great deal on chuck roast. Go to the Ingredient tab, choose Chuck Roast, and then click on the recipes tab. You will see all the recipes that use chuck roast.

I also used the Advantage Cooking Software to plan my grocery shopping trip. A very useful feature is the ability to save the reports to an Excel spreadsheet. This is nice because you can remove ingredients that you already have on hand so that you don’t purchase them again.

Here is my list of recipes from my cooking day. I made a total of 33 entrees.

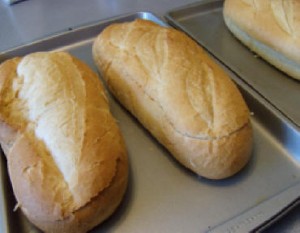
BreadForGrinders


Soups and Sandwiches

  • Iowa State Fair Guinea Grinders – 1 recipe packaged as 12 individual servings for lunches
  • Wedding Soup – 1 recipe packaged in 8 individual servings for lunches and 1 dinner portion (12 servings)
  • Tuscan White Bean Soup – 1 recipe/6 servings
  • Sloppy Joes – 3 recipes flash frozen in muffin tins for individual servings (18 servings)

Beef

  • Lasagna Roll-ups – 2 recipes/8 servings
  • Cranberry Chuck Roast – 1 recipe/6 servings
  • Beef Kabobs – 2 recipes/8 servings
  • Rosemary-Sage London Broil – 1 recipe/6 servings

Poultry

Pork

Meatless

  • Lentil Rice Casserole – 2 recipes/8 servings

Breads and Breakfast

Now for the lessons that I learned this last cooking day.

  1. I brought my recycling bins into the house and placed them right next to the trash can. It made recycling easy and convenient since I did not have to run out to the garage every time.
  2. When you are going over your shopping list and crossing off the items that are in your pantry, make sure you actually find the items that you “think” you have. Actually it is best to get everything out that you need so you know where it is. In the middle of my cooking day I was unable to find the shredded coconut that I knew I had. I looked everywhere. I looked where it is usually stored. I looked where is it never stored and I still could not find it. I ended up running to the store in the middle of my cooking session which is a real waste of time. The kicker – I found it a week after my cooking day when cleaning out my pantry.
  3. Test your equipment before cooking day. I had two slow cookers. I use one for my everyday cooking and the other is generally only used for cooking day. My cooking day slow cooker decided to quit working in the middle of making soup. Luckily I figured it out before too much time had past so no harm was done.
  4. Make sure you have a place in the refrigerator to cool the food and a place in the freezer to safely put the food when it is ready to freeze. Now that I look back at the day, it was actually very comical! We placed the individual servings of Wedding Soup in the refrigerator freezer for lunches. When we went back later to put the breakfast burritos in the freezer, a container of soup fell on the floor and went everywhere in the kitchen. We promptly mopped up the mess. My son came home from work, ate a partial bowl of soup and put the remaining soup in the fridge (Of course the fridge is packed with food at the time). I opened the fridge and for the second time in one day soup came flying out of the fridge. It was too much excitement for one cooking day!

Freezer Cook of the Month Contest Winner

Our Freezer Cook of the Month is Beth from Indianapolis, IN. Beth has a great story about using 30 Day Gourmet to save money on her vacation.

Let’s hear Beth’s story:

My husband and I were wanting to go on a cruise with our large group of friends from church. Turns out, it is just too expensive. So we decided to go back to Gulf Shores Alabama (one of our favorite places). I complained that I love it there, but despise spending so much time grocery shopping and cooking, so my dear husband said that we will just eat out most meals. It would still be cheaper than a cruise. He gained brownie points, but practical me can’t see spending that much money. I have recently found a lovely group of women to do co-op cooking with (and they are great cooks!). I decided I was going to bring my freezer meals on the trip. My husband works for a pharmaceutical company and they had a damaged Styrofoam cooler that was going to get thrown away, so he brought it home and we packed it chuck full of meals for every night of our vacation. We stopped at an ice company on our way out of town and bought a small sheet of dry ice. Two 100 degrees days later, I unpacked this food proudly and proclaimed it ‘rock solid!’ I was just tickled pink! As unappetizing as chicken pot pie sounds when it is hot outside, it really hit the spot when we were starving one evening after boogie boarding all day long! We were even able to share it with another family. Tonight we are sharing with another family that is running out of meals. I just hope I use all of mine up before we leave for home! We saved a bundle of money, I didn’t have to spend the entire first day grocery shopping and I shove it in the oven and return to the pool for a time. I love freezer cooking and rave about it all the time. I used to do it alone, but am so thankful for a new group of friends as well as brand new recipes. I really appreciate having the support and networking of 30 Day Gourmet.

Fondly,

Beth

Currently eating well in Gulf Shores, Alabama!

What a great story! Thanks for sharing while on vacation. This is just another example of how to use 30 Day Gourmet to save time and money.

So, how do you make 30 Day Gourmet work for you? How do you use it to help you deal with a challenge in your life? How do you use it to help others? Do you have a funny cooking story to share? You can post your recipes on the 30 Day Gourmet Facebook® fan page or click here to send me an email. 

Bonus Recipes

Caramel Apple DipCaramel Apple Dip

Here is a great dip for fruit, such as apples, or even celery. You can freezer it in little individual containers and send it for lunches during the school year.

Caramel Sauce

I am including this recipe for homemade caramel sauce in case you would to try your hand at making it yourself. This is a wonderful sauce that is easy to make and is very delicious. It is much better than most store bought versions. Use it in the Caramel Apple Dip recipe above or use it plain on ice cream.


Chicken Pizza RollupsChicken Pizza Rollups

I cook this recipe on the grill using a cast iron skillet on days when it is too hot to use the oven. I got “two thumps up” when I served this recipe for the first time to my family. It was an instant hit and I will definitely be adding it to the menu our next cooking day.

Closing Comments from Carol

I hope you enjoy the recipes. Calling all cooks – this is your last chance to submit your summertime recipes to share with everyone in the August newsletter. Also, think about your favorite ways to use up summer produce.

You can post your recipes on the 30 Day Gourmet Facebook® fan page or click here to send me an email. Or do you have any other topics that you would like me to cover? Click here to send me an email. I enjoy hearing from you!

Have fun in your kitchen!

Carol


Flatbread Pizza

 Breads and Breakfast, Low Fat, Recipes, Under 350 Calories  Comments Off on Flatbread Pizza
Jul 012009
 

Share This Recipe


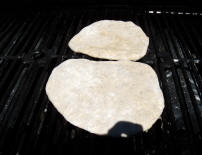
I have been experimenting with grill pizzas for a long time. I have come to the conclusion it is all about the crust. I started experimenting with flatbread dough. Since flatbreads cook so fast it is the perfect recipe for making pizza on the grill. Simply grill one side of the dough to get it to “set”. Pull it off, flip it over, put your toppings on the cooked side, and return it to the grill to cook the other side. This would be fun for a large gathering since they cook so fast. You could set up a topping bar and let everyone choose their own toppings for their personal flat bread pizza. What fun!

Click here to go to a Printer Friendly Page Click here to go to a Printer Friendly Page
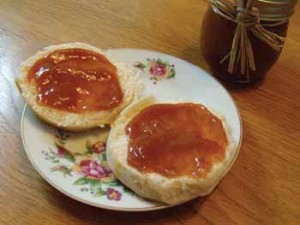
Advantage Cooking owners click here to download this recipe.

FlatBreadPizza

Recipes

1

2

3

4

5

6

Servings

8

16

24

32

40

48

Makes: small pizzas

4

8

12

16

20

24

Ingredients
Warm water

1 C.

2 C.

3 C.

4 C.

5 C.

6 C.

Sugar

1 t.

2 t.

1 T.

1 T. + 1 t.

1 T. + 2 t.

2 T.

Active dry yeast

1/2 t.

1 t.

1-1/2 t.

2 t.

2-1/2 t.

1 T.

Olive or canola oil

1 T.

2 T.

3 T.

1/4 C.

1/4 C. + 1 T.

1/4 C. + 2 T.

Salt

1 t.

2 t.

1 T.

1 T. + 1 t.

1 T. + 2 t.

2 T.

Italian seasoning

1 t.

2 t.

1 T.

1 T. + 1 t.

1 T. + 2 t.

2 T.

Flour

3 C.

6 C.

9 C.

12 C.

15 C.

18 C.

On Hand Ingredients
Your favorite pizza topping

Assembly Directions:
In a large bowl or in a mixer bowl using dough hook, stir together water and sugar until sugar is dissolved. Add yeast and let stand 5 to 10 minutes or until the yeast is foamy. Add oil, salt, and Italian seasoning. Stir in as much flour as you can. Dough should be smooth and elastic (not wet). Shape into a dough ball and place in a lightly oiled bowl. Cover and let rise in a warm place until double in size (about 1 to 1-1/2 hours). For each recipe, punch down and divide into 4 equal portions.

Freezing Directions:
Wrap each portion in plastic wrap and place in a freezer bag or container. Seal, label and freeze.

Serving Directions:
Thaw each portion at room temperature for 1-1/2 or 2 hours or until thawed. Heat grill to 400 – 450 degrees. On a lightly floured surface shape the dough in to rounds either by hand or using a rolling pin. Place dough on hot grill and cook for 3 minutes. The bottom should be slightly browned. Remove dough from grill. Flip over on a plate. Add toppings to pizza. Return to grill. Cook for another 3 to 5 minutes or until the bottom of the crust has browned and the cheese melts.

Dough1

Comments:
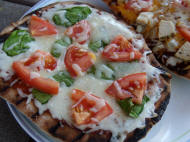
We have two favorites we like to make with this dough. We make BBQ Chicken Pizza with BBQ sauce, chopped cooked chicken, caramelized onions, tomatoes, and cheddar and mozzarella cheese. We also make a Spinach and Tomato pizza with pizza sauce, fresh spinach, tomatoes, Italian seasoning, and mozzarella and Parmesan cheeses.

Nutritional Info: dough only
Per Serving: 189 Calories; 2g Fat (10.5% calories from fat); 5g Protein; 36g Carbohydrate; 1g Dietary Fiber; 0mg Cholesterol; 268mg Sodium.
Exchanges: 2-1/2 Grain(Starch); 1/2 Fat.

Copyright ©2013 – 30 Day Gourmet. All rights reserved.