Carol Santee

Carol is the co-author of the Big Book of Freezer Cooking and the author of 30 Day Gourmet’s Slow Cooker Freezer Favorites, Freezer Lunches To Go and Healthy Freezer Cooking eBooks. She is a computer information specialist and works for a computer software company.

December 2004 Chewin’ the News with Shelley

 2004, Chewin' the News  Comments Off on December 2004 Chewin’ the News with Shelley
Dec 012004
 

Cookin’ at the Keyboard with Shelley

ShelleyI was helping my daughter with her Algebra 2 lesson last week. I groaned in dread as I started into the text because, as everyone knows:

Long Explanations = Complicated Subject Matter

Fortunately, this is not a universal truth. The “Ingredient Conversion” explanation below may be long, but it’s not complicated. Take a deep breath (no groaning allowed) and read on.

Conversions are necessary in order to equate volume measures to weight measures. For example, I buy butter in pounds, but most of my recipes call for butter measured in tablespoons or cups. Advantage Cooking needs to know how many cups are in a pound of butter, or it will punish you by telling you how many teaspoons to buy (now you can groan!)

Here are the steps to solve the problem:

Locate “Butter” in the ingredient list. 
Under the Packaging tab enter “Pound Package”.

Under the Conversion tab enter the following:

From Amount From Measure

To Amount To Measure

To Ingredient

.5 Cup

4 Ounces

Butter

This entry simply tells the software that ½ cup of butter is equal to 4 ounces. You could just as easily have entered 1 cup of butter is equal to 8 ounces, etc. I’ve listed several other conversions below to give you more examples. If the desired packaging is not available, use the “Define Packaging” button at the bottom of the window.

Locate “Sugar” in the ingredient list. 
Under the Packaging tab enter as many varieties of packaging as desired,
e.g. “Bag (5 pounds)”, “Bag (10 pounds)”, “Bag (25 pounds)”

Under the Conversion tab enter this equivalent found on a 10-pound bag of sugar:

From Amount From Measure

To Amount To Measure

To Ingredient

1134 Teaspoons

10 Pounds

Sugar

Locate “Brown Sugar” in the ingredient list.
Under the Packaging tab enter as many varieties of packaging as desired,
e.g. “2 Pound Package”, “4 Pound Package”

Under the Conversion tab enter this equivalent found on a 4-pound package of brown sugar:

From Amount From Measure

To Amount To Measure

To Ingredient

454 Teaspoons

4 Pounds

Brown Sugar

Locate “Chocolate Chips” in the ingredient list. 
Under the Packaging tab enter as many varieties of packaging as desired,
e.g. “Bag (12 oz)” or “Bag (24 oz) or “Bag (60 oz)”

Under the Conversion tab enter the following equivalent (notice that a pint doesn’t always equal a pound!)

From Amount From Measure

To Amount To Measure

To Ingredient

2 Cup

12 Ounce

Chocolate Chips

Locate “Coconut” in the ingredient list.
Under the Packaging tab enter “Bag (7 oz)”

Under the Conversion tab enter this equivalent found on the bag of coconut:

From Amount From Measure

To Amount To Measure

To Ingredient

2.67 Cup

7 Ounce

Coconut

Locate “Flour” in the ingredient list. 
Under the Packaging tab enter as many varieties of packaging as desired,
e.g. “Bag (5 pound)” or “Bag (10 pound)”

Under the Conversion tab enter this equivalent found on a 5-pound bag of flour:

From Amount From Measure

To Amount To Measure

To Ingredient

17 Cup

5 Pound

Flour

Conversions are also important when it comes to ingredients that aren’t readily available at the grocery store (e.g. cooked and chopped chicken, chopped onion, or crumbled bacon.) But we’ll save that discussion for next month. In the mean time, do you want to know about quadratic equations?

If you haven’t tried our Advantage Cooking software, click here for a 30 day free trial or to order your own copy.


December 2004 Chewin’ the News with Tammy

 2004, Chewin' the News  Comments Off on December 2004 Chewin’ the News with Tammy
Dec 012004
 

tammyNotes from Tammy

Hi cooks! Hope you had an enjoyable Thanksgiving holiday! My daughter went to the Family Fun website in last month’s News and picked some crafts for us to do. We still have our “Thankful leaves” on a door in the kitchen … a great reminder of all we have to be thankful for!

December seems especially busy this year! Both of my boys have birthdays this month, and my hubby is in Germany this week on business. I’m sure wishing I had followed FlyLady’s holiday plan about now! *sigh* Maybe next year!!

If you need gift ideas, be sure to check out our website!

This issue of “Chewin’ the News” brings you two new dessert recipes, as well as the three sample recipes from my ebook, Freezer Desserts to Die For! Read more about it below, in the Bonus Recipes section.

Bonus Recipes

What could be a better holiday gift than something homemade from your kitchen? With everyone being so busy these days, a homemade treat will be appreciated all the more! Not sure what desserts are freezer friendly? Then check out my ebook, Freezer Desserts to Die For! where you’ll find 25 new recipes, plus lots of helpful hints, tips and freezing information. Below are the three sample recipes from the ebook, as well as two NEW recipes for you for the holidays!

Enjoy the bonus recipes!

Cherry Delight

This tasty dessert is so quick and easy to make! And it’s such a pretty pink! You can easily freeze it in individual servings or a single container.

Click here to view/print this recipe!

Cheater’s Chocolate Chip Cheesecake

This has got to be one of my all-time favorite recipes! So easy to make, and everyone will want the recipe!

Click here to view/print this recipe!

Brownie Pie

This is a rich fudgey dessert. Serve it with a scoop of vanilla ice cream and a drizzle of chocolate syrup and your guests will think they’re at a restaurant!

Click here to view/print this recipe!

Pretzel-turtlesPretzel Turtles
I was at a Christmas Cookie/Candy exchange over the weekend, and I heard one of the women say “I made Pretzel Turtles.” I said “Oh, I made those last week! They’re great!” She said “Yeah, but they took forever… seemed like I spent all day making them!” I said “Mine used Rolo candy… did yours?” She hesitantly said “No…. I grated some pecans into foil muffin cups and put a pretzel on top of it. Then I melted the caramel mixture together and put it on the pretzel. I had to wait for that to set up before I could melt the chocolate and put it on top of the caramel. Then I pressed a pecan half on the chocolate.” You should have seen her face when I told her about my recipe and how quick and easy it was. She said forget her recipe… she was making mine next time!!

I saw this recipe years ago in some ladies magazine. But just now got around to trying it. What a great candy this makes for the holidays! I personally like the salty-sweet combination from the pretzels and chocolate.

Click here to view/print this recipe!
butterWhite Chocolate Macadamia cookies

The first time I tried White Chocolate Chip Macadamia Nut Cookies (WCCMNC, for short) was at Subway, the sandwich shop chain. I was hooked! When my kids sold frozen cookie dough as a fund-raiser for school or sports teams, the WCCMNC dough was always the most popular. My friend Lesa said “If your kids sell WCCMNC dough again, let me know… I’ll buy some!”

In spite of the fact that everyone seems to like them, I don’t know anyone who makes homemade WCCMNC. There are all kinds of cookie recipes floating around, but none for WCCMNC. I don’t know why that is? Maybe because they can be expensive to make and people don’t want to take a chance on messing them up? So I determined to come up with an awesome recipe. And I’m happy to say I did!

I did my research on the internet, looking for recipes and reading the comments people made about them. What ingredients worked, what didn’t, and why. Armed with all those opinions, ideas and recipes, I put the best of all of them together for my recipe. Then it was on to the kitchen to test the recipe with a few ingredient variables. My expectation was that I wasn’t going to find much of a difference, but boy, was I wrong!

The first variable was real butter vs. a margarine/shortening mix. I have very few recipes I actually use real butter in because I haven’t found a big difference in the taste, and margarine is much cheaper. Most of the recipes I found in my research used softened butter. But a lot of people commented that the cookies spread all over the cookie sheet, and they would use a mix of margarine and butter-flavored shortening the next time they made the cookies, because they would keep their shape better with those ingredients. So I wanted to try both options to compare taste and size.

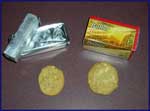
The picture above shows the cookie made with margarine/shortening on the left, and butter on the right. I made my cookies using the large cookie scoop from Pampered Chef, so all the cookies got the same amount of dough. You can see that the cookie with butter is bigger, so it did spread more. To prevent the “mess” others got when using butter, I didn’t soften my butter first… I used it straight from the ‘fridge. A little hard on the mixer maybe, but the cookies held their shape great!

I was also very surprised at the taste and texture differences between the two cookies. The cookie made with butter was definitely better! I thought I must be imagining it, so I tasted again, making sure I just got cookie… no chocolate or nuts. The butter cookie was obviously better! It was thinner, chewy and crisp. Don’t get me wrong, the margarine cookie was good, and if I didn’t have butter, I’d still make the cookies. But using butter made a superior cookie!

The second variable was using white chocolate chips vs. melting chocolate. Melting chocolate is used in candy making, is frequently called Almond Bark, and is cheaper than chocolate chips. Most of the recipes I researched said to use the melting chocolate, not chocolate chips. People who used chips seemed to think it would be better with the melting chocolate.

I couldn’t believe there would be that much of a difference between the two, especially if you used a quality chip. In my experience, Nestle and store brand white chocolate chips are waxy and don’t taste much like white chocolate. Hershey’s is my brand of choice for white chocolate chips. I couldn’t find them in two different grocery stores, so I had to “settle” for Ghirardelli chips. Given their reputation, I figured they were a safe bet to be a quality white chocolate chip. And they were very good! But it ended up not mattering, because the almond bark was SO much better in the cookies! It was almost like you couldn’t even taste the chips… they just blended in to the cookie. The almond bark was very creamy, even after the cookies cooled. When you bit into a piece of almond bark, you could definitely taste it… it was almost like a burst of creamy white chocolate! Mmmmmmmm!

The melting chocolate came in a 1-1/2 pound slab, for $1.50 from my Wal-Mart SuperCenter. The Ghiradelli chips were on sale for about $3.50 for a 12 ounce bag, at another local grocery store. I made two batches of the cookies using the almond bark, and still have almost a pound left. In case you’re thinking that you’d never use the rest of the slab of almond bark, I’ve got a recipe for you….Oreo Truffles. You can also follow the directions on the wrapper to dip pretzels, dried fruit, nuts and crushed candy canes in the melted chocolate… which could also turn into much-appreciated gifts for the chocolate lover on your list!

The macadamia nuts will be the most expensive ingredient… I paid $4.98 at Wal-Mart for an 8.5 ounce can of dry roasted macadamias. I couldn’t find “plain” macadamias, if there is such a thing. But the dry roasted worked fine… I like the sweet cookie/salty nut combination! I tried chopping the macadamias with my food chopper, but that didn’t give me uniform size pieces. It worked best to cut each nut into 3 or 4 pieces with a sharp knife. I got just under 2 C. of chopped nuts that way, so you should be able to get a double batch of cookies from a can like I bought.

Another important consideration was how long to bake the cookies. The cookies are still soft when you take them out of the oven, which can lead to a mess when you try to take them off the cookie sheet, let alone put them on the wire cooling rack! So I needed to figure out the baking/cooling options for the best results.

I bake cookies using both racks in my oven… one rack goes in the second position from the bottom, and the other goes in the fourth position. If a recipe says to bake cookies for 10 minutes, they go in the oven on the lower shelf for 8 minutes, then I move them to the top shelf for 2 minutes, to finish baking and browning, without burning. When they go to the top shelf, another pan goes in the oven on the lower shelf. So I usually have 2 pans with 2 timers going at once. That method works perfect with these cookies! Once they come out of the oven, they need to sit on the cookie sheet for one to two minutes to finish baking and firm up. Then they are easily moved to the cooling rack.

So, based on what I’ve learned in my research and testing, I’m proud to share my recipe for White Chocolate Macadamia Cookies with you. It’s definitely “to die for!”

Click here to view/print this recipe!

Website News from Nanci

Happy Holidays to all of our loyal cooks! I trust that you are stopping to smell the proverbial roses (or sugar cookies) during this busy but wonderful season of the year. It’s hard to keep the main thing the main thing, isn’t it?
I have a whole new group of people to cook for this Christmas -my students! So far they are not very picky and are extremely appreciative when I bring in treats. Many act like they have never seen homemade baked goods before. I suppose maybe they haven’t!

Get a thrill this season out of making (and freezing) treats for those you love. Don’t stop at the sweets. I’m sure that there are lots of people in your life who would love a frozen casserole more than anything. Grandparents – new parents – neighbors – and yes, even TEACHERS!

PRIORITY SHIPPING UPGRADE OFFER
We’re cutting it close for Christmas but hey – there’s always New Year’s gifts right? For the whole month of December, choose Standard (Media) Mail shipping and I will give you a free upgrade to Priority. All orders over $50 will receive free Priority shipping.
Freezer Cooking Manuals!
Advantage Cooking Software! 

Click here to order now!

Message Board Updates

The message boards continue to be popular!

The “Where is everyone from?” post continues to be a favorite! Please introduce yourself if you haven’t… we’d love to meet you!

It’s hunting season in my area… does anyone have tried-and-true freezer recipes for venison?

Do you use the jar sealer with your food saver? If so, some cooks would like some tips from you about using it successfully.

Check out the rest of the message boards when you get a chance… they are a great source of ideas, recipes, tips, and encouragement! If you have any questions about the message boards, please email me!


Recipe of the Month Contest Winner

Recipe of the Month… Toffee Pecan Bars

Our winner this month is Rhea from Bakersfield, CA with her recipe for Toffee Pecan Bars. Perfect for guests, as well as gift-giving!

I was surprised at how quick this recipe went together… 10 or 15 minutes, plus baking time. You can’t say that for most desserts! Rhea’s directions said to let it cool overnight before cutting. Of course I was too impatient to wait that long! I waited till it was cool, but not overnight. However, we decided we liked the flavor better the next day. We also liked it better chilled than at room temperature.

Rhea also said she preferred to use only half of the bag of toffee chips, because it was too sweet for her otherwise. I used the whole bag when I tried the recipe, and it wasn’t too sweet for us. So you’ll have to use your personal preference there!

For a nice touch, cut the bars into triangles or diamonds instead of squares or rectangles. Cut wide squares in half corner-to-corner for triangles. For diamonds, cut the bars straight the length of the pan. Then instead of cutting straight across the width, cut diagonally from top corner to bottom corner. Make diagonal cuts out from there, 1-1/2″ to 2″ wide. You will have a few odd shaped pieces leftover if you cut diamonds, but not with triangles.

Hi, I’m Rhea from Bakersfield, CA. I start my Christmas baking in mid September or so and simply make a double batch of whatever I’m baking and freeze the rest. Pre-freezer days, I spent two full days baking at the start of my daughter’s Christmas vacation and was really too beat to enjoy the results. Believe me, freezing is the way to go!!

Christmas baking always means cookies to me but then most any food occasion translates as “cookies” to me. I can pass up cake, pie, ice cream, anything but cookies and I’ve never had a bad cookie. I bake cookies most every weekend and always freeze half the batch or they would all be gone before Monday morning and the second half seldom makes it past mid-week! I made these bars for the first time a few years ago and brought them to work. I then forgot about the recipe until one of my co-workers asked why I never made them anymore. I unearthed the recipe and it has become one of my favorites. Buttery, rich, gooey, nuts, toffee pieces – what more could a girl ask for in a cookie? Another co-worker recently retired after 35 years with the department and I made over 20 dozen cookies for her reception. The Toffee Pecan Bars were the first to go (even before my Lemon Bars!) and I ended up making a list of those who wanted the recipe – there were simply too many requests to remember! I hope you enjoy them as much as I do.

Click here to view/print the December Recipe of the Month.

You too can get in on the winning! Just post your favorite freeze-able recipe on the message boards. Congratulations, Rhea!

Freezer Cook of the Month Contest Winner

Our winner this month is Kelli, with a great idea for giving the gift of 30 Day Gourmet! The perfect idea for that hard-to-buy for ________ (insert your favorites here… parents, grandparents, aunts, uncles, friends) who have everything. And you still have time to put a gift-certificate/menu together before the holidays!

Kelli says:

I have an idea I would like to share with people for the holidays. Last year, I made menus on my computer with different sections for soups & salads, breakfast foods, casseroles, desserts, etc. My parents and both sets of grandparents received the menus for Christmas. Did I mention that my mom now hates to cook for just her and my dad? My grandmother is a widow, and my other sets of grandparents….well, I don’t think she’s cooked since her 5 kids moved out over 40 years ago. Anyway, they got to pick 30 items from the menu. They could mix and match or get 30 of one thing if they wanted. In January, I did the cooking and delivered the meals. They said it was the best gift ever! They were even willing to pay me to make more meals this past summer. Guess what they are getting again this Christmas? The only difference is I am cooking before Christmas this year. I know what everyone likes, so they will actually receive their meals on Christmas day. I tell you, this reduced so much of my stress! I never know what to get for them. They have everything they need. 30 Day Gourmet was the perfect gift, and it was made with love!

So, how do you make 30 Day Gourmet work for you? How do you use it to help you deal with a challenge in your life? Do you have a funny story about your cooking day? How do you use it to help others? Click here to send me an email. Congratulation, Kelli!! Thanks for sharing your great idea with us! Our families thank you too!


Update to our November 2004 Freezer Cook of the Month winner:

After the Nov News went out, I received emails from a couple of people advising me that the USDA recommends you don’t cook a whole chicken from frozen in a slow cooker, because it doesn’t reach a ‘safe’ temperature quick enough, so there’s a concern for food poisoning. We obviously don’t want that! Read what they have to say about it, and decide for yourself if and/or how you want to use this method to cook chicken.

USDA Slow Cooker Safety

Gourmet Q&A from Tammy

Q. Ok, I updated my Yahoo preferences to get “daily” emails instead of “digest” so your links will work. But that didn’t help. What else can I do? Thanks! Josey

A. Hi Josey! When I answered the question last month about links not working in the Yahoo digest version of our News, I needed to include more information. If you already get the daily emails from Yahoo, and our links are still not working, there is one more setting to change. Sign in to Yahoo, and choose “Edit My Membership”. The last option says:

Message Format
__Convert to HTML. Convert plain-text messages sent to me to HTML.
__Do not convert to HTML. Don’t change the format of messages sent to me.
Note: The HTML format allows you to see colors and graphics in your messages.

You need to choose the first option, “Convert to HTML”. Choosing the HTML option allows all the pictures and links to work in the email. If you do not choose to get your emails HTML, you get a text version, with no pictures and links. So, if you set your account to receive individual emails instead of the digest, and also set it to receive HTML emails, not text, you should be good to go! Hope that helps! And sorry for the incomplete answer last month!

Final Thoughts

Well, that about sums it up for this month! Hope you enjoyed this gift-idea packed issue. Time for me to go finish my holiday baking and also make gift jars for the kids’ teachers! And finish up that Christmas shopping!

Click here to send me an email with any questions, ideas, suggestions or problems. I enjoy hearing from you all!

Best wishes for you and your family to have a beautiful holiday together! Merry Christmas! Happy Holidays!

Tammy

White Chocolate Macadamia Cookies

 Low Sodium, Recipes, Snacks and Desserts, Under 350 Calories  Comments Off on White Chocolate Macadamia Cookies
Dec 012004
 
Share This Recipe

Tammy: I researched and tested to come up with this recipe, which is awesome, if I do say so myself!! The cookies will taste the best if you use real butter. But using half margarine and half butter-flavored shortening is an acceptable substitute. You can use white chocolate chips in place of the melting chocolate, but the melting chocolate is what makes the cookies so wonderful! I wouldn’t recommend that substitution… you’ll be disappointed! Melting chocolate is found in the baking aisle, near the chocolate chips. It is melted and used in candy making. Sometimes it’s called “almond bark”. If you’re interested in the full details of my testing, go to our website at www.30daygourmet.com and read the December 2004 e-Newsletter.

butter
Click here to go to a Printer Friendly Page Click here to go to a Printer Friendly Page
Advantage Cooking owners click here to download this recipe.

Recipes

1

2

3

4

5

6

Servings

36

72

108

144

180

216

Makes

3 dozen

6 dozen

9 dozen

12 dozen

15 dozen

18 dozen

Ingredients
Coarsely chopped Macadamia nuts

1 C.

2 C.

3 C.

4 C.

5 C.

6 C.

Coarsely chopped white melting chocolate*

1 C.

2 C.

3 C.

4 C.

5 C.

6 C.

Butter**

1 C.

2 C.

3 C.

4 C.

5 C.

6 C.

Brown sugar

3/4 C.

1-1/2 C.

2-1/4 C.

3 C.

3-3/4 C.

4-1/2 C.

Sugar

1/2 C.

1 C.

1-1/2 C.

2 C.

2-1/2 C.

3 C.

Eggs

2

4

6

8

10

12

Vanilla

1 t.

2 t.

1 T.

1 T. + 1 t.

1 T. + 2 t.

2 T.

Flour

2-1/2 C.

5 C.

7-1/2 C.

10 C.

12-1/2 C.

15 C.

Baking soda

1 t.

2 t.

1 T.

1 T. + 1 t.

1 T. + 2 t.

2 T.

Salt

1/2 t.

1 t.

1-1/2 t.

2 t.

2-1/2 t.

1 T.

Assembly Directions:
Cut the macadamia nuts and the melting chocolate into chunks with a sharp knife and set aside. In a large bowl, beat the butter with a mixer. Add the brown sugar and sugar and beat well. Add the eggs, beating after each addition. Add the vanilla and beat until dough is evenly mixed. In a medium bowl, stir together the flour, baking soda and salt. Add to the creamed mixture a few scoops at a time, beating well after each addition. When all of the flour mixture has been mixed in, add the macadamia nuts and white chocolate. Stir in with a spoon, or mix with the mixer.

To Bake:
Preheat oven to 350 degrees. If your oven has two racks, use both of them… put one in the second slot from the bottom, and the other two more slots above that. Drop dough by tablespoons onto a cookie sheet. (Tablespoons of dough will give you a cookie that’s about 4” in diameter, and give you 3 dozen cookies. If you want smaller cookies, use half tablespoons.) Put the cookie sheet on the lowest shelf, and bake for 10 minutes. Move the cookie sheet to the top shelf, and bake for 1-3 minutes more. Cookies should be browning around the edges, but the middle should be puffed up and not quite cooked when you take them out of the oven from the top shelf. Set the cookie sheet on top of the oven, or on a cooling rack for 2 minutes. The puffed-up middle of the cookies will “fall”, and they will finish baking and firm up while sitting on the cookie sheet for 2 minutes. When the timer rings, remove the cookies from the cookie sheet to a cooling rack. If you try to take them off the cookie sheet when you first take it out of the oven, the cookies will be too soft and will fall apart. If you let them bake in the oven until they firm up, they will be over-baked.

You can use both racks in the oven at the same time too… put the first cookie sheet in for 10 minutes. When you move it to the top shelf, set a timer for those cookies, and put a second cookie sheet in on the lower shelf, and set a timer for them too. Take the sheet on the top shelf out, set that timer for 2 minutes for the cookies to cool. When the second sheet gets moved to the top shelf, put a third sheet on the lower shelf. And keep going.

If the cookies start spreading too much during baking, put the cookie dough in the refrigerator or freezer to chill it while the cookies in the oven are baking. If you are re-using cookie sheets, be sure they have time to cool off before you put raw dough on them. Raw cookie dough on a hot cookie sheet will give you a melted puddle, which doesn’t bake up very nicely.

Freezing Directions:
You can freeze the raw dough before baking, if desired. Put it into a rigid container (easier to scrape out when you bake it) or freezer bag. Seal, label and freeze.
OR
Put the baked, cooled cookies in a freezer bag or rigid container. Seal, label and freeze.

Serving Directions:
Thaw the dough in your refrigerator until it is completely thawed. Bake as directed above.
OR
Thaw the baked cookies on the counter. Serve when they are completely thawed.

Tammy’s Comments:
*= or white chocolate chips, but they don’t taste as good!
**= or 1/2 C. margarine and 1/2 C. butter-flavor shortening per batch, instead of real butter.

Nutritional Info: per cookie
Per Serving: 156 Calories; 10g Fat (55.9% calories from fat); 2g Protein; 16g Carbohydrate; 1g Dietary Fiber; 24mg Cholesterol; 126mg Sodium.
Exchanges: 1/2 Grain (Starch); 2 Fat; 1/2 Other Carbohydrates.

Dec 012004
 
Share This Recipe

Tammy: I was at a Christmas Cookie/Candy exchange over the weekend, and I heard one of the women say “I made Pretzel Turtles.” I said “Oh, I made those last week! They’re great!” She said “Yeah, but they took forever… seemed like I spent all day making them!” I said “Mine used Rolo candy… did yours?” She hesitantly said “No…. I grated some pecans into foil muffin cups and put a pretzel on top of it. Then I melted the caramel mixture together and put it on the pretzel. I had to wait for that to set up before I could melt the chocolate and put it on top of the caramel. Then I pressed a pecan half on the chocolate.” You should have seen her face when I told her about my recipe and how quick and easy it was. She said forget her recipe… she was making mine next time!!
I saw this recipe years ago in some ladies magazine. But just now got around to trying it. What a great candy this makes for the holidays! I personally like the salty-sweet combination from the pretzels and chocolate.

Pretzel-turtles
Click here to go to a Printer Friendly Page Click here to go to a Printer Friendly Page
Advantage Cooking owners click here to download this recipe.

Recipes

1

2

3

4

5

6

Servings

60

120

180

240

300

360

Ingredients
Mini pretzels

60

120

180

240

300

360

Rolo candy

13 oz.

26 oz.

39 oz.

52 oz.

65 oz.

78 oz.

Pecan halves

60

120

180

240

300

360


Assembly Directions:
Line a cookie sheet with foil. Spread the mini pretzels out on the foil, and top each one with a piece of Rolo candy. Bake at 250 degrees for 4 minutes. Remove the pan from the oven. Put a pecan half on top of a Rolo, and press it down, so the melted candy fills the pretzel. If the Rolo resists when you try to push it down, put the cookie sheet back in the oven for 1 more minute, so it can melt more. Top all of the Rolos with the pecan halves as directed above. Slide the piece of foil (with the candy still on it) off the warm cookie sheet onto a cool cookie sheet. Put the cool cookie sheet with the candy on it into the refrigerator for 15-20 min or until the chocolate is set. Remove the cookie sheet from the refrigerator.

Freezing Directions:
Put the candy in a rigid container, separating the layers with waxed paper. You can use freezer bags, but be warned that the pretzels will get broken as the bag is jostled around in your freezer. Seal, label and freeze.

Serving Directions:
Remove the desired number of candy pieces from the freezer and allow to come to room temperature. You can serve them chilled, but the caramel is easier to eat at room temperature.

Tammy’s Comments:
What a simple idea to make some great Christmas candy! The hardest part of making this recipe is unwrapping the foil from the whole bag of Rolo’s! I love the combination of sweet chocolate and salty pretzels. I saw this idea a couple of years ago in a ladies magazine (I haven’t a clue which one!) and just now got around to trying it. Definitely a keeper recipe at my house!!

Nutritional Info:
Per Piece: 43 Calories; 2g Fat (46.0% calories from fat); 1g Protein; 5g Carbohydrate; trace Dietary Fiber; 1mg Cholesterol; 34mg Sodium.
Exchanges: 1/2 Other Carbohydrates.

Hot Cocoa Mix

 Beverages, Low Fat, Low Sodium, Recipes, Under 350 Calories  Comments Off on Hot Cocoa Mix
Dec 012004
 
Share This Recipe

I like to put enough mix for one or two cups of hot cocoa in individual sandwich bags (not the zip kind) and tie a curly ribbon around it with an instruction card attached and put it in a Christmas mug to give as gifts. It makes a great gift for school teachers, Sunday School teachers, neighbors, etc.

I usually make the 40 cup batch which is a VERY large batch of Hot Cocoa Mix. It’s the best I’ve ever tasted.
After you divide some out for gifts, there’s still plenty left for your family.
Click here to go to a Printer Friendly Page Click here to go to a Printer Friendly Page
Advantage Cooking owners click here to download this recipe.

Recipes

1

2

3

4

5

6

Servings: (1/3 C. mix per 1 C. hot water)

30

60

90

120

150

180

Makes: cups of mix

10

20

30

40

50

60

Ingredients:
Non-fat dry milk mix

8 C.

16 C.

24 C.

32 C.

40 C.

48 C.

Coffee Mate

3/4 C.

1-1/2 C.

2-1/4 C.

3 C.

3-3/4 C.

4-1/2 C.

Nestle Quik (less chocolate flavor) OR

3/4 C.

1-1/2 C.

2-1/4 C.

3 C.

3-3/4 C.

4-1/2 C.

Nestle Quik (more chocolate flavor)

1 C.

2 C.

3 C.

4 C.

5 C.

6 C.

Powdered sugar

1/4 C. + 2 T.

3/4 C.

1 C. + 2 T.

1-1/2 C.

1-3/4 C. + 2 T.

2-1/4 C.

Sugar

1/4 C.

1/2 C.

3/4 C.

1 C.

1-1/4 C.

1-1/2 C.

Cinnamon

1/2 t.

1 t.

1-1/2 t.

2 t.

2-1/2 t.

1 T.

Salt

1/8 t.

1/4 t.

3/8 t.

1/2 t.

1/2 + 1/8 t.

3/4 t.

Assembly Directions:
Mix all ingredients together.

Freezing and Cooking Directions:
Divide into freezer bags and freeze. To make Hot Cocoa combine 1/3 cup mix to 1 cup hot water.

Nutritional Info:
Per Serving: 98 Calories; trace Fat (3.0% calories from fat); 7g Protein; 18g Carbohydrate; trace Dietary Fiber; 3mg Cholesterol; 122mg Sodium.
Exchanges: 1 Non-Fat Milk; 1/2 Other Carbohydrates.

Dec 012004
 
Share This Recipe

Tammy: Our winner this month is Rhea from Bakersfield, CA with her recipe for Toffee Pecan Bars. Perfect for guests, as well as gift-giving!

I was surprised at how quick this recipe went together… 10 or 15 minutes, plus baking time. You can’t say that for most desserts! Rhea’s directions said to let it cool overnight before cutting. Of course I was too impatient to wait that long! I waited till it was cool, but not overnight. However, we decided we liked the flavor better the next day. We also liked it better chilled than at room temperature.

Rhea also said she preferred to use only half of the bag of toffee chips, because it was too sweet for her otherwise. I used the whole bag when I tried the recipe, and it wasn’t too sweet for us. So you’ll have to use your personal preference there!

For a nice touch, cut the bars into triangles or diamonds instead of squares or rectangles. Cut wide squares in half corner-to-corner for triangles. For diamonds, cut the bars straight the length of the pan. Then instead of cutting straight across the width, cut diagonally from top corner to bottom corner. Make diagonal cuts out from there, 1-1/2″ to 2″ wide. You will have a few odd shaped pieces leftover if you cut diamonds, but not with triangles.
Click here to go to a Printer Friendly Page Click here to go to a Printer Friendly Page
Advantage Cooking owners click here to download this recipe.

Recipes

1

2

3

4

5

6

Servings

24

48

72

96

120

144

Makes

1 9×13 pan

2 9×13 pans

3 9×13 pans

4 9×13 pans

5 9×13 pans

6 9×13 pans

Ingredients
Flour

2 C.

4 C.

6 C.

8 C.

10 C.

12 C.

Confectioners sugar

1/2 C.

1 C.

1-1/2 C.

2 C.

2-1/2 C.

3 C.

Chilled butter

1 C.

2 C.

3 C.

4 C.

5 C.

6 C.

Sweetened condensed milk

14 oz.

28 oz.

42 oz.

56 oz.

70 oz.

84 oz.

Eggs

1

2

3

4

5

6

Vanilla

1 t.

2 t.

1 T.

1 T. + 1 t.

1 T. + 2 t.

2 T.

Coarsely chopped pecans

1 C.

2 C.

3 C.

4 C.

5 C.

6 C.

Toffee chips

8 oz.

16 oz.

24 oz.

32 oz.

40 oz.

48 oz.

Assembly Directions:
For the crust, mix together the flour and confectioners sugar in a medium-sized mixing bowl. Cut in the chilled butter, using a pastry blender or a fork, until crumbly. Press mixture evenly in the bottom of an un-greased 9”x13” pan. Bake at 350 degrees for 15 minutes. Meanwhile, in a medium mixing bowl, beat together the sweetened condensed milk, egg and vanilla until smooth. Stir in the pecans and the toffee chips. Spread over hot crust. Bake at 350 degrees for an additional 25 minutes. Cool overnight and then cut into bars.

Freezing Directions:
Put bars into a freezer bag or rigid container, separating layers with waxed paper. Seal, label and freeze.

Serving Directions:
Remove from freezer and allow to thaw in the refrigerator. Serve chilled or at room temperature.

Rhea’s Comments:
Toffee chips are usually located in the baking aisle with the chocolate chips. I usually use only about half a bag of toffee chips because the full bag makes them too sweet for me. Once the bag is open, the chips do have a tendency to clump. Just whack the bag a couple of times and the chips will separate again.

Tammy’s Comments:
These bars are so quick to put together… 10 minutes, plus baking time. You can cut and eat them when they’ve cooled, but my tasters agreed they liked them better the next day, and chilled in the refrigerator too. They weren’t too sweet for us when I used the whole bag of toffee chips, so you’ll have to decide that one for yourself! I might even add a handful of mini-chocolate chips the next time I make them!

Nutritional Info: per piece
Per Serving: 255 Calories; 16g Fat (54.1% calories from fat); 4g Protein; 26g Carbohydrate; 1g Dietary Fiber; 36mg Cholesterol; 139mg Sodium.
Exchanges: 1/2 Grain (Starch); 2-1/2 Fat; 1-1/2 Other Carbohydrates.

November 2004 Chewin’ the News

 2004, Chewin' the News  Comments Off on November 2004 Chewin’ the News
Nov 012004
 

Notes from Tammy

tammyHappy Thanksgiving! Can’t believe the holiday is just around the corner already! We are staying home for Thanksgiving, which means I’m cooking. More about that later.

Do you need some activities to keep the kids entertained on Thanksgiving? My kids don’t have school on Wednesday, so I will put them to work on some of these ideas. They will really enjoy the change of pace, and it will keep them busy and out of my way as I prepare for company. They can make centerpieces, place cards for the table, a “Gratitude Garland” and lots more! Check out the website for Family Fun Magazine for lots of great ideas! Crafts, recipes, activities and games galore!

“Spoons” is our game of choice for a group… it’s easy, and a riot of fun! We take it seriously at my house… players must remove jewelry from their hands so they will be less likely to injure other players as they fight for spoons. We have actually drawn blood while playing this card game! Watch the competitiveness come out in your family! You can find the directions at the Family Fun website listed above.

This issue of “Chewin’ the News” brings you three sample recipes from our Holiday eBook, as well as ideas of holiday-appropriate recipes. Read more about it below, in the Bonus Recipes section.

Bonus Recipes

Instead of talking about specific recipes for the holidays, let’s talk about planning to feed a larger-than-normal group. If you’re having company for the holidays and don’t know where to start, this is just for you!

My parents are coming for a few days over Thanksgiving. I also invited my neighbors family of four over for Thanksgiving dinner, since they don’t have any family nearby. So I need to plan meals for 8 and 12, instead of my normal 6.

First thing I do is grab a piece of paper and my calendar. Mom and Pops will be here late Wednesday night, or mid-morning Thursday, depending on when Pops gets home from work on Wednesday. So the first meal I could have company for would be breakfast Thursday. Thursday lunch I need to plan for 12, Thursday dinner is for 8, maybe 12, depending how long the neighbors stay. Friday breakfast, lunch and dinner will be for 8. Saturday breakfast will be for 8, and then Mom and Pops are heading for home. That takes care of who I need to feed, now for what to feed them!

My family really enjoys our traditional holiday meal, and no one wants a big breakfast, so cereal is fine for Thursday morning. I will have Party Cheese Ball and fresh veggies and Dip for those who get hungry before the turkey is done. Our Thanksgiving menu will be turkey, bread stuffing, Make Ahead Mashed Potatoes, gravy, Sweet Potato Soufflé, sweet corn, and Best Ever Freezer Crescent Rolls. For dessert, Grammy’s Carrot Cake with Cream Cheese frosting, and Mom’s Pumpkin Pie. (Both recipes can be found in my ebook, Freezer Dessert to Die For!) If anyone is hungry at dinner time, leftovers is the name of the game!

Friday, I’ll have Pepperidge Farm French Toast Casserole ready for breakfast. Then whoever isn’t crazy enough to go shopping early that morning can put it in the oven for them and the kids. (Count my husband Rob and I in on the crazy ones!) Turkey sandwiches and Thanksgiving leftovers will take care of lunch. For dinner, Taco Chili is a family favorite, and I can put it in the slow cooker and forget about it. Saturday, we love homemade waffles for breakfast, so I think I’ll ask mom to bring her waffle iron along, and we can get both of them going to feed everyone quicker. And that takes care of my menu planning. That wasn’t so bad, was it?

I’m not making my turkey ahead of time, but if you want help with that, check out the Holiday eBook. If you’ve never done a turkey before, or haven’t been happy with the results of previous attempts, I highly recommend finding a cookbook by Rick Rodgers where he explains in detail how to cook a turkey. I got his directions from a newspaper article years ago, and have made perfect turkey ever since! Unfortunately, I don’t know the name of the cookbook the directions are from. He is a very popular author at www.amazon.com, and has a book about turkey, and one about Thanksgiving. Those would be the ones I would check first. And I would definitely check my local library to see if they had either one in stock. In my opinion, the price of the book would be more than worth it, just to learn how to make great turkey year after year!

If you need more recipe ideas, be sure to check out the “Recipes” button on our website. Choose the kind of recipe you’re looking for (Side and Salad, Bread and Breakfast, etc.) and scroll through the list to see what sounds good to you. The recipes below are from the Holiday eBook, which is also a great resource to get you cookin’ for company!

SweetPotatoSweet Potato Soufflé

I don’t like sweet potatoes, but love this recipe!! What a great side dish! Goes great with ham or turkey.


Celebration Salad Pic copyCelebration Salad

This salad will add some color to your table! The cranberries make it a perfect compliment to turkey.


Mousse Pie Pic copyMerry Kiss-Mousse Pie

This festive chocolate pie will give you a dessert option for those who don’t like the traditional pumpkin desserts.


Website News from Nanci

nanciwebHappy Thanksgiving to everyone! 
We will be making a quick trip to Michigan this year to spend the day with my in-laws. It’s been several years since we have gone “home” for Thanksgiving so they have been going out to eat instead. Dad is looking forward to having the big meal “at home” this year, complete with homemade foods and plenty of leftovers. With the help of our Holiday Freezer Cooking ebook and my trusty cooler, I will contribute foods from my freezer. Must have’s are: Sweet Potato Soufflé, Stuffing, Celebration Salad and Pumpkin Pie. Yum! If you don’t have time to freeze foods for Thanksgiving, try it for Christmas! You won’t believe how much it helps your holiday schedule.

New Ebooks!
It seems like we just released our Co-op Cuisine Ebook and we’ve got another one coming out already. These are both great ebooks! If you don’t have them yet, you need to order one. Each ebook has 25 recipes and the cost is only $6.95 for the download version. Our new Vegetarian Freezer Cooking Ebook would make a great gift for a vegetarian friend. Christmas is just around the corner!

Recipe of the Month Contest Winner

Recipe of the Month… Favorite Chili

Our winner this month is Laurie from —- with her recipe for Favorite Chili. My family likes chili, but I’ve always made it the easy way, by following the directions on the back of an envelope of chili spice mix. This recipe is a little different, including the addition of Velveeta cheese, so I decided to give it a try.

It was unanimous that this recipe was much better than my usual chili. I froze some, to make sure it froze ok. When I served it the next week, Gabe wanted to know if it was the “new” chili recipe, or the kind I always make. Coz the “new” recipe was better than the other, and he hoped it was the “new” one. We eat chili in a bowl, as well as on top of French fries, for Chili Cheese Fries. (That was the only way I could get my kids to eat chili when they were younger!) We had chili that someone else made, and Gabe made a point of telling me my “new” chili recipe was better. So it’s definitely “Favorite Chili” at my house!

It’s easy to make, goes together quickly in the slow cooker, has great flavor, and freezes well too! What more could you ask for? Freeze it in single servings for lunch, or in a large family-size container for dinner.

Click here to view/print the November Recipe of the Month.

Freezer Cook of the Month Contest Winner

Our winner this month is Megan, with a new cooking method for us. She posted on the message boards about cooking a whole chicken in the slow cooker, and everyone who tried it just raved about the results. So I had to try it too! I was more than pleased with the way it turned out! Especially considering my whole chicken had been in my freezer for 2 years, still wrapped how I bought it from the store. I cooked it for 6 hours on High, starting with a frozen chicken. It was falling off the bone, and was moist and tender. My husband said next time I should make some foil “pockets” of stuffing to put in the crock around the chicken, and baste the stuffing with the juices from the chicken. Good idea!! We had the fresh chicken for dinner, and then I de-boned the rest and put it in the freezer to use for future meals.

So, how do you make 30 Day Gourmet work for you? How do you use it to help you deal with a challenge in your life? How do you use it to help others? Do you have a funny story that happened on your cooking day?

Gourmet Q&A from Tammy

Q. I was unable to retrieve the bonus recipes from Brandel Falk in the  October email digest. The links given didn’t work. Did anyone else have this problem? Would it be possible to have them sent again? Thanks for 30 Day Gourmet!
Sincerely, Nancy M.

A. Hi Nancy! Thanks for letting me know you had a problem. For some reason when you get your emails from Yahoo in digest form, the links don’t always work. Your options are to change your Yahoo groups to come individually, instead of in digest form. Or, at the top of our News, under the logo and my name, there is a line that says “To read this Newsletter online, click here.” If you click that link, it will take you to the Newsletter on our web site, and all the links will work there. Or, if that link doesn’t work, go to our web site at www.30daygourmet.com and click on the link on the left side that says “Free eNewsletters”… click “Current Issue” to read it now. That should take care of the problem for you!

Cookin’ at the Keyboard with Shelley

ShelleyOne of my defense tactics for the holiday season is to restock the freezer. Scanning the list of recipes in my Advantage Cooking database last month, I found myself growing bored, and then impatient. Apparently my freezer cooking habit had become routine, and the available recipe selection was all too familiar.

Fortunately, my problem was easily solved. I hopped on the internet and effortlessly imported several recipes from the 30 Day Gourmet website. Several other recipes that friends had shared with me were sitting in an email folder, also waiting to be imported. It wasn’t long until my cooking plan was revitalized and I was anxious to get started.

The hard part came when I printed the Grocery Report. The newly imported recipes contained ingredients that weren’t defined (or were entered differently) in my database. This produced some humorous or, depending on my mood, irritating results (like the report telling me to buy 192 teaspoons of tomato sauce). If your database has been similarly impacted by imports, here are a few suggestions to help you “clean up” your grocery report.


  1. After the report is displayed on the screen, reduce the Print Preview window and tile it next to the main Advantage window. This will allow you to page through the report in one window while changing the ingredient information in the other window. Note: any changes made will not be reflected in the Grocery Report window until a new report is generated.
  2. Anytime an ingredient shows up in a base measure like teaspoons, it means that there is no packaging defined for that ingredient. Advantage needs to be told how to buy the ingredient in the grocery store. For milk, packaging could be “Gallon”. Sugar packaging could be “Bag (10 pound)” or “Bag (25 pound)”. Packaging for spaghetti sauce could be “Cup” or “Jar (30 ounce)”. Locate the Ingredient and add a Packaging entry in the lower window.
  3. If an ingredient is listed twice on the Grocery Report it is because the ingredient has both a weight and a volume measure, which cannot be combined into one measure. Change one of the measures, or add a conversion (see the manual or the help file – I’ll talk more about this next month).
  4. If an ingredient is listed under multiple names (e.g. “egg”, “eggs”, “egg/s”), use the Ingredient Merge button to combine the references into a single ingredient.
  5. If the Total Needed for any ingredient on the Grocery Report looks suspicious, there are two checks to make: 1) compare the ingredient total on the Grocery Report to the amount on the Ingredient Report, checking the amount per recipe and the recipe quantity, and 2) check the conversions of any related ingredient converted to this ingredient.


Now that your grocery list is both accurate and streamlined, be sure to detour through the kitchen on your way to the store. Eliminate the items on the list that are already in your pantry, or adjust the quantity to be purchased. Happy shopping!

Final Thoughts

I hope you’ve enjoyed another edition of our Newsletter. We enjoy putting it together for you! My ebook, Freezer Desserts to Die For will be featured in the December issue. Look for a new recipe or two as well! Click here to send me an email with any questions, ideas, suggestions or problems. I enjoy hearing from those of you who take time to drop me a note. Happy Fall!

Tammy

Favorite Chili

 Recipes, Soups & Sandwiches, Under 350 Calories  Comments Off on Favorite Chili
Nov 012004
 
Share This Recipe

Tammy: Our winner this month is Laurie from —- with her recipe for Favorite Chili. My family likes chili, but I’ve always made it the easy way, by following the directions on the back of an envelope of chili spice mix. This recipe is a little different, including the addition of Velveeta cheese, so I decided to give it a try.

It was unanimous that this recipe was much better than my usual chili. I froze some, to make sure it froze ok. When I served it the next week, Gabe wanted to know if it was the “new” chili recipe, or the kind I always make. Coz the “new” recipe was better than the other, and he hoped it was the “new” one. We eat chili in a bowl, as well as on top of French fries, for Chili Cheese Fries. (That was the only way I could get my kids to eat chili when they were younger!) We had chili that someone else made, and Gabe made a point of telling me my “new” chili recipe was better. So it’s definitely “Favorite Chili” at my house!

It’s easy to make, goes together quickly in the slow cooker, has great flavor, and freezes well too! What more could you ask for? Freeze it in single servings for lunch, or in a large family-size container for dinner.
Click here to go to a Printer Friendly Page Click here to go to a Printer Friendly Page
Advantage Cooking owners click here to download this recipe.


Recipes

1

2

3

4

5

6

Servings

6

12

18

24

30

36

Makes

6 C.

12 C.

18 C.

24 C.

30 C.

36 C.

Ingredients  
Cooked lean ground beef

2-1/2 C.

5 C.

7-1/2 C.

10 C.

12-1/2 C.

15 C.

Canned diced tomatoes

15 oz.

30 oz.

45 oz.

60 oz.

75 oz.

90 oz.

Tomato sauce

4 oz.

8 oz.

12 oz.

16 oz.

20 oz.

24 oz.

Kidney beans

15 oz.

30 oz.

45 oz.

60 oz.

75 oz.

90 oz.

Chili seasoning mix

1/2 envelope

1 envelope

1-1/2 envelopes

2 envelopes

2-1/2 envelopes

3 envelopes

On Hand Ingredients
Velveeta cheese

2 oz.

4 oz.

6 oz.

8 oz.

10 oz.

12 oz.

Assembly Directions:
In a large bowl, stir together the ground beef, tomatoes, tomato sauce, beans, and chili seasoning mix. Do not drain the tomatoes or beans. Stir until evenly combined.

Freezing Directions:
Pour the chili mixture into a rigid container or 1 gallon freezer bag. Seal, label and freeze. Keep the Velveeta cheese on hand.

Serving Directions:
Thaw mixture in the refrigerator. Dump chili into a slow cooker and cook on low for about 2 hours. Before serving, cut the Velveeta in chunks and stir it into the chili until it melts. Serve chili once cheese is melted.

Comments:
This is my family’s Favorite Chili recipe for sure! The melted Velveeta adds a nice flavor. Add more Velveeta than the recipe calls for, if desired. I do!

Nutritional Info:
Per Serving: 296 Calories; 15g Fat (45.8% calories from fat); 20g Protein; 20g Carbohydrate; 6g Dietary Fiber; 58mg Cholesterol; 636mg Sodium.
Exchanges: 1 Grain (Starch); 2-1/2 Lean Meat; 1 Vegetable; 1-1/2 Fat.

Oct 012004
 
Share This Recipe

Tammy: I thought this recipe would be great for tailgate parties… the flavor of wings without any of the work!! And I was right! All of my taste-testers agreed it was awesome! My neighbor, whose family loves wings, took one bite and said “Oooh.. I’ve got to get the recipe for this from you!” I gave Rob a scoop and some tortilla chips to try it. My oldest son asked to try it. They both said it was great. Next thing I know, both of the boys have taken the bowl and chips from Rob, and are eating it as fast as they can, to try and get more than the other. Which really surprised me, because the youngest doesn’t eat much spicy food. Guess this was the exception! Spicy-wimp that I am, I must admit I had a few bites. I reached for my water quick, but it was good enough to have a few more!

Click here to go to a Printer Friendly Page Click here to go to a Printer Friendly Page
Advantage Cooking owners click here to download this recipe.

Recipes 1 2 3 4 5 6
Servings 24 48 72 96 120 144
Makes 6 C. 12 C. 18 C. 24 C. 30 C. 36 C.
Ingredients
Cooked chicken breasts, shredded 3 6 9 12 15 18
Frank’s Hot Sauce* 3/4 C. 1-1/2 C. 2-1/4 C. 3 C. 3-3/4 C. 4-1/2 C.
Cream cheese 16 oz. 32 oz. 48 oz. 64 oz. 80 oz. 96 oz.
Ranch salad dressing 1 C. 2 C. 3 C. 4 C. 5 C. 6 C.
Shredded cheddar cheese 1-1/2 C. 3 C. 4-1/2 C. 6 C. 7-1/2 C. 9 C.

* = or similar brand. 3/4 C. = 6 oz.

Assembly Directions: 
Heat chicken and hot sauce over medium heat. Stir in cream cheese and ranch dressing. Continue cooking and stirring, until the cream cheese is melted. Mix in the cheddar cheese, heating and stirring until it is melted. Set aside to cool.

Freezing Directions: 
Put dip in rigid container(s) or freezer bag(s) based on how you will serve it… single servings as a snack, or all of it in one container/bag for a group/family serving. Seal, label and freeze.

Serving Directions:

Thaw dip in the refrigerator. Heat in the microwave until hot and bubbly. Serve with tortilla chips or Ritz crackers. OR for a group or party, put the warmed dip in a slow cooker on low to keep it warm.

Comments: 
The taste of Buffalo Wings without all the work! This thick and spicy dip is sure to be a hit with wing lovers. If you think it might be too spicy for you, start with 1/4 C. of hot sauce and add from there, if needed. Feel free to use your favorite dippers too… bread sticks, celery sticks… whatever sounds good!

Nutritional Info: 
Serving size: 1/4 cup
Per Serving: 179 Calories; 15g Fat (73.3% calories from fat); 11g Protein; 1g Carbohydrate; trace Dietary Fiber; 47mg Cholesterol; 417mg Sodium.
Exchanges: 1-1/2 Lean Meat; 2-1/2 Fat.

Caramel Apple Crisp

 Low Fat, Recipes, Snacks and Desserts, Under 350 Calories  Comments Off on Caramel Apple Crisp
Oct 012004
 
Share This Recipe

Tammy: This recipe is a little different than ‘traditional’ apple crisp, but it’s our favorite! Because the topping mixture is crumbly, it doesn’t freeze solid, so it doesn’t need to thaw much. Cooking apples, like Granny Smith, work best in this recipe. A double recipe can be baked in a 9”x13” pan.

Click here to go to a Printer Friendly Page Click here to go to a Printer Friendly Page
Advantage Cooking owners click here to download this recipe.

Recipes

1

2

3

4

5

6

Servings

9

18

27

36

45

54

Makes: 8×8 pan

1

2

3

4

5

6

Ingredients
Peeled and sliced apples

4 C.

8 C.

12 C.

16 C.

20 C.

24 C.

Caramel ice cream topping

1/4 C.

1/2 C.

3/4 C.

1 C.

1-1/4 C.

1-1/2 C.

Cinnamon

1 t.

2 t.

1 T.

1 T. + 1 t.

1 T. + 2 t.

2 T.

Chopped walnuts or pecans

1/4 C.

1/2 C.

3/4 C.

1 C.

1-1/4 C.

1-1/2 C.

Topping
Flour

1 C.

2 C.

3 C.

4 C.

5 C.

6 C.

Sugar

1 C.

2 C.

3 C.

4 C.

5 C.

6 C.

Cinnamon

1 t.

2 t.

1 T.

1 T. + 1 t.

1 T. + 2 t.

2 T.

Salt

1/2 t.

1 t.

1-1/2 t.

2 t.

2-1/2 t.

1 T.

Beaten egg

1

2

3

4

5

6

On Hand Ingredients
Butter or margarine*

5 T.

10 T.

15 T.

20 T.

25 T.

30 T.

*- 8 T. = 1/2 C. = 1 stick of butter or margarine.

Assembly Directions:
Put the peeled and sliced apples in a bowl. Add the caramel, cinnamon and nuts. Stir to mix well. Set aside. In a separate bowl, stir together the flour, sugar, cinnamon and salt. Add the beaten egg and stir until well combined. The mixture should be crumbly with small pieces.

Freezing Directions:
Put the apple mixture in a one-quart freezer bag. Put the topping mixture in a one-quart freezer bag. Seal, label and freeze both bags.

Serving Directions:
Put the bag with the topping mix in the refrigerator to partially thaw. The bag with the apple mixture can partially thaw on the counter or in the refrigerator. Because the topping mix has a raw egg in it, it MUST thaw in the refrigerator. Dump the partially thawed apples into an 8”x8” baking pan. Melt the butter in the microwave for 30 seconds at 50% power. Dump the partially thawed topping mix on top of the apples, spreading it to cover them. Drizzle the melted butter over the topping. Bake at 375 degrees for 35 minutes. Serve warm with vanilla ice cream, if desired.

Nutritional Info: Caramel Apple Crisp
Per Serving: 273 Calories; 9g Fat (28.9% calories from fat); 3g Protein; 47g Carbohydrate; 2g Dietary Fiber; 21mg Cholesterol; 231mg Sodium.
Exchanges: 1/2 Grain (Starch); 1/2 Fruit; 1-1/2 Fat; 2 Other Carbohydrates.