Carol Santee

Carol is the co-author of the Big Book of Freezer Cooking and the author of 30 Day Gourmet’s Slow Cooker Freezer Favorites, Freezer Lunches To Go and Healthy Freezer Cooking eBooks. She is a computer information specialist and works for a computer software company.

Strawberry-Banana Frozen Salad

 Low Sodium, Recipes, Sides and Salads, Under 350 Calories  Comments Off on Strawberry-Banana Frozen Salad
Jun 012006
 
Share This Recipe

Last week I went on the hunt for frozen fruit salads that I could make up and get into the freezer for our drop-in company. Both of the salads below turned out great and were big hits with our friends. One tip for salads: package them in portions that you will eat in one serving. Use the little freezer cups for individual servings. It’s a pain to thaw a giant salad so that you can carve off enough for your lunch – ha!
Click here to go to a Printer Friendly Page Click here to go to a Printer Friendly Page
Advantage Cooking owners click here to download this recipe.

Recipes

1

2

3

4

5

6

Servings

24

48

72

96

120

144

Ingredients
Cream cheese

8 oz.

16 oz.

24 oz.

32 oz.

40 oz.

48 oz.

Sugar

3/4 C.

1-1/2 C.

2-1/4 C.

3 C.

3-3/4 C.

4-1/2 C.

Thawed frozen sliced strawberries, undrained

16 oz.

32 oz.

48 oz.

64 oz.

80 oz.

96 oz.

Canned crushed pinepapple, drained

20 oz.

40 oz.

60 oz.

80 oz.

100 oz.

120 oz.

Chopped pecans

1/2 C.

1 C.

1-1/2 C.

2 C.

2-1/2 C.

3 C.

Bananas, quartered and sliced

2

4

6

8

10

12

Whipped topping, thawed

8 oz.

16 oz.

24 oz.

32 oz.

40 oz.

48 oz.

Assembly Directions:
Cream together cream cheese and sugar with mixer. Add remaining ingredients by hand.

Freezing Directions:
Pour into 9×13 pan or freezer container. Seal, label and freeze.

Serving Directions:
Thaw slightly and enjoy!

Comments:
You can also put the fruit salad into individual freezer containers for a quick lunch or picnic!

Nutritional Info:
Per Serving: 283 Calories; 15g Fat (45.1% calories from fat); 3g Protein; 38g Carbohydrate; 2g Dietary Fiber; 21mg Cholesterol; 62mg Sodium.
Exchanges: 1-1/2 Fruit; 3 Fat; 1 Other Carbohydrates.

Oatmeal Scotchie Bars

 Low Fat, Recipes, Snacks and Desserts, Under 350 Calories  Comments Off on Oatmeal Scotchie Bars
Jun 012006
 
Share This Recipe

My husband loved Oatmeal Scotchies as a kid. It was his favorite cookie that his mom made. Here is a bar version of the cookie that is great to pack for lunches. If I keep these around and don’t put them way in the freezer, they will just disappear.
Click here to go to a Printer Friendly Page Click here to go to a Printer Friendly Page
Advantage Cooking owners click here to download this recipe.

Recipes

1

2

3

4

5

6

Servings

36

72

108

144

180

216

Ingredients
Flour

2 C.

4 C.

6 C.

8 C.

10 C.

12 C.

Baking powder

2 t.

1 T. + 1 t.

2 T.

2 T. + 2 t.

3 T. + 1 t.

1/4 C.

Baking soda

1 t.

2 t.

1 T.

1 T. + 1 t.

1 T. + 2 t.

2 T.

Salt

1 t.

2 t.

1 T.

1 T. + 1 t.

1 T. + 2 t.

2 T.

Margarine or butter

1 C.

2 C.

3 C.

4 C.

5 C.

6 C.

Sugar

3/4 C.

1-1/2 C.

2-1/4 C.

3 C.

3-3/4 C.

4-1/2 C.

Brown sugar

3/4 C.

1-1/2 C.

2-1/4 C.

3 C.

3-3/4 C.

4-1/2 C.

Eggs

2

4

6

8

10

12

Oats

1-1/2 C.

3 C.

4-1/2 C.

6 C.

7-1/2 C.

9 C.

Butterscotch chips

11 oz.

22 oz.

33 oz.

44 oz.

55 oz.

66 oz.

Assembly Directions:
Preheat oven to 350 degrees. Lightly butter a jelly roll pan or a 9×13 baking dish. Combine flour, baking powder, baking soda, and salt in a bowl and set aside. In a large mixing bowl, combine margarine, sugars and eggs. Beat until creamy. Gradually blend in the flour mixture, oats and butterscotch chips. Pour into prepared pan. Bake for 25 to 35 minutes or until lightly browned. DO NOT OVERBAKE.

Freezing Directions:
Cool before cutting into bars. Place bars in a freezer container with wax papers between the layers. Seal, label and freeze.

Serving Directions:
Thaw and enjoy!

Nutritional Info:
Per Serving: 161 Calories; 6g Fat (33.5% calories from fat); 2g Protein; 25g Carbohydrate; 1g Dietary Fiber; 11mg Cholesterol; 189mg Sodium.
Exchanges: 1/2 Grain(Starch); 1 Fat; 1 Other Carbohydrates.

Jun 012006
 
Share This Recipe

My family has become addicted to these cookies. I picked some up at the local grocery store one week when I knew that I would not have time to make cookies. Everyone loves them. I then set out to make my own version of the cookie. These are not as crisp but have great flavor. The easiest way to ice the cookies is to hold the cookie upside over the icing bowl. Take the cookie and just barely touch the top to the icing. This gives the icing that rippled effect just like the store bought kind. Give it a try!
Click here to go to a Printer Friendly Page Click here to go to a Printer Friendly Page
Advantage Cooking owners click here to download this recipe.

Recipes 1 2 3 4 5 6
Servings 30 60 90 120 150 180
Ingredients
Flour 1 C. 2 C. 3 C. 4 C. 5 C. 6 C.
Baking soda 1/2 t. 1 t. 1-1/2 t. 2 t. 2-1/2 t. 1 T.
Salt 1/2 t. 1 t. 1-1/2 t. 2 t. 2-1/2 t. 1 T.
Ground cinnamon 1 t. 2 t. 1 T. 1 T. + 1 t. 1 T. + 2 t. 2 T.
Ground nutmeg 1/4 t. 1/2 t. 3/4 t. 1 t. 1-1/4 t. 1-1/2 t.
Quick cooking oats 1-1/2 C. 3 C. 4-1/2 C. 6 C. 7-1/2 C. 9 C.
Butter or margarine 1/2 C. 1 C. 1-1/2 C. 2 C. 2-1/2 C. 3 C.
Sugar 1/2 C. 1 C. 1-1/2 C. 2 C. 2-1/2 C. 3 C.
Brown sugar 1/4 C. 1/2 C. 3/4 C. 1 C. 1-1/4 C. 1-1/2 C.
Eggs 1 2 3 4 5 6
Vanilla 1 t. 2 t. 1 T. 1 T. + 1 t. 1 T. + 2 t. 2 T.
Raisins 1/3 C. 2/3 C. 1 C. 1-1/3 C. 1-2/3 C. 2 C.
Water 1 C. 2 C. 3 C. 4 C. 5 C. 6 C.
Icing
Powdered sugar 1 C. 2 C. 3 C. 4 C. 5 C. 6 C.
Light corn syrup 1 T. 2 T. 3 T. 1/4 C. 1/4 C. + 1 T. 1/4 C. + 2 T.
Milk 2 T. 1/4 C. 1/4 C. + 2 T. 1/2 C. 1/2 C. + 2 T. 3/4 C.

Assembly Directions:
Preheat oven to 350 degrees. In a bowl combine flour, baking soda, salt, cinnamon, and nutmeg. Stir until thoroughly mixed. Stir in oats and set aside. In a mixing bowl, cream butter and sugars. Add egg and vanilla and beat until smooth. Place raisins and water in a small pan and bring to a boil. Once raisins begin to plump remove from pan and drain. Chop the raisins by hand or in a food processor. Add to the batter a beat until smooth. While mixing on low speed, slowly pour flour mixture into batter and mix until thoroughly blended.

Using a medium cookie scoop, scoop out onto cookie tray and bake for 10 to 12 minutes. Cookies should be light brown. Remove from tray and cool.

In a separate bowl mix powdered sugar, corn syrup and milk until smooth. After the cookies have cooled, dip the tops of the cookies into the icing, turn over and let the icing set.

Freezing Directions:
Place in freezer bags or in a freezer container. Seal, label and freeze.

Serving Directions:
Thaw and enjoy!

Nutritional Info:
Per Serving: 125 Calories; 4g Fat (26.9% calories from fat); 2g Protein; 21g Carbohydrate; 1g Dietary Fiber; 6mg Cholesterol; 97mg Sodium.
Exchanges: 1/2 Grain (Starch); 1/2 Fat; 1 Other Carbohydrates.

Turtle Cake

 Recipes, Snacks and Desserts, Under 350 Calories  Comments Off on Turtle Cake
Mar 012006
 
Share This Recipe

Many of you have a recipe for this Turtle Cake. It’s always a favorite at church suppers or company dinners. The gooey caramel, pecan, chocolate chip center puts it in that “to die for” category of desserts. In our house, though, because of the pecans this would be an “adults only” dessert. Good thing it freezes great! I freeze the individual pieces in rigid freezer containers. This isn’t the type of dessert that you want to be spooning out of a bag?. Warm it up right in the container and dig in!
Click here to go to a Printer Friendly Page Click here to go to a Printer Friendly Page
Advantage Cooking owners click here to download this recipe.

Recipes

1

2

3

4

5

6

Servings

24

48

72

96

120

144

Ingredients
Chocolate cake mix

1 box

2 boxes

3 boxes

4 boxes

5 boxes

6 boxes

Caramels

14 oz.

28 oz.

42 oz.

56 oz.

70 oz.

84 oz.

Butter or margarine

2/3 C.

1-1/3 C.

2 C.

2-2/3 C.

3-1/3 C.

4 C.

Evaporated milk

1/2 C.

1 C.

1-1/2 C.

2 C.

2-1/2 C.

3 C.

Pecans

2 C.

4 C.

6 C.

8 C.

10 C.

12 C.

Chocolate chips

2 C.

4 C.

6 C.

8 C.

10 C.

12 C.


Assembly Directions:
Prepare cake mix as directed. Place half of mix in 13″ x 9″ cake pan. Cook at 350° for 15 minutes. Melt caramels on low heat with butter and milk. Pour over cake. Pour nuts over sauce and then pour on chocolate chips. Follow with remaining cake mix. Bake for an additional 20 minutes.

Freezing Directions:
Cool, cut and freeze in individual pieces.

Serving Directions:
Thaw and enjoy!

Comments:
Nanci’s note: I like to use Ziploc’s or Glad’s freezer containers for this type of dessert. They can be frozen individually, taken in lunches or grabbed for an after dinner dessert.

Nutritional Info:
Per Serving: 328 Calories; 21g Fat (53.0% calories from fat); 3g Protein; 38g Carbohydrate; 2g Dietary Fiber; 1mg Cholesterol; 231mg Sodium.
Exchanges: 4 Fat; 2-1/2 Other Carbohydrates.

Creamy Ranch Potatoes

 Low Fat, Recipes, Sides and Salads, Under 350 Calories  Comments Off on Creamy Ranch Potatoes
Mar 012006
 
Share This Recipe

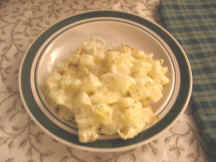
My family loves the Crispy Cheesy Potatoes recipe from the third edition of the Freezer Cooking Manual. I wanted to create a different version that was lower in fat and calories (one of my goals for the New Year!). The ranch dressing mix gives the potatoes a nice flavor.

ranchpotato
Click here to go to a Printer Friendly Page Click here to go to a Printer Friendly Page
Advantage Cooking owners click here to download this recipe.

Recipes

1

2

3

4

5

6

Servings

8

16

24

32

40

48

Ingredients
Skim milk

2-1/2 C.

5 C.

7-1/2 C.

10 C.

12-1/2 C.

15 C.

Flour

1/3 C.

2/3 C.

1 C.

1-1/3 C.

1-2/3 C.

2 C.

Minced onion

2 T.

1/4 C.

1/4 C. + 2 T.

1/2 C.

1/2 C. + 2 T.

3/4 C.

Chicken bouillon granules

2 t.

1 T. + 1 t.

2 T.

2 T. + 2 t.

3 T. + 1 t.

1/4 C.

Ranch dressing mix packet

1

2

3

4

5

6

Reduced fat cream cheese

8 oz.

16 oz.

24 oz.

32 oz.

40 oz.

48 oz.

Frozen hash brown potatoes

32 oz.

64 oz.

96 oz.

128 oz.

160 oz.

192 oz.

Assembly Directions:
Measure 1/2 cup of milk per recipe and pour into in a separate bowl. Add the flour and stir with a fork or whisk until there are no more lumps. Add the remaining milk to a sauce pan or pan large enough to accommodate the amount of milk for the number of recipes that you are making. Add the minced onion, chicken bouillon granules, and ranch dressing mix. Stir until blended. Cut the cream cheese into smaller pieces and add to the pan. Heat the mixture on medium heat until boiling. You need to stir constantly so that it does not scorch. When it starts to boil, add the milk and flour mixture. Continue to stir constantly and heat until mixture thickens. Allow mixture to cool.

After mixture has cooled, place frozen potatoes in a bowl and add the sauce. Mix well.

Freezing Directions:
Place mixture in a gallon freezer bag or a freezer container. Seal, label, and freeze.

Serving Directions:
Thaw potato mixture completely. Preheat the oven to 350 degrees. Grease an 8×8 baking pan and place the mixture in the pan. Bake for 45 minutes or until hot and bubbly.

Nutritional Info:
Per Serving: 213 Calories; 5g Fat (23.0% calories from fat); 9g Protein; 32g Carbohydrate; 2g Dietary Fiber; 17mg Cholesterol; 576mg Sodium.
Exchanges: 1-1/2 Grain (Starch); 1/2 Lean Meat; 1/2 Non-Fat Milk; 1/2 Fat.

Cheesecake Bars

 Recipes, Snacks and Desserts, Under 350 Calories  Comments Off on Cheesecake Bars
Mar 012006
 
Share This Recipe

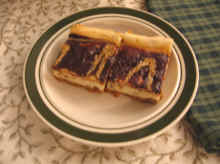
My kids and I love cheesecake and I wanted something that you could have stashed away in the freezer for that special occasion. The first time I made them, my kids thought I was making a gigantic pop tart because of the way the peanut butter stripes look on top of the cheese cake. This is a fun treat to make ahead to take to a potluck or any family gathering.

cheesecakebars1
Click here to go to a Printer Friendly Page Click here to go to a Printer Friendly Page
Advantage Cooking owners click here to download this recipe.

Recipes

1

2

3

4

5

6

Servings

24

48

72

96

120

144

Ingredients
Graham cracker crumbs

2 C.

4 C.

6 C.

8 C.

10 C.

12 C.

Butter or margarine, melted

6 T.

3/4 C.

1 C. + 2 T.

1-1/2 C.

1-3/4 C. + 2 T.

2-1/4 C.

Reduced fat cream cheese

24 oz.

48 oz.

72 oz.

96 oz.

120 oz.

144 oz.

Sugar

3/4 C.

1-1/2 C.

2-1/4 C.

3 C.

3-3/4 C.

4-1/2 C.

Flour

3 T.

1/4 C. + 2 T.

1/2 C. + 1 T.

3/4 C.

3/4 C. + 3 T.

1 C. + 2 T.

Vanilla

1 T.

2 T.

3 T.

1/4 C.

1/4 C. + 1 T.

1/4 C. + 2 T.

Eggs

3

6

9

12

15

18

Reese’s peanut butter cups; chopped

8

16

24

32

40

48

Semi-sweet chocolate chips

1/4 C.

1/2 C.

3/4 C.

1 C.

1-1/4 C.

1-1/2 C.

Skim milk

2 T.

1/4 C.

1/4 C. + 2 T.

1/2 C.

1/2 C. + 2 T.

3/4 C.

Creamy peanut butter

1 T .

2 T.

3 T.

1/4 C.

1/4 C. + 1 T.

1/4 C. + 2 T.

Oil

1 t.

2 t.

1 T.

1 T. + 1 t.

1 T. + 2 t.

2 T.

Assembly Directions:
Preheat oven to 325 degrees. Line a 13×9 inch baking pan with aluminum foil. The ends of the foil should extend over the edge of the pan. Mix the crumbs and the margarine in a mixing bowl. Press firmly into the bottom of the lined pan. Beat cream cheese and sugar in mixer until well blended. Add the flour and vanilla; mix well. Add the eggs, one at a time until blended. Add the Reese’s peanut butter cups and mix until just blended. Pour over crust.

Melt the chocolate chips and milk in a small pan over low heat or microwave on high for 1 to 2 minutes. Stir the mixture once the chips have melted. Spread the chocolate mixture over the top of the batter.

Melt the peanut butter and oil in a small pan over low heat or microwave on high for 30 seconds to 1 minute. Stir the mixture until blended. Drizzle or pipe the mixture in a zigzag pattern over the top of the chocolate layer.

Bake for 45 minutes to 1 hour or until center is almost set. Refrigerate. Once cooled, lift the cheesecake out of the pan and cut it into bars.

Freezing Directions:
Place bars in a freezer container. Place wax paper between rows. Seal, label, and freeze.

Serving Directions:
Thaw and enjoy.

Nutritional Info:
Per Serving: 203 Calories; 12g Fat (52.6% calories from fat); 5g Protein; 19g Carbohydrate; 1g Dietary Fiber; 40mg Cholesterol; 264mg Sodium.
Exchanges: 1/2 Grain (Starch); 1/2 Lean Meat; 2 Fat; 1 Other Carbohydrates.

Broccoli Corn Casserole

 Recipes, Sides and Salads, Under 350 Calories  Comments Off on Broccoli Corn Casserole
Mar 012006
 
Share This Recipe

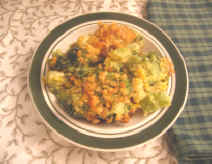
Our winner this month is Cyndee from Cary, NC, with her recipe for Broccoli and Corn Casserole. This recipe was an instant hit with my family. It is a different take on your regular vegetable casserole. It has a great flavor and you will be pleasantly surprised with the broccoli and corn combination.

broccolicorncasserole
Click here to go to a Printer Friendly Page Click here to go to a Printer Friendly Page
Advantage Cooking owners click here to download this recipe.

Recipes

1

2

3

4

5

6

Servings

8

16

24

32

40

48

Ingredients
Butter or margarine

6 T.

3/4 C.

1 C. + 2 T.

1-1/2 C.

1-3/4 C. + 2 T.

2-1/4 C.

Stuffing mix (crumbs not cubes)

2 C.

4 C.

6 C.

8 C.

10 C.

12 C.

Eggs

2

4

6

8

10

12

Frozen chopped broccoli

20 oz.

40 oz.

60 oz.

80 oz.

100 oz.

120 oz.

Canned cream corn

32 oz.

64 oz.

96 oz.

128 oz.

160 oz.

192 oz.

Finely chopped onion

2 T.

1/4 C.

1/4 C. + 2 T.

1/2 C.

1/2 C. + 2 T.

3/4 C.

Salt

1/2 t.

1 t.

1-1/2 t.

2 t.

2-1/2 t.

1 T.

Pepper

Dash

1/8 t.

1/4 t.

3/8 t.

1/2 t.

1/2 t. + 1/8 t.


Assembly Directions:
Melt the butter. Add stuffing mix to butter and toss to coat. Combine eggs, broccoli, corn, onion, salt, and pepper. Stir 3/4 of stuffing mixture into the vegetables. Turn into an ungreased 9×13, two 1-1/2 qt. casseroles OR two aluminum pie pans. Sprinkle remaining crumbs on top of casserole.

Freezing Directions:
Cover dish with foil or place in a one or two gallon freeze bag. Seal, label, and freeze.

Serving Directions:
Thaw and bake at 350 degrees for 45 minutes.

Nutritional Info:
Per Serving: 304 Calories; 11g Fat (31.3% calories from fat); 10g Protein; 45g Carbohydrate; 5g Dietary Fiber; 71mg Cholesterol; 1370mg Sodium.
Exchanges: 3 Grain (Starch); 1/2 Vegetable; 2 Fat.

Mar 012006
 

Cookin’ at the Keyboard with Shelley

Kids in the Kitchen

kids-shelleyI’ve said before that every freezer cooking session will look different, and our family’s most recent experience proved my point. The combination of dwindling freezer meals and an increasingly concentrated calendar forced us into action. I began by making a run to the grocery store for meat and onions. The amounts were only a guess, but it was a start. While I sat at my desk creating a cooking plan in the software and then printing a grocery report, the girls cooked the chicken and browned the ground beef. Arriving home from my second trip to the store, I started assigning recipes to daughters. By the time the kitchen was clean and the freezer was full, I realized that I had done very little cooking in the process.

While my daughters are both comfortable and capable in the kitchen, this is not the norm. Children today are growing up without learning how to cook. By the phrase “how to cook” I mean something beyond operating the microwave. One wife posted on a cooking forum, “I didn’t know how to cook anything for my husband when we got married unless it came in a box with directions on the back.” My mother is an excellent cook, but she seldom uses a recipe. Consequently, I didn’t learn to cook until I left home. It was trial and error, and lots of long distance phone calls!

Critics say that the devaluation of home economics, along with a lack of parental guidance, is producing adolescents who are ignorant of basic life skills. A three-year study by Stirling University revealed that youngsters today fail miserably in the basics of cooking, cleaning, repairing, and money management. One survey done in conjunction with a kid’s cooking contest revealed that a mother’s most common objections to cooking with her children are 1) the mess, and 2) a lack of time.

In her book, Children Who Do Too Little, Patricia Sprinkle says, “Training happens at home. It requires dedication and consumes time. It can’t be hurried. It is woven day by day on the loom of family life.” Rachel Ray, a noted chef and author, states, “Cooking is a wonderful way to help kids build their confidence. I learned at a very early age how fun and rewarding it is to cook with my family, and the strong sense of accomplishment and confidence cooking provides.”

If your children are actively learning new skills in the kitchen, I commend you. If not, now might be a good time to start. One of my favorite resources for training my children is the book, Life Skills for Kids, by Christine M. Field. Christine admits, “When I realized my main job was to equip my children, not merely entertain them, my vision for parenting changed radically.” Cooking with your kids will not only equip them for the future, but it can also be entertaining and rewarding in the moment.

Software Suggestions

Advantage Cooking Conversions

I was helping my daughter with her Algebra 2 lesson. I groaned in dread as I started into the text because, as everyone knows:

Long Explanations = Complicated Subject Matter

Fortunately, this is not a universal truth. The “Ingredient Conversion” explanation below may be long, but it’s not complicated. Take a deep breath (no groaning allowed) and read on.

Conversions are necessary in order to equate volume measures to weight measures. For example, I buy butter in pounds, but most of my recipes call for butter measured in tablespoons or cups. Advantage Cooking needs to know how many cups are in a pound of butter, or it will punish you by telling you how many teaspoons to buy (now you can groan!)

Here are the steps to solve the problem:
Locate “Butter” in the ingredient list.
Under the Packaging tab enter “Pound Package”.
Under the Conversion tab enter the following:

From Amount

From Measure

To Amount

To Measure

To Ingredient

.5

Cup

4

Ounces

Butter

This entry simply tells the software that = cup of butter is equal to 4 ounces. You could just as easily have entered 1 cup of butter is equal to 8 ounces, etc. I’ve listed several other conversions below to give you more examples. If the desired packaging is not available, use the “Define Packaging” button at the bottom of the window.

Locate “Sugar” in the ingredient list.
Under the Packaging tab enter as many varieties of packaging as desired,
e.g. “Bag (5 pounds)”, “Bag (10 pounds)”, “Bag (25 pounds)”
Under the Conversion tab enter this equivalent found on a 10-pound bag of sugar:

From Amount

From Measure

To Amount

To Measure

To Ingredient

1134

Teaspoons

10

Pounds

Sugar

Locate “Brown Sugar” in the ingredient list.
Under the Packaging tab enter as many varieties of packaging as desired,
e.g. “2 Pound Package”, “4 Pound Package”
Under the Conversion tab enter this equivalent found on a 4-pound package of brown sugar:

From Amount

From Measure

To Amount

To Measure

To Ingredient

454

Teaspoons

4

Pounds

Brown Sugar

Locate “Chocolate Chips” in the ingredient list.
Under the Packaging tab enter as many varieties of packaging as desired,
e.g. “Bag (12 oz)” or “Bag (24 oz)” or “Bag (60 oz)”
Under the Conversion tab enter the following equivalent (notice that a pint doesnt always equal a pound!)

From Amount

From Measure

To Amount

To Measure

To Ingredient

2

Cup

12

Ounce

Chocolate Chips

Locate “Coconut” in the ingredient list.
Under the Packaging tab enter “Bag (7 oz)”
Under the Conversion tab enter this equivalent found on the bag of coconut:

From Amount

From Measure

To Amount

To Measure

To Ingredient

2.67

Cup

7

Ounce

Coconut

Locate “Flour” in the ingredient list.
Under the Packaging tab enter as many varieties of packaging as desired,
e.g. “Bag (5 pound)” or “Bag (10 pound)”
Under the Conversion tab enter this equivalent found on a 5-pound bag of flour:

From Amount

From Measure

To Amount

To Measure

To Ingredient

17

Cup

5

Pound

Flour

Conversions are also important when it comes to ingredients that aren’t readily available at the grocery store (e.g. cooked and chopped chicken, chopped onion, or crumbled bacon.) But we’ll save that discussion for next month. In the mean time, do you want to know about quadratic equations?

Download a trial version of the software! It’s free!

Closing Comments from Shelley

I intentionally omitted recipe suggestions this month simply because new recipes introduce an element of uncertainty, an unwelcome factor when cooking with my kids. If you’re looking for new ideas I would suggest a children’s cooking video from the library. Beyond that, choose any one of your favorite recipes.

Make some time, (be prepared to) make a mess, and you’ll find you’ve made more than a meal, you’ve made a memory!


         Shelley

Mar 012006
 

Kitchen Fun with Carol

carol2007Hello everyone and happy spring! There is so much anticipation for spring around my house. You start to look for the sure signs that spring has arrived. The ground comes alive with blooming bulbs (daffodils are my favorite!) and early perennials. Every gas station around starts to sell mulch. The neighborhood comes alive with all the people who start to adventure out of the house!

It also means changes in the kitchen at my house. I plan a seasonal menu. I usually have a spring/fall menu that is a mix of different dishes. I have some of our favorite winter comfort foods on the menu such as Parsley Parmesan ChickenPotato Stuffed Meatloaf, and Taco Chili. I also start to add in some of our summer favorites such as April’s Chicken Marinade, hamburgers, and our favorite grill packets.

There is a process that I go through to put together the menu every quarter. I begin by putting together four weeks worth of recipes. I use the Monthly Menu Planner (Worksheet G) from The Freezer Cooking Manual. I use multiple criteria to pick recipes for the menu.


  1. I ask my family their opinion about the recipes on the current menu. Is there something that is your favorite? Is there a recipe that we haven’t had for a while that you would like? Is there a recipe you are tired of and would like to skip this time around?
  2. I review the menus that I have saved from past years. Sometimes they come in handy when I am looking for some planning inspiration. They remind me of a recipe that we have not had in a while that would be great to bring back into the rotation.
  3. I rank meals based on their cost. If we need to cut back on expenses, I can choose to make less expensive meals more often, serve more meatless meals, and serve the most expensive recipes only occasionally.
  4. I group recipes together by serving day cooking method – slow cooker, grill, oven, stove top. I also group them by types – meatless, Mexican, Chinese, soup, sandwich, eggs, beef, poultry, etc. Once the recipes are categorized, I can pick a day of the week for each category. For example:
  • Sunday – quick and easy
  • Monday – slow cooker
  • Tuesday – soup
  • Wednesday – Mexican
  • Thursday – oven
  • Friday – Chinese or grill
  • Saturday – eggs or quick and easy

Once the menu is put together, we rotate the menu for three months in a row. I also go through this process to plan out what I am making for lunch. Once the lunches and the dinners are planned, I make a list of on hand ingredients I need for each week. This becomes the beginning of my grocery shopping list for that week. There’s nothing worse than it being 5:00, you start dinner and then you realize you are missing a key ingredient to finish. Making the list ahead of time is a life saver!
recipebook

I also choose how I am going to cook for the time period. If I am ambitious, I can cook for the entire three months. I usually do this for the summer menu because it can be hectic with everyone’s summer schedule. I sometimes cook for one month at a time. Sometimes I plan mini cooking sessions based upon what’s on sale. For example, chicken leg quarters were on sale for nineteen cents a pound. I cook them in 10 pound batches. This yields about 10 cups of cooked chicken and 7 cups of chicken stock. With this done, I can easily make the recipes that use cooked chicken and stock such as Turkey and NoodlesChicken Fried Rice, Chicken/Turkey Patties (member’s only recipe), Bowtie Soup and Chicken Pockets.

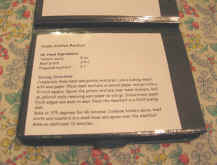
After the menu is planned and the food is cooked, I take my planning one step further. I create an index card with the serving instructions for the recipes on my menu. I place these cards in a photo “brag book”. This is a nice way to store the cards because they don’t get messy when you cook. It also makes it easy for anyone in the house to complete a recipe if you are not around. I also put any other non-freezer recipes that I use all the time in this book.  It is such a great time saver to have most the information that you use in one place!

I hope these tips help you with your menu planning. For more tips, read Beth’s ideas in the Freezer Cook of the Month section below. She has some great insights on how to save time and money on your next cooking day!

Bonus Recipes
cheesecakebars1Cheesecake Bars

My kids and I love cheesecake and I wanted something that you could have stashed away in the freezer for that special occasion. The first time I made them, my kids thought I was making a gigantic pop tart because of the way the peanut butter stripes look on top of the cheese cake. This is a fun treat to make ahead to take to a potluck or any family gathering.
ranchpotatoCreamy Ranch Potatoes

My family loves the Crispy Cheesy Potatoes recipe from the third edition of the Freezer Cooking Manual. I wanted to create a different version that was lower in fat and calorie(one of my goals for the New Year!). The ranch dressing mix gives the potatoes a nice flavor.

Recipe of the Month Contest Winner

March Recipe of the Month… Broccoli and Corn Casserole

Our winner this month is Cyndee from Cary, NC, with her recipe for Broccoli and Corn Casserole. This recipe was an instant hit with my family. It is a different take on your regular vegetable casserole. It has a great flavor and you will be pleasantly surprised with the broccoli and corn combination.

Let’s hear from Cyndee:

I’m a stay-at-home mom of two boys (ages 6 and 4) and a very rambunctious border collie/springer spaniel mix. I’ve been freezing cooking for about 9 years or so now. I do a lot of marinades in a bag (we love to grill year round), tripling dinner recipes, and piles of Tara’s Favorite Muffins (the chocolate chip variety). Our boys LOVE those muffins!

For about the last 2 years my husband and I have been living on the “South Beach”. We’ve lost about 60 pounds total. The best part is I can still freezer cook! I’ve adapted many of the recipes in the manual and on the boards – substituting Splenda for part of the sugars, replacing white with whole wheat/whole wheat pastry flour, choosing lean meats, etc. It’s all about choosing good carbs and lean meats/dairy…it really works for us.

Last month I helped to present “Supper Secrets” to our MOPS group. The main focus of our talk was freezing cooking. It was great to share tips, recipes, and, of course, the 30 Day Gourmet website with the other moms. It was a BIG hit with our group.

When I’m not mixing up another batch of muffins (seriously, I make well over 100 muffins each month), I’m busy with volunteer work at our church, MOPS, and in my oldest son’s classroom. I also love to spend time working on our scrapbooks.

I hope everyone enjoys this side dish. I find it challenging to find side dishes that will freeze well and that work with our diet. (Granted, this one’s not Beach-approved, but it’s pretty close!).

Click here to view/print the March Recipe of the Month.

Congratulations Cyndee! Thank you for posting this wonderful recipe.

Freezer Cook of the Month Contest Winner

Our winner this month is Beth from Edenton, NC. Beth has some great time and money saving tips to share with us.

Beth says:

My name is Beth, and I’ve been doing freezer cooking for about 13 years now. I love it!

I just wanted to write in a few tips and ideas that I’ve developed over the years.

First, I set up in a way that makes clean up easier, since, as y’all know well, by the end of the day, you’re exhausted, and the easier the clean up the better. I put a large towel in front of the stove, one in front of the freezer, and one in front of the sink.

I have a 5 gallon bucket that I put next to the trash can (that I put a new liner in). All food scraps and paper trash go in the bucket to go to the compost pile, and the plastic trash goes in the can with the liner. I also pour liquids to be discarded into the bucket. I also have a small clothes hamper that I put a trash bag in and put all wet and/or dirty pot holders, dish cloths, dish towels, and the towels from the floor in. That way I can just dump it into the washer, and start the load at the end of the day.

I also tear my old towels (when I replace them) into washcloth sized squares, and have these stacked on a counter out of the way to use as you would paper towels, when I use these, I toss them into the hamper, also.

When I have extra hamburger after a session, I go ahead and brown it, and freeze it. Then sometimes for lunch I add it to a can of vegetable beef soup, undiluted, and make “sloppy joe” type sandwiches out of it.

Every time I have a cooking session, I also freeze a separate serving of each dish for my neighbor. I gave him a casserole dish that’s a single serving size for Christmas a few years ago, and print clear instructions on the freezer bag.

When ever we have leftovers from dinner, I freeze them in individual sized serving packages. Especially Mexican Lasagna and Lasagna. This eliminates the “leftovers again” syndrome, and gives the kids and me a variety to choose from for lunches.

I also pick up ground beef and chicken breasts when they are on sale (just got 50 pounds of hamburger for $.86/lb) and package them in 1 pound packages (2 cups) for the beef and 8 breast packages for the chicken.

I also have a shelf in the freezer for breakfast, one for lunches, and one for dinners, and the drawer in the bottom and my small freezer, I use for snacks/desserts.

I hope this helps someone.


Wow! What great tips! The clothes hamper is such a wonderful idea. Thanks for sharing with everyone!

Closing Comments from Carol

A funny thing happened to me last week when I shopped at the grocery store. I always have a grocery list with me when I shop. It just makes it easier when you know what to buy and what not to buy. A young woman came up to me in the store and commented on how she thought it was unusual that I shopped from a list. I guess I never thought about it. After cooking the 30 Day Gourmet way for almost seven years it just seems natural to me to shop with a list! In fact, I think I would be lost without the list. This way of cooking has taught me how to plan, manage my time, how to save money and how to take control of my kitchen. I can’t image doing it any other way.

I hope this issue of time and money saving tips and menu planning hints was helpful!

Do you have any other topics that you would like me to cover? Click here to send me an email. I enjoy hearing from you!

Have fun in your kitchen!

Carol

No Cook Lasagna

 Beef, Recipes  Comments Off on No Cook Lasagna
Feb 012006
 
Share This Recipe

Shelley: With the ground beef and Italian sausage already fried, it’s easy to make up this “Lasagna Package” for the freezer. Now you can have lasagna at your fingertips without having to layer all the ingredients before freezing. I left all the ingredients and the recipe with my friend (see above) after our cooking day. She can have a fresh, homemade pan of lasagna in the oven in 10 minutes!
Click here to go to a Printer Friendly Page Click here to go to a Printer Friendly Page
Advantage Cooking owners click here to download this recipe.

Recipes

1

2

3

4

5

6

Servings

12

24

36

48

60

72

Ingredients
Italian sausage

1/2 lb.

1 lb.

1-1/2 lbs.

2 lbs.

2-1/2 lbs.

3 lbs.

Ground beef

1/2 lb.

1 lb.

1-1/2 lbs.

2 lbs.

2-1/2 lbs.

3 lbs.

Chopped onion

1/2 C.

1 C.

1-1/2 C.

2 C.

2-1/2 C.

3 C.

Shredded mozzarella cheese

12 oz.

24 oz.

36 oz.

48 oz.

60 oz.

72 oz.

Grated Parmesan cheese

1/2 C.

1 C.

1-1/2 C.

2 C.

2-1/2 C.

3 C.

Parsley flakes

1/4 C.

1/2 C.

3/4 C.

1 C.

1-1/4 C.

1-1/2 C.

Salt

1 t.

2 t.

1 T.

1 T. + 1 t.

1 T. + 2 t.

2 T.

Pepper

1/4 t.

1/2 t.

3/4 t.

1 t.

1-1/4 t.

1-1/2 t.

On Hand
Spaghetti sauce

30 oz.

60 oz.

90 oz.

120 oz.

150 oz.

180 oz.

Water

1-1/2 C.

3 C.

4-1/2 C.

6 C.

7-1/2 C.

9 C.

Ricotta cheese

15 oz.

30 oz.

45 oz.

60 oz.

75 oz.

90 oz.

Eggs

2

4

6

8

10

12

Uncooked lasagna noodles

12

24

36

48

60

72

Assembly Directions:
Fry the Italian sausage. Fry the hamburger with onion; drain. Freeze meat in a pint-sized freezer bag. Shred the mozzarella cheese and freeze in a quart-sized freezer bag. Combine Parmesan cheese, parsley, salt, and pepper in a pint-sized freezer bag.

Freezing Directions:
Put all three bags in a gallon-sized freezer bag. Seal, label and freeze.

Serving Directions:
Thaw meat and cheese. Combine hamburger, sausage, spaghetti sauce, and water in a sauce pan. Simmer 10 minutes.

Combine ricotta, mozzarella, eggs, and seasonings to make the cheese filling.

Layer as follows in a 9×13 baking pan:
1 cup meat sauce
3-4 pieces lasagna noodles (uncooked!)
1 cup meat sauce
1/2 of cheese filling
3-4 pieces lasagna noodles
1 cup meat sauce
Remaining 1/2 of cheese filling
3-4 pieces lasagna noodles
Remaining sauce

Cover with foil and bake at 350° for 55-60 minutes. Remove foil and bake 10 minutes longer. Let stand 10 minutes before serving.

Nutritional Info:
Per Serving: 453 Calories; 26g Fat (52.1% calories from fat); 23g Protein; 31g Carbohydrate; 3g Dietary Fiber; 104mg Cholesterol; 903mg Sodium.
Exchanges: 1 Grain (Starch); 2-1/2 Lean Meat; 2-1/2 Vegetable; 3-1/2 Fat.