Kitchen Fun with Carol
 Hello everyone and Happy Autumn! This is one of my favorite times of the year. The weather is wonderful – beautiful sunny days great for cook outs and tailgating with friends and cool crisp nights great for cooking hotdogs and s’mores over a bonfire.
The weather has also been great for outside events such as the county fair (love visiting the animals!) and looking at the airplanes at the National Museum of the US Air Force. We visited the museum this month and it was such a great experience. There was so much to see and do. History can take on such a greater meaning when you experience things first hand. We visited the Presidential hanger and saw some of the planes used by former US Presidents. We toured a Nissen Hut like those used in England during World War II.
Now you are probably thinking, “What does this have to do with food?” While at the museum we toured the Missile and Space Gallery. It was an impressive site! The missiles are so large. But my food related find was great, too! They had samples of foods that the astronauts ate while on missions. It was interesting seeing the foods that they took in space but they also talked about the cost of the food. The cost per person per day was $300 for the Gemini program. That’s $100 per meal. WOW!!
It made me think of my food budget at home. It’s nothing compared to the cost of food used in the space program but it is a reality that we all can relate. Food prices continue to rise but my food budget does not! What can you do to make the most out of your food budget? Here are some tips that I use to stay within my budget:
- Keep your pantry organized. This includes your freezer as well as your pantry. Group like items together. Knowing what you have on hand can save you money on your cooking day as well as your weekly grocery bill.
- Do a pantry challenge several times a year. This will help you clear those older meals out of your freezer before you have another cooking day. It can also help save money to pay for your next cooking day!
- Keep your Recipe Inventory Checklist up to date. This list is a great place to start when planning your menu for the week.
- Keep a price book. This helps you know when an item is really on sale.
- Come up with the cost per serving for each recipe that you plan on making. It helps if you make a list and rank the recipes. Need to save money? Concentrate on serving the recipes that cost the least.
- Consider ingredients and staple items that you have on hand before planning your next cooking day. Create your list of recipes from the items that you already have on hand.
- Utilize coupons where it makes sense. If there is a coupon for an item that you would normally buy anyway, go ahead an use it! Every little bit you save adds up quickly!
I received several emails last month asking about menu planning. Menu planning can be a tricky thing if you are not used to doing it. Remember, you don’t have to be ultra organized to plan your menus! It just takes some thought about what your family likes to eat, how much time you have to prepare it, and what activities you have planned during the same time period.
There are several ways to plan a menu but the most important thing that you need is 20 to 30 recipes that your family likes. Look at the Big Book of Freezer Cooking, our ebooks, and the recipes on the web site. Find the recipes that your family would like to try. Make one of each recipe and make sure your family likes the recipes before you make multiples. This is an extremely important money saving step. You don’t want to have 3 of a recipe in the freezer that your family will not eat!
I picked out some of my favorite recipes and then showed them to the family and let them narrow it down to what they wanted to eat. It worked out well this time. They were very specific about what they wanted to eat during this menu rotation. Sometimes they don’t really have an opinion so I just have to “wing it” and make what sounds good to me. Once I have a list of recipes, I make 2 or 3 of each. I also look through my freezer to see what I have left over from my last cooking session and add these to my list of recipes. Then I take the list of recipes and lay out the menu. I try to vary each day by recipe type. For example, I would not serve 2 pasta based dishes in a row.
I usually do 3 rotations of my 4 week menu so each menu lasts about 12 weeks or 3 months. Once I get through 2 months (or about 8 weeks), I start planning my next cooking session. My menu is usually seasonal. For example, summer will be a lot of grilled items. Winter is the opposite with baked recipes and lots of slow cooker recipes.
I have also done themed menus in the past. For example,
- Sunday is quick and easy meals.
- Monday is oven baked recipes.
- Tuesday is soup.
- Wednesday is grilling.
- Thursday is a slow cooker meal.
- Friday is stovetop.
- Saturday is Dad’s recipes or cook’s choice. (I love it when Dad cooks!)
Click here for a link to a newsletter with a theme based menu. Or your could plan your menu based on recipe type or ranking recipes based on cost – Mexican, Chinese, Beef, Poultry, etc. Click here (March 2006) for a link to a newsletter with an article on menus based on recipe types.
Be flexible! I also may not serve each meal on its menu day. Sometimes I don’t feel like eating spaghetti and meatballs when it is 90 degrees outside so I will swap out the meal on the menu plan with another one from later in the week. It gives you a little more flexibility. Or sometimes I will find a great deal while grocery shopping and I will swap out a meal with my bargain I found at the store. It’s a great way to add variety and maybe try something new.
Another trick is to file your old menus. I file mine by year in a 3-ring binder. They can inspire you when you get stuck and don’t know what to serve. Before you file your menus, make notes on it and remind yourself what you did and did not like about the menu layout.
Facebook® Questions
If you have been following us on the 30 Day Gourmet Facebook® fan page, you have seen some of the great questions that have been posted about 30 Day Gourmet, our recipes, and our new book, the Big Book of Freezer Cooking. I thought it would be great to share some of these questions with you.
Q: Hi everyone I just joined~ I just saw the pictures of the freezer meals stacked what an inspiration! I love it and it is my goal to do~ one question: what kind of freezer containers would everyone suggest I use? I love the labels too any thoughts and suggestions?
A: There are many containers that can be used in the freezer. Here are some of the suggestions we received:
- Freezer bags: They save a lot of space in the freezer when you are trying to store a lot of different meals.
- Reusable 8×8 or 9×13 containers: Look for the Glad Ovenware. They are great for freezing lasagnas. And because they are plastic, it’s easy to “pop” the frozen dish out of the pan and place it in a freezer bag once the dish is frozen or when you want to defrost the dish before baking. They also stack nice in the freezer.
- Rubbermaid containers: To freeze baked goods or large batches of soups.
- Ziploc Twist ‘n Loc containers: They come in a small (2 cup) and medium (3 cup) size. The small sized containers are great for freezing individual servings. Use them for soups and stews.
- Check out yard sales and thrift shops for glass and metal baking dishes. I got a lot for about $1-$2 each. Most didn’t have lids so you have to freeze the dishes individually before stacking them, or use stiff corrugated cardboard cut to size between each dish.
Q: What labels/writing material should I use? Will tape stick to the containers in the freezer?
A: There are a lot of different ways to label packages.
- I have written all the instructions etc on a recipe card and put the card in a sandwich bag inside the baggie with the meal. Works for me!
- I always use a Sharpie when writing on freezer bags. They work out well.
Keep asking questions! We love helping everyone!
Bonus Recipes
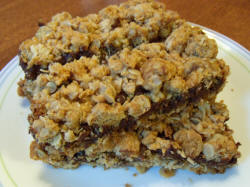
 Chocolate Oat Bars
These are great little bars for the lunch box. They have a great crunchy oat topping and a fudgy middle. Want even more chocolate flavor? Double the filling! They are delicious! Or you can cut the bars in half for little hands!
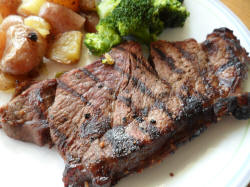
 Steak Marinade Robusto
I have one more grilling recipe to share with you this fall so get out there and fire up your grills! This is a very robust steak marinade – strong flavor and very tender.
A great tip for grilling steaks – bring them up to almost room temperature before grilling them. The steak will cook faster and more evenly.
Closing Comments from Carol
I hope you enjoyed my tips on menu planning and cooking on a budget. I would love to hear your tips as well.
You can post your recipes on the 30 Day Gourmet Facebook® fan page or click here to send me an email. Or do you have any other topics that you would like me to cover? Click here to send me an email. I enjoy hearing from you!
Have fun in your kitchen!
Carol

Sorry, the comment form is closed at this time.