FREEZER COOKING NEWS FROM NANCI

Is your summer flying by like mine? Don’t they always? Ours has been great so far. I have graduated 2 kids, spent a fantastic week in the Outer Banks, moved our daughter Becky to DC, attended a week long “camp” for AP English teachers, and cleaned my pantry and refrigerator. It doesn’t get any better than that, right? I always think of the 4th of July as the halfway mark since my first day of school is August 11th. Since it poured rain here the whole day, I decided to have a quick cooking day instead.
“Shop the Sales” and Bag It Cooking Day
Grocery stores always run great deals the week of a major holiday. It’s too late for you to grab the 4th of July specials but the same low prices will come around again on Labor Day. Plan now to take advantage of that.
I spent $160 and “bagged” the meat for 31 entrees with about 156 servings. That’s $1 per entrée!!
And I did it all in about 5 hours. I basically just followed the steps that are outlined in the Freezer Cooking Manual (go figure).
STEP 1 – PLAN IT!
*Gather Grocery Store Ads (you can usually view them online as well)

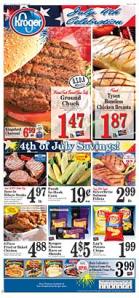
Our local Kroger store had great sales on ground beef, chicken and steak.
I based my choices solely on the grocery store ads and the season. Meats in marinade are great for summertime. We love to put the meat on the grill and round out the meal with some fresh sweet corn or homemade mashed potatoes. I take a quick look through the ads and jot down the big sales.
chicken breast (boneless, skinless) – $1.87 lb. – Kroger
pork ribs – $1.69 lb. – Kroger
round steak – $3.49 lb. – Kroger
ground beef – $1.28 lb. – Marsh
pork tenderloin – $2.99 lb. – Marsh
spare ribs – $1.68 lb. – Marsh
*Choose Recipes
When choosing recipes, I generally go to the RECIPES section of our website, choose a category (poultry, for example) and then scroll through the list to see what sounds good. It’s best to make at least 2 of each recipe to save time. Looking at the recipes on the website also saves time because I can quickly see the ingredient list and the cooking method and make a decision. Once I have my list of recipes, I have a huge 3 ring binder full of 30 Day Gourmet recipes sorted by the same categories as our RECIPES section of the website. I pull the recipes out so that I can create my shopping list. Here’s a list of the recipes that I decided on:
1 – Chicken breasts in Caesar Marinade – 1 recipe – 6 servings
2 – Elegant Chicken in Marinade – 3 recipes – 18 servings
3 – Oriental Sesame Chicken Strips – 2 recipes – 8 servings
4 – Boneless BBQ Chicken Bites – 1 recipe – 6 servings
5 – Chicken Quesadilla meat – 1 recipe – 6 servings (I don’t use a recipe for this. I just boil 1 chicken breast for every 1 C. of shredded meat that I want. Once the meat is boiled, I shred it and cook it in a frying pan on medium with some taco seasoning mix and water.)
6 – Pork in Marinade – 4 recipes – 24 servings
7 – Polynesian BBQ Pork Marinade – 3 recipes – 18 servings
8 – Beef Teriyaki – 2 recipes – 8 servings
9 – Steaks in Marinade – 4 recipes – 18 servings
10- Swiss Steak – 1 recipe – 6 servings (these came in a sale pkg. – I coated them with flour, flash froze them to keep the flour on and then bagged them with the sauce)
11 – Burger patties – 1 recipe – 6 servings (these came in a sale pkg. – I just bagged them)
12 – Cooked ground beef – 8 recipes – 32 servings (cooked the beef in 2 batches and bagged in 1 lb./3 C. portions)
*Make Shopping List

*Take a quick inventory of your pantry, refrigerator and freezer. I do this with the printed recipes in hand. Since I would be planning, shopping and cooking in a space of 5 hours, I just pulled the usable inventory out and set it on my counter. If you are doing a big cooking day or cooking with a friend, use Worksheet A from the manual.
*Make a list of the recipes you will be making either using Worksheet C from the manual or on a separate piece of paper. Later on, you’ll need to remember how many of each recipe you planned for. At the least, write down the recipe title and how many of each you plan to assemble.
*Create a shopping list from your recipes. I use Worksheet D from the manual. Many of you use our software. Some of you have other nifty gadgets to make your list with. Whichever you use, be specific about how much of each ingredient you need to buy. No need to purchase a gallon of Dijon mustard if you only need a tablespoonJ
STEP 2 – GO SHOPPING
My “quick run” to the local Kroger, Marsh and Walmart ended up taking almost 2 hours. Why??? Because I chose to try a few new recipes that called for 2 ingredients I had never purchased before. Who knew that combing through the aisles of 3 stores looking for Anchovy paste and Chinese 5 spice powder would take so long.
A few shopping tips:
*Take a cooler if you’re going to be leaving perishables in the car for very long.
*Don’t use those crazy U-scans when you buy meat. Sheesh! The bar codes wouldn’t scan and the “helper guy” had to do it all by hand keying in each number. Learned my lesson.
*Have the butcher slice your pork tenderloins.
*Don’t forget your little “discount” card. I saved 31% at one store and %15 at another by using my member discount.
Here’s a picture of all of the meat I bought:

Since I chose mostly marinade recipes, I didn’t have to buy much else.
Here are the rest of the groceries:

STEP 3 – GET READY
Since I planned, shopped and cooked in one day I didn’t really do any prep work this time. On second thought, cleaning my pantry and refrigerator out the day before counts I think. (Not that I’m going to be storing my entrees there!)
STEPS 4 & 5 – ASSEMBLE ENTREES & STOCK THE FREEZER
I didn’t really start “cooking” until 9 pm (I’m a nightowl, can you tell?) and I finished about 12:30 a.m. Here’s how the 3.5 hours went:
*Put the pork & steak in the refrigerator.
*Cook up the ground beef in 2 batches.
*Boil 3 chicken breasts for Chicken Quesadillas.
*Divide the chicken for Chicken breasts in Caesar Marinade & Elegant Chicken in Marinade into freezer bags & label them. Make the 2 marinade recipes & pour. Seal and freeze.
*Shred chicken, cook with taco seasoning mix & water. Cool. Label qt. bag, fill, seal and freeze.
*Cut 2.5 lbs. chicken into strips for Oriental Sesame Chicken Strips. Divide into freezer bags & label them. Make marinade and pour. Seal and freeze.
*Cut chicken for BBQ Boneless Chicken Bites. Put into labeled freezer bag. Make marinade & pour. Seal and freeze.
*Divide pork for Pork in Marinade & Polynesian BBQ Pork Marinade into freezer bags & label them. Make the 2 marinade recipes & pour it. Seal and freeze.
*Label bags for cooked and cooled ground beef. Fill, seal and freeze.
*Put burger patties into individual flip top baggies. Put all 6 burgers into labeled freezer bag. Seal & freeze.
*Label bag for Swiss Steak. Coat steaks with flour mixed with some salt and pepper. Flash freeze steaks so flour stays on. Combine sauce ingredients. Put steaks in gallon freezer bag. Put sauce in quart size freezer bag. Put sauce bag inside gallon bag. Seal and freeze.
*Divide steaks for Steaks in Marinade recipe into labeled freezer bags. Make marinade & pour. Seal and freeze.
*Cut strips for Beef Teriyaki recipe and divide into labeled freezer bags. Make marinade & pour. Seal and freeze.
All done!!!!!!!!!!!
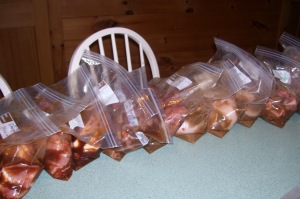
Here’s a picture of several of the bagged meats in marinade lined up on the counter.

This picture is of most of my entrees.

Wrapping It Up
I hope this was informative and helpful for you. A lot of people have the wrong idea that freezer cooking means 50 casseroles in your freezer OR a 24 hour day of freezing tons of food. WRONG! Make it work for you. And by the way, having this food in my freezer doesn’t mean:
A. I won’t be going out to eat in the next 35 days. Are you kidding me?
B. I will eat meat every day for the next 35 days. No way. It will probably take us 2-3 months to eat all of these entrees.
C. I will throw half of this away because no one actually eats the stuff from their freezer. NO! It will taste great! The only thing I pre-cooked is the ground beef for tacos, sloppy joes, etc. and the chicken for quesadillas. Everything else is FRESH!
Next time, I’ll be sharing some of the emails I got from you about how you have been or are currently teaching your kids to cook. Thanks for all of the great insights!
We’re all about helping you succeed in your own freezer cooking. Be sure to become a fan of our new facebook page. As always, www.30daygourmet.com has tons of info and recipes available to you for free. If you like what you see, consider purchasing our books and/or software.
Here’s a quick list of our items. Free shipping on orders over $50. Gift wrap only $1.
- 30 Day Gourmet’s BIG Book of Freezer Cooking $19.95
- Advantage Cooking Software $34.95 download
- Holiday Freezer Cooking $6.95 download
- Freezer Cooking on a Budget $6.95 download
- Freezer Lunches to Go $6.95 download
- Freezer Desserts to Die For! $6.95 download
- Freezer Cooking for Daycare Providers & Busy Parents $6.95 download
- Healthy Freezer Cooking $6.95 download
- Vegetarian Freezer Cooking $6.95 download
- Co-op Cuisine $6.95 download
- Souper Freezer Soups $6.95 download
- Slow Cooker Freezer Favorites $6.95 download
Nanci
