Carol Santee

Carol is the co-author of the Big Book of Freezer Cooking and the author of 30 Day Gourmet’s Slow Cooker Freezer Favorites, Freezer Lunches To Go and Healthy Freezer Cooking eBooks. She is a computer information specialist and works for a computer software company.

Apr 012004
 
Share This Recipe

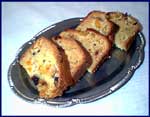
I found this recipe one day when going through my grandmother’s handwritten recipe book. She had written “very, very good” on the corner of the page. Boy, she was right. It is very delicious. To reduce the fat and the carbohydrates in the recipe, the sugar was replaced with a sugar substitute. The margarine was reduced by 1/4 C. and applesauce was used in its place. These kinds of changes can be made to many quick bread recipes to reduce the fat and sugar.

apricotbread1
Click here to go to a Printer Friendly Page Click here to go to a Printer Friendly Page
Advantage Cooking owners click here to download this recipe.

Recipes

1

2

3

4

5

6

Servings

12

24

36

48

60

72

Makes: loaf

1

2

3

4

5

6

Ingredients
Dried apricots

1/2 C.

1 C.

1-1/2 C.

2 C.

2-1/2 C.

3 C.

Raisins

1/4 C.

1/2 C.

3/4 C.

1 C.

1-1/4 C.

1-1/2 C.

Water

1 C.

2 C.

3 C.

4 C.

5 C.

6 C.

Sugar

1 C.

2 C.

3 C.

4 C.

5 C.

6 C.

Ground cloves

1/8 t.

1/4 t.

3/8 t.

1/2 t.

1/2 t. + 1/8 t.

3/4 t.

Nutmeg

1/8 t.

1/4 t.

3/8 t.

1/2 t.

1/2 t. + 1/8 t.

3/4 t.

Salt

1/2 t.

1 t.

1-1/2 t.

2 t.

2-1/2 t.

1 T.

Butter or margarine*

6 T.

12 T.

18 T.

24 T.

30 T.

36 T.

Eggs

1

2

3

4

5

6

Flour

2 C.

4 C.

6 C.

8 C.

10 C.

12 C.

Baking soda

1 t.

2 t.

1 T.

1 T. + 1 t.

1 T. + 2 t.

2 T.


Assembly Directions:
Preheat oven to 350 degrees. Cut apricots into 4 or 5 pieces. Kitchen scissors work the best. Cook apricots and raisins in water for 5 minutes in saucepan on stovetop or in the microwave. Add sugar, spices, salt and margarine. Mix and let cool. Then add eggs, flour and baking soda. Stir well. Fold into lightly greased bread pans and bake for 45 to 55 minutes or until knife inserted in the center of the loaf comes out clean.

Freezing Directions:
Allow bread to cool. Place in a gallon freezer bag. Seal, label and freeze.

Serving Directions:
Thaw and slice into 12 slices.

Comments:
*1 stick margarine = 8 T. or 1/2 C.

Nutritional Info:
Per Serving: 219 Calories; 6g Fat (25.5% calories from fat); 3g Protein; 38g Carbohydrate; 1g Dietary Fiber; 16mg Cholesterol; 267mg Sodium.
Exchanges: 1 Grain (Starch); 1/2 Fruit; 1 Fat; 1 Other Carbohydrates.

March 2004 Chewin’ the News

 2004, Chewin' the News  Comments Off on March 2004 Chewin’ the News
Mar 012004
 

Notes from Tammy

tammy

Hi again, everybody! Hope you all enjoyed the Valentine’s ideas for your family. I want to apologize if you didn’t get your February News… we’ve been having problems with the server that we send the News out from. February’s actually got sent twice! Don’t feel left out if you didn’t get yours… I didn’t either!! If you missed the February News, go to the “Free e-Newsletters” link on the left side of our home page, and click to read previous issues. You definitely won’t want to miss the Oreo Truffles recipe! It’s starting to feel a lot like spring around here, and we are lovin’ it!! The snow has mostly melted, and the crocus are starting
to peak through the dead grass. The bright green leaves and colorful flowers are a very welcome sight about now! Spring is just around the corner, and just in time, I think!  My husband coaches our oldest son’s soccer team, and he got a call about getting ready for spring soccer a couple of days ago. It’s about time to start thinking about those spring sports schedules again, huh? Which means snacks and dinners on the go. I’ve got a couple new recipes this month that should help out. My family really enjoyed them, and I’m sure yours will too!

Bonus Recipes

I didn’t plan on having so many bread machine recipes this month, but it kinda worked out that way! If you don’t have a bread machine, you can still use bread machine recipes. You just have to do the “work” yourself!
The dough cycle on my bread machine mixes/kneads the dough for 7 minutes, lets it rise for 5 minutes, kneads for 18 minutes, and then rises for 50 minutes. Then the dough is ready to go. If you’re mixing up dough by hand, or with the help of a heavy-duty mixer, follow these basic steps…. Mix the warm water and yeast, until the yeast is softened. Add the rest of the ingredients, part of the flour and mix well. Add the rest of the flour and mix until evenly combined. Let the dough rest for about 5 minutes. Knead the dough by hand or with the dough hook on your mixer. Grease a bowl, and put the kneaded dough in it. Cover the bowl with greased plastic wrap, or a towel. Let rise until doubled. Punch down, and the dough is ready to make your recipe.

Soft ‘n Chewy Pretzels

If your kids like the “heat-n-eat” pretzels you buy from the freezer case, they should enjoy these! I had to try a few different recipes to get one that I was happy with. When I told my neighbor I was going to be trying some pretzel recipes, she wanted to know how I was going to make them brown. She said her mom made pretzels when she was a kid, and they really enjoyed them. A couple years ago she and her siblings decided to make them again. They found mom’s recipe, and after reading through it, decided they weren’t going to make pretzels after all! Because mom’s recipe called for them to boil some water, drop 3 crystals of Lye (a chemical? used to make soap, that is strong enough to burn your skin!) in the boiling water, and dip the raw pretzels into the lye-water to turn them brown. They promptly accused mom of trying to poison them!

A couple recipes I was looking at said to brush the raw pretzels with a beaten egg. That didn’t work! They didn’t turn brown, they were too  soft, and had an egg flavor too. Not what I was looking for! I found a safer version of the lye-water, and it works like a charm! You dissolve baking soda in hot water, and dunk the raw pretzels into it before baking. It was a bit   messy at first, and awkward too, until I got the hang of dunking and draining. But it was worth it! The pretzels had a nice light-brown-all-over color, and a light “crust” too.

The second challenge of making pretzels was shaping them. That was more of a challenge than I thought! If you’ve ever seen the “Auntie Anne’s” pretzel stands in the mall, they make shaping pretzels look SO easy! I was halfway done with my third batch before I finally got it down! I took some pictures, and hopefully, it will be easier for you than it was for me!

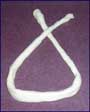
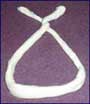
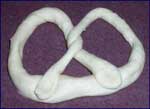
To shape the pretzels, after you get the dough rolled out, grab the ends and lift the rope completely off the counter. Touch the middle of the rope to the counter, and lay the ends down from it, in a U shape. Put the bottom of the U closest to you, with the ends out straight in front of you. Cross the ends of the rope over each other, about 3” from each end, to make an X. Grab the ends, and twist them again, so that the end that was on the left side is now on the right, and the end that was on the right is now on the left. If you twist them the wrong way, it will un-do the X you’ve already made. Pick up the ends and the twist, and bring it towards you, touching the ends onto the bottom of the U, about 2” apart. And that’s it… you did it!

Click here to view/print this recipe!

Garlic Pizza Crust
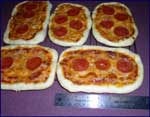
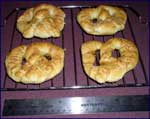
GarlicPizza_CrustThe original recipe for this is from the Friendly Freezer Group. I “tweaked” it a little for the bread machine. It’s great pizza dough for making snack-size or personal-size pizzas. The original recipe said it would make 6, but I could have easily gotten 8 or 9 snack-size pizzas out of it. My 6 were better sized as a meal for me or the kids. You can see from the picture that my pizzas were kinda big for a snack, compared to the 4” rounds they sell in the freezer case! I flash-froze the cooked and cooled pizzas, and then put them in a freezer bag. It was so easy to grab a couple out, throw them in the oven for 10 minutes, and it was time to eat! And, my husband really liked this pizza crust too! (More about that under the Recipe of the Month!)

The fresh-crushed garlic adds wonderful flavor to the crust. I smelled the dough while the bread machine was going, and I thought it was going to be too much garlic. Turns out it was perfect! Someone said you could add a little more garlic, some Parmesan cheese and some Italian herbs to the dough, and make some pretty awesome breadsticks!
A single recipe fits in my bread machine, but it would be worth it to make 2 or 3 times the recipe by hand to get that many snack/personal pizzas in the freezer. I could see this being an easy “on-the-go” dinner that everyone would enjoy. As well as being great for snacks, late nite munchies, summer lunch with the kids, etc. I also plan to make a few just for me, using the BBQ Chicken Pizza in the Feb04 News, since no one else in my house eats it. It will be a perfect lunch for me, whenever I get hungry for it, and am home alone. Yummmm…. I’m tasting it already!!


Click here to view/print this recipe!

Helen’s Nutty Bars
This recipe has been one of the 50 Free Recipes for years. And a fan favorite too! So Nanci decided to include it in the Fourth Edition manual. I’ve gotten a few emails from people asking for the recipe. They printed it from the 50 Free, made it a couple of times, and then lost it. So they went to the website to print another copy, only it isn’t there anymore! So, by including it in the newsletter, it will be on the website for those who have an older manual. These are quite addictive… enjoy!


Click here to view/print this recipe!

Website News from Nanci

nanciwebHealthy Freezer Cooking: A Guide to Creating Nutritious Meals is finally here! Carol Santee (author of our Freezer Lunches to Go ebook) has written another winner. After her husband was diagnosed with Type II diabetes, Carol entered the daunting world of healthy cooking. She has since mastered assembling and freezing foods that taste great but work well for all types of restricted diets. Want to learn how to reduce fat, sugar, cholesterol, and salt in recipes? Then this is the ebook for you! The book includes tips on how to reduce fat and sugar in a recipe, information on all of the different sugar substitutes available and tips on menu planning. Includes 25 great tasting healthy recipes – 21 recipes with 10g or less of fat per serving! Nutritional analysis included for all recipes.

Order yours now! Just $6.95 for the download version. Nutritional info and files for Advantage Cooking software users included.
Free sampler also available including three recipes for you to try out!

Updated Members Section 
Those of you who own a Freezer Cooking Manual or our software are entitled to access the Members section. It has been recently updated and there are lots of recipes there for you to download. Click here to check it out!

Recipe of the Month Contest Winner

This month’s Recipe of the Month winner is Lori McClure, of Mackinaw, IL. Her recipe is a master mix for Pizza Dough. We love pizza at my house. But my hubby would rather have no pizza than eat homemade pizza. So I’m always on the lookout for a “different” recipe that he might like. And I found one here! The mix of flours and cornmeal give it a slightly different texture, which is what makes the crust. You mix up the dry ingredients, measure 3 C. into each zipper baggie, and in the freezer it goes. Then when you want pizza, grab a bag of dry ingredients, add it to water, oil and yeast in your bread machine, press start, and you’ll be ready to go in no time!

The recipe, as Lori posted it, calls for 16 C. bread flour, or a 5 lb. bag. Lori and I had an interesting discussion about this. I asked which she used. Because my bag of bread flour said it should hold approximately 19 C. of flour. But I measured it out, and got just over 17 C. And I measured it just like they said to on the bag… fluff the flour with a spoon, spoon it into a measuring cup, and level off the top, without tapping the cup to settle the flour. Lori measures by scooping her measuring cup into the flour, tapping to get air pockets out, and then leveling off. She gets 16 C. from her bag of flour that way. Lori pointed out that equivalency charts say 1 lb flour = 4 C, which means a 5 lb. bag should have 20 C. of flour in it. So, based on those discrepancies, we went with 16 C. for the recipe.
Let’s meet Lori:

I became introduced to the Freezer Cooking method almost 4 years ago when I attended a one-night class offered at a local junior college. I came home and ordered the 30 Day Gourmet book that night and had my first cooking day right away. I am an at-home-mom of 3 kids ages 11, 8 and 4. My husband works 2nd shift so the afternoons and evenings are left to me for getting the kids to practices, appointments, and all the other nightly routines done…plus still trying to have a good dinner in there somewhere. 30 Day Gourmet has definitely been a life saver in that department!

Click here to view/print the March Recipe of the Month.

Freezer Cook of the Month Contest Winner

Esther Morse, Colorado Springs, CO.

Several years ago, my girlfriend and I decided to form a Girl Scout troop for our daughters, Amanda and Elizabeth. After taking the camp training, we packed up and hauled our troop, of about 8 girls, on a camping trip. While on a short hike, Carol and I noticed wild onions growing; what a great addition to our dinner of goulash! Pick! Pick! Pick! After a couple hundred feet or so… wild daffodils! What a great addition to our base housing gardens! Pick! Pick! Pick!
Upon arriving back at the campsite, Carol laid down because of a severe headache, and I was left in charge! “Okay, Girls, peel those wild onions, slice ‘em up, and let’s get them sauteeing in butter”…mmm mmm mmm!
Carol reappeared just as the goulash was being served up. As she groggily came over to the picnic bench / cooking area, she held up some plants and said, “I thought you were going to put these onions in the goulash?”
Well, I’ve read that daffodils are some of the un-edible flowers… guess we were just lucky!

Gourmet Q&A from Tammy

Q. What kind of freezer labels should I use? Ones I’ve tried don’t come off all the way and make a mess on my dishes and plastic containers. Any ideas? Leslie

A. Well, Leslie, help is on the way! You can buy freezer labels from our on-line store. They’re 2”x3”, with room to write the recipe name, the date and instructions for serving day. They stick to plastic or glass containers, as well as freezer bags. I’ve never had one come off in my freezer. But, when it’s time to take the label off, it comes off easily, in one piece. They come 50 to a roll, for $4. They’re very easy to keep at hand and use. Glad you asked about this, Leslie… it reminds me that I need to order some more!  Click here to order yours.

Cookin’ at the Keyboard with Shelley
ShelleyI’ve received a request for the Advantage Cooking software to print recipes in “column” format, similar to the Freezer Cooking Manual. It is helpful to have ingredient amounts calculated and easily accessible when cooking multiple quantities of a recipe, and it is possible to use the software to generate the same information for any recipe entered. Here’s the process.

Unless I’m trying a meal for the first time, I always cook multiple quantities of a recipe. Depending on the nature of the recipe, I will assemble the ingredients in one of two ways.

The first method is used when the recipe ingredients are difficult to divide into individual meals. Marinades are the best example. Instead of combining six times the quantity of one recipe in a bowl and then trying to separate the “layers” when I’m done, I’ll use six different bowls and assemble one recipe, six times. In this case, I don’t need to multiply the recipe ingredients while I’m cooking; the original recipe has all the information I need. The critical step is to make sure I buy the correct amount of each ingredient! When planning for my Cooking Day, I must be sure to enter a quantity of “6” for this particular “Cooking Day Recipe” before generating a Grocery Report.

A good example of the second method of assembly would be meatballs. I don’t want six different bowls; I want one bowl with six times the recipe. To print a recipe with the ingredients already calculated, use the “Scale” option in the Recipe Manager. Select the desired recipe and click the “Scale” button. When the scaling window appears, enter the desired multiplication factor (“6” in this case), check the “Copy Recipe” option, and click “Scale”. A new recipe will be added using the same recipe name, followed by the quantity. All the ingredients are automatically multiplied by the scale factor! Print this new recipe and use it, instead of the single version, when assembling the recipe. Please note: when planning for the cooking day, be careful when selecting the “Cooking Day Recipes.” If you select the single version recipe, enter a quantity of “6”. If you select the scaled version of the recipe, enter a quantity of “1”. Either method will calculate the correct amount of ingredients on the Grocery Report. (An easy mistake would be to select the scaled version of the recipe, enter a quantity of six, and come home ready to make 36 recipes of meatballs. Oops!)

You will notice that scaling a recipe can result in some unusual amounts and measures of ingredients. Use the “Change Measure” button at the bottom of the window to quickly convert to equal, but more easily used, measures (e.g. 12 tablespoons = ¾ cup).

If you haven’t tried our Advantage Cooking software, click here for a 30 day free trial or to order your own copy.

30 Day Gourmet in the News

Lots of our consultants and “regular” cooks are being featured in their local newspapers as word about their “unusual” cooking plan spreads. Please let us know if you are one of them! Here’s what we have coming up.

St Louis Post-Dispatch Food Section – March 3rd
30 Day Gourmet Angie Copple is one of those brave gourmets who cooks with her husband. 🙂 She also cooks with her two brothers and their wives. Wow! That’s a kitchen full! When a local Food Editor heard about “that cooking thing they do” she came out (with a photographer) to see it for herself. The result was a large front page article featuring the cooking couples. 

Working Mother Magazine – May issue 
An article about Dinnertime Shortcuts is slated to run in their May issue featuring 30 Day Gourmet. Watch for it!

Cook’s Chuckle

The church gossip and self-appointed arbiter of the church’s morals kept
sticking her nose into other people’s business.  Several church members were

unappreciative of her activities, but feared her enough to maintain their silence.

She made a mistake, however, when she accused George, a new member, of
being drunk after she saw his pickup truck parked in front of the towns only
bar one afternoon.  She commented to George and others that everyone seeing it
there would know what he was doing.

George, a man of few words, stared at her for a moment and just walked
away.  He didn’t explain, defend, or deny; he said nothing.  Later that evening,
George quietly parked his pickup in front of her house… and left it there all night.

Final Thoughts

Thanks for all your support of what we do here at 30 Day Gourmet! Without you all, I wouldn’t have a job I love, and get to work from home too! Please let me know if there’s anything we can do to help you with your freezer cooking. Besides coming to your house and doing it for you!! Click here to send me an email with any questions, ideas, suggestions or problems. I enjoy hearing from you all!
Have a great month, and we’ll be talking again soon!
Tammy

Soft ‘n Chewy Pretzels

 Low Fat, Recipes, Snacks and Desserts, Under 350 Calories  Comments Off on Soft ‘n Chewy Pretzels
Mar 012004
 
Share This Recipe

Tammy: What a great snack to have on hand! Don’t let the directions about shaping and dunking the pretzels put you off… it really isn’t that difficult. Once you do one or two and get the hang of it, it’s pretty easy. Most pretzel recipes I looked at said “ twist into desired shape”. Which is all well and good, until you’re standing there with the dough in your hands and can’t make it look like a pretzel if your life depended on it! It took me a bit to get it down, and I figured detailed directions were much better than vague ones! If you’re a visual person, check out the March 2004 issue of our newsletter online for some pictures I took while making my pretzels.

Pretzel_3
Click here to go to a Printer Friendly Page Click here to go to a Printer Friendly Page
Advantage Cooking owners click here to download this recipe.

Recipes

1

2

3

4

5

6

Servings

12

24

36

48

60

72

Makes

12

24

36

48

60

72

Ingredients
Warm water

1 C.

2 C.

3 C.

4 C.

5 C.

6 C.

Active dry yeast

1 envelope

2 envelopes

3 envelopes

4 envelopes

5 envelopes

6 envelopes

Flour

1-1/2 C.

3 C.

4-1/2 C.

6 C.

7-1/2 C.

9 C.

Butter or margarine, softened*

2 T.

4 T.

6 T.

8 T.

10 T.

12 T.

Salt

1/2 t.

1 t.

1-1/2 t.

2 t.

2-1/2 t.

1 T.

Sugar

1 T.

2 T.

3 T.

1/4 C.

1/4 C. + 1 T.

1/4 C. + 2 T.

Flour

1-1/4 C.

2-1/2 C.

3-3/4 C.

5 C.

6-1/4 C.

7-1/2 C.

Pretzel Dip
Hot water

4 C.

Baking soda

5 T.

Coarse or Kosher salt

1 T. +/-


Assembly Directions:
Pour warm water into a large mixing bowl and add the yeast. Stir 2 or 3 times, until the yeast is wet. When the yeast is dissolved, add the first measure of flour, butter, salt and sugar. Beat for 3 minutes. Add the second measure of flour and knead (by hand or with a dough hook) until the dough isn’t sticky. Place dough in a greased bowl and cover. Allow it to rise until doubled. Punch down the dough, and divide into 12 equal pieces, per recipe made. Grease a baking sheet.

To shape the pretzels, form each piece of dough into an 18” long rope. To do this, put each piece of dough on the counter, and roll it back and forth with your palm, until it’s big enough to use both palms. Put your palms beside each other, on the center of the rope, rolling the dough and at the same time moving your palms away from each other, towards the ends of the rope. When the rope is the appropriate size, grab an end in each hand and pick the rope up off the counter. Touch the center of the dough U to the counter close to you, stretching the ends out vertical from you, so it’s in a large U shape. Take the ends, and cross them over each other to make an X, 2” to 3” from the ends. Take the ends and cross them again, and then pull the double X towards you, by the ends. Stick the ends to the bottom of the U, 2” to 3” apart. Pick up the pretzel by grabbing the dough where the ends connect to the bottom of the U with both hands, and placing it on the greased baking sheet. If necessary, shape the pretzel with your fingers so there is some open space between the curved sides and the double X in the middle. Continue shaping the rest of the dough pieces the same way. Let pretzels rise until doubled.

Pretzel_5   Pretzel_4   Pretzel_2

Preheat oven to 475 degrees. Put the hot water in a deep plastic or glass bowl. Don’t use aluminum. Add the baking soda, and stir until it’s dissolved. If the baking soda doesn’t get dissolved, it will make your pretzels a splotchy brown color. Pick up a pretzel by grabbing the bottom where the ends are attached between the thumb and index finger of each hand. Dunk the pretzel into the water/baking soda solution, and back out again. Let the excess water drain off for 5-8 seconds. The pretzel may stretch a little as it’s draining, and you may need to “catch” the top with your pinkies so it doesn’t stretch back into the water. Put the pretzel back on the baking sheet, shaping it if needed, to allow space between the sides and middle. Dunk all of the other pretzels as you did the first one. When all the pretzels are back on the baking sheet, sprinkle with the coarse/Kosher salt to taste. Bake until browned, 10-12 minutes. Remove pretzels from the baking sheet to a wire rack to cool. Cooling on the wire rack will prevent them from getting soggy.

Freezing Directions:
Put each cooled pretzel into a fold-top baggie. Put all the baggies in a one-gallon freezer bag. Seal, label and freeze.

Serving Directions:
Remove the desired number of pretzels from the freezer. Open the baggie and heat in the microwave for 10 seconds or until warm.

Comments:
*8 T. butter or margarine = 1/2 C. = 1 stick

Nutritional Info:
Baking soda not included in nutritional analysis. Majority of the dip is not used in the recipe.
Per Serving: 127 Calories; 2g Fat (15.8% calories from fat); 3g Protein; 23g Carbohydrate; 1g Dietary Fiber; 0mg Cholesterol; 585mg Sodium.
Exchanges: 1-1/2 Grain (Starch); 1/2 Fat.

Mar 012004
 
Share This Recipe

Tammy: This recipe originally came from the Friendly Freezer group, with a few adjustments on my part. It is wonderful to have these heat-n-eat pizzas in the freezer. Great for snacks or a quick meal on the go. This recipe also works great to make breadsticks… add some Parmesan cheese and Italian herbs for an extra special touch! If you don’t have a bread machine, see the March 2004 issue of our newsletter online for info on how to convert bread machine recipes.

GarlicPizza_Crust
Click here to go to a Printer Friendly Page Click here to go to a Printer Friendly Page
Advantage Cooking owners click here to download this recipe.

Recipes

1

2

3

4

5

6

Servings

8

16

24

32

40

48

Makes: snack-size pizzas

8

16

24

32

40

48

Ingredients
Warm water

1 C.

2 C.

3 C.

4 C.

5 C.

6 C.

Salt

1/2 t.

1 t.

1-1/2 t.

2 t.

2-1/2 t.

1 T.

Cooking oil

1/4 C.

1/2 C.

3/4 C.

1 C.

1-1/4 C.

1-1/2 C.

Flour

3 C.

6 C.

9 C.

12 C.

15 C.

18 C.

Sugar

1 T.

2 T.

3 T.

1/4 C.

1/4 C. + 1 T.

1/4 C. + 2 T.

Active dry yeast

1 env.

2 env.

3 env.

4 env.

5 env.

6 env.

Garlic cloves; minced

1

2

3

4

5

6

Assembly Directions:
Measure water into your bread machine pan. Add salt, oil, flour, sugar and yeast. Put the pan into the bread machine, and start the dough cycle. Once the machine has started to mix the dough, add the minced garlic. When the dough cycle is complete, grease baking sheets. Divide dough into 8 pieces. Use fingers to shape dough into desired shape: circle, square or rectangle. Top with sauce and your favorite pizza toppings. Bake at 425 degrees for 10-15 minutes. Remove pizzas from baking sheet to wire cooling rack. Cool completely.

Freezing Directions:
Flash freeze the cooled pizzas. Put them in a one-gallon freezer bag. Seal, label and freeze. OR individually wrap each pizza and put all the pizzas in a one-gallon freezer bag. Seal, label and freeze.

Serving Directions:
Remove required number of pizzas from the freezer. Preheat oven to 425 degrees. Put frozen pizzas on a baking sheet and heat for 10 minutes, or until heated through. Serve.

Nutritional Info: Crust only – per snack size pizza
Per Serving: 240 Calories; 7g Fat (27.7% calories from fat); 5g Protein; 38g Carbohydrate; 2g Dietary Fiber; 0mg Cholesterol; 136mg Sodium.
Exchanges: 2-1/2 Grain (Starch); 1-1/2 Fat.

Pizza Dough Master Mix

 Breads and Breakfast, Low Fat, Recipes, Under 350 Calories  Comments Off on Pizza Dough Master Mix
Mar 012004
 
Share This Recipe

Tammy: This month’s Recipe of the Month winner is Lori McClure, of Mackinaw, IL. Her recipe is a master mix for Pizza Dough. We love pizza at my house. But my hubby would rather have no pizza than eat homemade pizza. So I’m always on the lookout for a “different” recipe that he might like. And I found one here! The mix of flours and cornmeal give it a slightly different texture, which is what makes the crust. You mix up the dry ingredients, measure 3 C. into each zipper baggie, and in the freezer it goes. Then when you want pizza, grab a bag of dry ingredients, add it to water, oil and yeast in your bread machine, press start, and you’ll be ready to go in no time!

The recipe, as Lori posted it, calls for 16 C. bread flour, or a 5 lb. bag. Lori and I had an interesting discussion about this. I asked which she used. Because my bag of bread flour said it should hold approximately 19 C. of flour. But I measured it out, and got just over 17 C. And I measured it just like they said to on the bag… fluff the flour with a spoon, spoon it into a measuring cup, and level off the top, without tapping the cup to settle the flour. Lori measures by scooping her measuring cup into the flour, tapping to get air pockets out, and then leveling off. She gets 16 C. from her bag of flour that way. Lori pointed out that equivalency charts say 1 lb flour = 4 C, which means a 5 lb. bag should have 20 C. of flour in it. So, based on those discrepancies, we went with 16 C. for the recipe.
Click here to go to a Printer Friendly Page Click here to go to a Printer Friendly Page
Advantage Cooking owners click here to download this recipe.

Recipes

1

2

3

4

5

6

Servings: 12 per crust

108

216

324

432

540

648

Makes: large pizza crust

9

18

27

36

45

54

Ingredients
Unbleached bread flour

16 C.

32 C.

48 C.

64 C.

80 C.

96 C.

Unbleached flour

8 C.

16 C.

24 C.

32 C.

40 C.

48 C.

Stone-ground cornmeal

2 C.

4 C.

6 C.

8 C.

10 C.

12 C.

Sugar

1/2 C.

1 C.

1-1/2 C.

2 C.

2-1/2 C.

3 C.

Salt

1/4 C. + 2 T.

3/4 C.

1 C. + 2 T.

1-1/2 C.

1-3/4 C. + 2 T.

2-1/4 C.

Baking powder

1/4 C. + 2 T.

3/4 C.

1 C. + 2 T.

1-1/2 C.

1-3/4 C. + 2 T.

2-1/4 C.

Assembly Directions:
In a large bowl, mix the bread flour, flour, cornmeal, sugar, salt and baking powder until they are evenly combined.

Freezing Directions:
Measure 3 C. of mix into a one-quart zipper bag. Repeat 8 times for each recipe, as 1 recipe makes 9 bags of mix. Put 4 to 5 bags of mix in 2 one-gallon freezer bags, or all of them in a two-gallon freezer bag. Seal, label and freeze. OR put 3 C. of mix into 9 one-quart freezer bags. Seal, label and freeze each bag.

Serving Directions:
Remove a bag of dough mix from the freezer, and allow it to come to room temperature. For each bag of mix, add to your bread machine:

1 C. warm water
2 T. olive oil or other cooking oil
Add the bag of dough mix, and
1 t. active dry yeast… NOTE: 1 envelope of yeast = 2-1/4t., so you only need part of an envelope, if you don’t use bulk yeast.

Follow the instructions for your bread machine for the dough cycle. When the dough cycle is complete, allow the dough to rest in the bread machine for 30-60 minutes. OR cover the dough with greased-plastic and allow to rest for 30-60 minutes, on the counter or in the refrigerator. When you’re ready to proceed, grease a 16” –20” pizza pan, or an 11”x17” jelly roll pan. Punch down the dough with a plastic scraper as you remove it to the pizza pan. Spread the dough edge to edge, top with pizza sauce and your favorite pizza toppings. Bake at 425 degrees for 15-20 minutes.

Comments:
This makes a tasty pizza crust! It’s different because of the combination of flours that are used. You can make the pizza without letting the dough rest for 30-60 minutes, but it’s harder to spread in the pan. When you divide it into the 9 bags, if you have some leftover, you can divide it into the bags, or just throw it away. When I measured mine, I was short 1/2 to 3/4 C. of mix for in my last bag. So I removed 1T. from each of the other 8 bags to make up the difference for the last bag. Worked like a charm!

If you would like to try this recipe, but don’t want to make 9 crust mixes in case you don’t like it, make 1/4 of the recipe. That will give you crust for 2 pizzas and maybe a little leftover, which you can just throw away. To make 1/4 of the recipe, mix 4 C. bread flour, 2 C. flour, 1/2 C. cornmeal, 2 T. sugar, 1 T. + 1-1/2 t. salt, 1 T. + 1-1/2 t. baking powder. Combine and follow directions as above.

If you don’t have a bread machine, see the March 2004 issue of our newsletter online for info on how to convert bread machine recipes.

Nutritional Info: Dry Mix (12 servings per crust)
Per Serving: 116 Calories; trace Fat (3.0% calories from fat); 4g Protein; 24g Carbohydrate; trace Dietary Fiber; 0mg Cholesterol; 437mg Sodium.
Exchanges: 1-1/2 Grain (Starch).

Nutritional Info: Prepared Dough (12 servings per crust)
Per Serving: 137 Calories; 3g Fat (17.5% calories from fat); 4g Protein; 24g Carbohydrate; trace Dietary Fiber; 0mg Cholesterol; 438mg Sodium.
Exchanges: 1-1/2 Grain (Starch); 1/2 Fat.

Cherry Cloud Salad

 Low Sodium, Recipes, Sides and Salads, Under 350 Calories  Comments Off on Cherry Cloud Salad
Feb 012004
 
Share This Recipe

Tammy: This pretty pink salad/dessert goes perfect with your Valentine’s Day dinner! Easy to stir together, you can freeze it in a family size container or individual serving sizes.
Click here to go to a Printer Friendly Page Click here to go to a Printer Friendly Page
Advantage Cooking owners click here to download this recipe.

Recipes

1

2

3

4

5

6

Servings

14

28

42

56

70

84

Makes

7 C.

14 C.

21 C.

28 C.

35 C.

42 C.

Ingredients
Frozen non-dairy whipped topping, thawed

12 oz.

24 oz.

36 oz.

48 oz.

60 oz.

72 oz.

Sweetened condensed milk

14 oz.

28 oz.

42 oz.

56 oz.

70 oz.

84 oz.

Canned cherry pie fillling

21 oz.

42 oz.

63 oz.

84 oz.

105 oz.

126 oz.

Drained crushed pineapple

1 C.

2 C.

3 C.

4 C.

5 C.

6 C.

Chopped pecans

1/3 C.

2/3 C.

1 C.

1-1/3 C.

1-2/3 C.

2 C.

Assembly Directions:
Put the non-dairy whipped topping in a large bowl. Add the sweetened condensed milk and stir by hand to mix. Add the cherry pie filling, the pineapple and the pecans. Stir until evenly mixed.

Freezing Directions:
Put in freezer bags or rigid containers, based on the size of your family. Or, put foil muffin cups on a cookie sheet. Spoon the mixture into the muffin cups. Put the whole cookie sheet in the freezer until the salad is frozen. Dump the frozen muffin cups into a freezer bag. Seal, label and freeze.

Serving Directions:
Allow the mixture to thaw in the refrigerator. Serve chilled. Refrigerate any leftovers.

Tammy’s Comments:
This fluffy salad is perfect for Valentine’s Day! What a pretty pink it is! But I’m sure your family or guests will enjoy it year ‘round.

Nutritional Info: (per 1/2 cup serving)
Per Serving: 247 Calories; 11g Fat (37.5% calories from fat); 3g Protein; 37g Carbohydrate; 1g Dietary Fiber; 10mg Cholesterol; 46mg Sodium.
Exchanges: 2 Fat; 2 Other Carbohydrates.

Buttermilk Biscuit Mix

 Breads and Breakfast, Low Fat, Recipes, Under 350 Calories  Comments Off on Buttermilk Biscuit Mix
Feb 012004
 
Share This Recipe

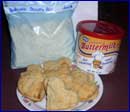
Tammy: This recipe is just like what Grandma used to make! The SACO Buttermilk Blend is powdered buttermilk. It’s in the baking aisle of my local grocery, in a 12 oz. round cardboard can, near the powdered and canned milk. I got this recipe from SACO foods website, at www.sacofoods.com. I modified the directions to work for freezer cooking. It’s quick and easy, and makes light biscuits!

buttermilk
Click here to go to a Printer Friendly Page Click here to go to a Printer Friendly Page
Advantage Cooking owners click here to download this recipe.

Recipes

1

2

3

4

5

6

Servings

12

24

36

48

60

72

Makes

1 dozen

2 dozen

3 dozen

4 dozen

5 dozen

6 dozen

Ingredients
Flour

2 C.

4 C.

6 C.

8 C.

10 C.

12 C.

SACO Buttermilk Blend

1/4 C.

1/2 C.

3/4 C.

1 C.

1-1/4 C.

1-1/2 C.

Baking powder

2 t.

1 T. + 1 t.

2 T.

2 T. + 2 t.

3 T. + 1 t.

1/4 C.

Sugar

2 t.

1 T. + 1 t.

2 T.

2 T. + 2 t.

3 T. + 1 t.

1/4 C.

Salt

1 t.

2 t.

1 T.

1 T. + 1 t.

1 T. + 2 t.

2 T.

Baking soda

1/2 t.

1 t.

1-1/2 t.

2 t.

2-1/2 t.

1 T.

Shortening

1/3 C.

2/3 C.

1 C.

1-1/3 C.

1-2/3 C.

2 C.

On Hand Ingredients
Water

2/3 C.

1-1/3 C.

2 C.

2-2/3 C.

3-1/3 C.

4 C.

Assembly Directions:
In a large mixing bowl, sift together the flour, Buttermilk Blend, baking powder, sugar, salt and baking soda. Use a pastry blender to cut the shortening into the sifted ingredients thoroughly, until the mixture resembles the texture of corn meal.

Freezing Directions:
Put each recipe of biscuit mix in a freezer bag. Each recipe equals 3 C. of mix. Seal, label and freeze.

Serving Directions:
Remove the bag of biscuit mix from the freezer, and allow it to come to room temperature. Dump the mix into a large bowl. Add the water and mix until dough is mostly combined. Do not over mix. Lightly flour the counter, and turn the dough out onto the counter. Lightly knead it 20 to 25 times. Roll or pat the dough to a half-inch thickness. Cut with a floured biscuit cutter. Place close together on an un-greased cookie sheet. Bake for 10-12 minutes at 450 degrees.

Nutritional Info: (per biscuit)
Per Serving: 136 Calories; 6g Fat (39.6% calories from fat); 3g Protein; 18g Carbohydrate; 1g Dietary Fiber; trace Cholesterol; 326mg Sodium.
Exchanges: 1 Grain (Starch); 1 Fat.

BBQ Chicken Pizza

 Poultry, Recipes  Comments Off on BBQ Chicken Pizza
Feb 012004
 
Share This Recipe

Tammy: This is a great slow-cooker recipe! Easy, tasty, and a nice change from regular pizza. The recipe calls for chicken tenders, but you can use boneless, skinless chicken breast also. Since the chicken cooks in a BBQ sauce, it’s very flavorful. To make the pizza, you dump the chicken and sauce on a pizza crust, add cheese, and put it in the oven. It doesn’t get any easier than that!
Click here to go to a Printer Friendly Page Click here to go to a Printer Friendly Page

Advantage Cooking owners click here to download this recipe.

Recipes

1

2

3

4

5

6

Servings

12

24

36

48

60

72

Makes: number of pizzas

2

4

6

8

10

12

Ingredients
Chicken tenders, raw*

2 lbs.

4 lbs.

6 lbs.

8 lbs.

10 lbs.

12 lbs.

Chili sauce

12 oz.

24 oz.

36 oz.

48 oz.

60 oz.

72 oz.

Small onions, sliced

2

4

6

8

10

12

Green pepper, sliced in rings

1

2

3

4

5

6

On Hand Ingredients
Pizza crust, raw or cooked

2

4

6

8

10

12

Shredded pizza blend cheese**

16 oz.

32 oz.

48 oz.

64 oz.

80 oz.

96 oz.


Assembly Directions:
Put the chicken tenders (or sliced chicken breast) in a slow cooker. Pour the chili sauce over the chicken. Separate the onion slices into rings, and spread the onion and pepper rings over the chili sauce. If you are making multiple recipes, layer each recipe in the slow cooker (chicken, sauce, onion and pepper rings; chicken, sauce, onion and pepper rings) so the flavors will be evenly distributed. Cook on low for 6-8 hours. Allow mixture to cool.

Freezing Directions:
Divide cooled chicken mixture into a quart freezer bag or rigid container. Each recipe makes 2 pizzas, so freeze it based on how many pizzas you will make at a time. Seal, label and freeze. Keep the pizza crusts and cheese on hand.

Serving Directions:
Thaw bag of chicken mixture in the refrigerator. Thaw the pizza crusts and cheese if necessary. You can use a prepared, fully baked pizza crust (like Boboli) or you can make your own pizza crust from scratch or a mix. In either case, put the crust on a pizza pan and spoon or dump the chicken mixture onto the crust. Leave the chicken in chunks, or shred it… whatever your personal preference is. Sprinkle with the Pizza Blend cheese. If you are using a prepared crust, bake as directed on the crust package or until the cheese is melted and the pizza is heated through. If using a raw crust, bake as directed. Serve hot. Refrigerate any leftovers.

Tammy’s Comments:
* = Boneless, skinless chicken breasts can be used in place of the chicken tenders. Cut each breast into 4-5 pieces.
** = Pizza Blend cheese is a mixture of mozzarella and cheddar cheeses.
I love BBQ chicken pizza!! Having this mixture in the freezer makes it easy to have it any time you want. Especially if you use a prepared pizza crust! For more variety, you can shred the BBQ chicken, and serve it on a bun as a sandwich. Top with some shredded cheddar, and you’re ready to go!

Nutritional Info: (per slice)
Per Serving: 460 Calories; 16g Fat (31.5% calories from fat); 32g Protein; 44g Carbohydrate; 1g Dietary Fiber; 81mg Cholesterol; 850mg Sodium.
Exchanges: 2-1/2 Grain (Starch); 3-1/2 Lean Meat; 1/2 Vegetable; 2-1/2 Fat.

February 2004 Chewin’ the News

 2004, Chewin' the News  Comments Off on February 2004 Chewin’ the News
Feb 012004
 

Notes from Tammy

tammyHi everybody! Hope you enjoyed the slow cooker recipes last month! It seems too obvious to talk about Valentine’s Day for February, but we haven’t done that before! (Probably because we haven’t gotten the February News out before the 14th!)

What can you do to make Valentine’s Day dinner special for your family? Plan a heart-theme, or a red (or pink) and white theme. You don’t have to go extravagant with new recipes either. Family favorites are probably best.

pretzelsI planned a heart-themed dinner for my family last year, and the kids especially loved it! I made family-favorite recipes, with a little tweaking, to go with my heart theme. I made individual meatloaves with the Master Meat Mix, and shaped them using a heart cookie cutter. I made Cheesy Mashed Potatoes, and plopped them in a heart shape on the plates. I made homemade bread, and salad too. I put salad in each bowl, and then drew a heart on top with each person’s favorite salad dressing. And I put butter in a chocolate candy mold for heart-shaped pats of butter. Add a few candles, real glasses for the kids, and prepare to enjoy!!

Spaghetti or lasagna would be great options for a red-and-white dinner. Or make pizza with heart-shaped pepperoni. Write “I love you” on top of your pizza with veggies. Add a few drops of red food color to your mashed potatoes, for pink potatoes, if your family will still eat them. Use your imagination and come up with some ideas to work for you!

If your family packs their lunch, use cookie cutters to cut out a heart-shape from their sandwich. Rob eats wheat bread, and the kids eat white, so I fill the heart-cutouts in the kids’ sandwiches with a wheat bread heart from their dad’s sandwich. Or, if that would embarrass them too much, cut their cheese and bologna in a large heart shape. Just a little something extra to do to show them you love them!

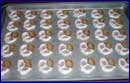
Making Oreo Truffles is a great way to show someone you love them! After making them, I had some leftover melted white chocolate, so I dipped some small pretzel twists in the chocolate. I like the sweet/salty contrast, so I only dip 2/3 of my pretzels in chocolate. Then for an extra touch, I sprinkled some pink crystal sprinkles on the wet chocolate. My family ooh’d and aah’d over how pretty they were.

Tammy's-familyIf you haven’t dipped pretzels in chocolate coating before, it’s really easy! Melt it in the microwave and dip. Make sure you use a deep bowl, so the melted chocolate is deep enough to cover the pretzels as you dip them in. Put the dipped pretzels on a waxed paper covered cookie sheet until the chocolate is set. Put the dipped pretzels in a rigid container or freezer bag. They keep very well in the freezer!

I hope this gives you some ideas to get started, and I hope you have a great Valentine’s Day dinner with your family!


Happy Valentine’s Day, from my family to yours!

Bonus Recipes

meatloafMaster Meat Mix

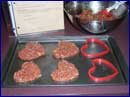
This recipe is from the Freezer Cooking Manual, and has been a crowd-pleaser since the first time I made it! To make heart-shaped individual meat loaves, use a cookie sheet with sides. Put the heart cookie cutter on the cookie sheet, put a spoonful of Master Meat Mix inside the cookie cutter, and spread it around to full the cookie cutter. When it’s solidly full, lift the cookie cutter up, and repeat with the rest of the mix. The meat loaves will keep their shape as they bake. Depending on the size you make them, the cooking time may need adjusted. Thirty to forty-five minutes should probably do it, instead of an hour.


BBQ Chicken Pizza

This is a great slow-cooker recipe! Easy, tasty, and a nice change from regular pizza. The recipe calls for chicken tenders, but you can use boneless, skinless chicken breast also. Since the chicken cooks in a BBQ sauce, it’s very flavorful. To make the pizza, you dump the chicken and sauce on a pizza crust, add cheese, and put it in the oven. It doesn’t get any easier than that!


buttermilkButtermilk Biscuits

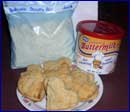
Do you know you can buy powdered buttermilk at the grocery store, keep it in the fridge indefinitely, and you’ll always have buttermilk for cooking? You can use it in any recipe that calls for buttermilk. It’s in the baking aisle at my local grocery, near the powdered milk and canned milk. It comes in a 12 oz. round cardboard can, and is made by SACO Foods. I went to their website (www.sacofoods.com) to find a biscuit recipe, and was not disappointed! This recipe is just like grandma used to make! I changed the assembly directions a bit, so it was more freezer-friendly. I have you making it like a mix, that you take out of the freezer, dump in a bowl, add water, mix, cut and bake. So homemade biscuits are only minutes away, with this mix in the freezer! And be sure to check out the SACO website for more recipes using this innovative product!

Cherry Cloud Salad
This pretty pink salad/dessert goes perfect with your Valentine’s Day dinner! Easy to stir together, you can freeze it in a family size container or individual serving sizes.


Website News from Nanci

nanciwebNew Members Section is Ready! 
Kudos to Curtis and his team for finishing this big project. Members can now download:

  • Classic Recipes (individually or as a complete set)
  • 3rd edition Recipes not included in the 4th edition
  • Recipe additions & variations mentioned in the 4th edition
  • Software files for all of these plus newsletter & winning recipes prior to 1/03

Check it out here!

Who’s a member? Anyone who has purchased either a 30 Day Gourmet Freezer Cooking Manual and/or the 30 Day Gourmet Advantage Cooking Software. Your user name and password was included with your order.

Software
Gaylen and Shelley have just completed an upgraded version of our software. Read Shelley’s notes for full details. If you already own the software, a free upgrade to the new version is now available on the site (click here).

International Orders 
I’ve been working with our shopping cart provider to make it possible for more of you who live outside the US to order on our website. Here’s what we were able to add recently:

  • APO addresses
  • Canada
  • Great Britain
  • Australia


New Links Page 
Thanks to Carol our links page has finally been updated. If you’re looking for sites with great information pertinent to freezer cooks, check it out!

Newest eBook – Healthy Freezer Cooking: A Guide to Creating Nutritious
Meals by Carol Santee

Want to learn how to reduce fat, sugar, cholesterol, and salt in recipes? Then this is the ebook for you! The book includes tips on how to reduce fat and sugar in a recipe, information on all of the different sugar substitutes available and tips on menu planning. Includes 25 great tasting healthy recipes – 21 recipes with 10g or less of fat per serving! Nutritional analysis included for all recipes. Watch for it soon!

Freezer Cook of the Month Contest Winner

I received the following email from Heidi, of Columbia, MO and had to award her Cook of the Month for February!

On January 7, 2004, 35 weeks pregnant I began my first cooking day. I had prepared for 3 days in advance and had everything chopped, recipes ready to go, and I was starting bright and early with a crockpot recipe. My two toddlers (15 months and 35 months) were set for a day in front of the TV. I decided since it was my first time and I was pregnant and had two other small children to start out slow. I had 11 recipes that I was going to get done. I cooked ALL day long. I did fix and sit down with my children to eat lunch but that was really it. At 4:15 I noticed some strange cramping sensations. At 4:30 I decided they might not be cramps after all. I called my husband (who works 40 min. away) and told him to step on it. I then called a friend to come over. She and I finished packing up the last 4 recipes. My husband then took me to the hospital, where it was confirmed that I was in labor. My poor friend had to clean my totally destroyed kitchen (good for me), and I got a freezer full of food (not a moment too early either), and a little boy. Unfortunately, he had to stay in NICU for 10 days, but is doing great and at home now. So, the moral of the story is… don’t do this pregnant… unless you’re over due and anxious to meet your new little bundle of joy.

Congratulations, Heidi, on getting your first cooking day done, and for the new man in your life! Glad everything turned out okay! This is proof-positive that we freezer cooks can be a determined bunch! Some might even say a little crazy! But let us show you our full freezer, and then you’ll begin to understand that we aren’t crazy at all!!!

Gourmet Q&A from Tammy

Q. I’ve got a new email address… what do I need to do to keep my newsletter subscription coming? Zoe

A.  I’ve gotten a few questions like this in the past month, and the answer is very easy. At the top of the News is a link that you can use to subscribe. Use that, and enter you new email address. At the bottom of the News is a link to use to un-subscribe. Use that, and enter your old email address. And that’s all there is to it!

Cookin’ at the Keyboard with Shelley

ShelleyThe new version of Advantage Cooking is now available! Download the trial version and use it free for 30 days. Current software users can get a free upgrade from the website (but be sure to use the “upgrade” download and not the “trial version” download in order to save your existing recipe files!) See the link at the bottom of this article to get your trial or upgrade.

New features in version 1.5 include:

  1. MasterCook® Compatible Recipe Import 
    Advantage will now accept MasterCook® version 4/.mxp files. (The import of .mx2 files will be included in the next release.) The converted recipe is displayed for editing before it is automatically imported.

  2. Recipe Category Filter
    Choose a recipe category and the recipe manager will display only the recipes in that category. Now it’s easy to find a chicken entrée without having to scroll through a list of luscious desserts.

  3. Print the Cooking Day Recipes
    Locating and printing all the recipes to be cooked together on a cooking day was once a time-consuming task. But no longer! The Cooking Day window now has three new options:
    Print Preview – to view a recipe on the screen,
    Print Recipe – to print an individual recipe, and
    Print All – to select any or all of the recipes assigned to a Cooking Day.

  4. Merge Ingredients
    My ingredient file is often cluttered with different entries for identical ingredients. For example, my file may use “Ground Beef”, but the imported recipe used “Hamburger” – which means I now have two entries for the same ingredient! With this new feature, it’s easy to merge one ingredient into another and get rid of the clutter.

  5. New Recipe Fields
    Two new fields have been added to the recipe information: Recipe Source and Preparation Time.

  6. Ingredient Pricing
    The first step in pricing is complete. The price of any ingredient assigned to a grocery store can be entered. The prices appear on the grocery store reports and total at the bottom. Cost analysis will be added in later versions.

The list of possible features to be added to the software is seemingly endless. I hope you’ll find these enhancements useful as we begin to design the new capabilities for the next release. If you have any suggestions, click here to send me an email.

If you haven’t tried our Advantage Cooking software, click here for a 30 day free trial or to order your own copy.

30 Day Gourmet in the News

Lots of our consultants and “regular” cooks are being featured in their local newspapers as word about their “unusual” cooking plan spreads. Please let us know if you are one of them! We want to add links on the site to any 30 Day Gourmet related news media. Thanks!

Nashville, Tennessee 
30 Day Gourmet Cherrie Hays was recently featured on Newschannel 5’s Talk of the Town show. Thanks, Cherrie!

The Mom Show 
Those of you who are Flyladies may be familiar with The Mom Show. It’s an online radio show. You can listen “live” or tune in to the archives at your convenience. I did an interview with Traci and Michelle for the 1/22/04 show. Click here to listen online.

Texas Co-op Power Magazine 
Welcome to all of you Texans who just read about us in the February issue of Texas Cooperative Power magazine. Click here to read the article in the 2/04 issue.

Working Mother Magazine
An article about Dinnertime Shortcuts is slated to run in the May issue featuring 30 Day Gourmet. Watch for it!

Website of the Month

Since chocolate is such a popular Valentine’s Day gift, I gotta go with www.hersheys.com as the website this month. It’s “The Sweetest Site on the Web!” Send a 2 pound chocolate “card” to someone, personalized with a chocolate message from you. (As a recipient of a couple of these, I can vouch for their yummy-ness!) Find some rich recipes, learn about chocolate, plan a visit to Hershey PA or check out some neat gift ideas.

Final Thoughts

January has been cold and icy here. It sure has been nice to have food in the freezer so I didn’t have to go out in the nasty winter weather to stock up. And I’m very thankful that I’ve had my electric, in spite of the ice and snow storms! Hope you have a fabulous February, and enjoy Valentine’s Day with the ones you love!
Talk to you again next month!
Tammy