Carol Santee

Carol is the co-author of the Big Book of Freezer Cooking and the author of 30 Day Gourmet’s Slow Cooker Freezer Favorites, Freezer Lunches To Go and Healthy Freezer Cooking eBooks. She is a computer information specialist and works for a computer software company.

Sep 012005
 
Share This Recipe

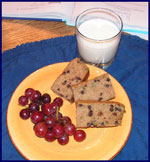
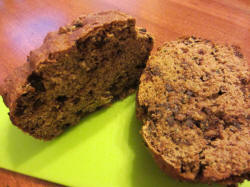
Shelley: When the zucchini is literally overflowing the garden, we wash, grate, and freeze it. The original recipe didn’t call for chocolate chips, but they turn this snack into a real treat. If you replace half the white flour with whole wheat the kids will never know.

Click here to go to a Printer Friendly Page Click here to go to a Printer Friendly Page
Advantage Cooking owners click here to download this recipe.

Chocolate Chip Zucchini Loaf

Chocolate Chip Zucchini Loaf

Recipes

1

2

3

4

5

6

Servings

12

24

36

48

60

72

Makes

1 loaf

2 loaves

3 loaves

4 loaves

5 loaves

6 loaves

Ingredients
Flour

2 C.

4 C.

6 C.

8 C.

10 C.

12 C.

Baking powder

1 t.

2 t.

1 T.

1 T. + 1 t.

1 T. + 2 t.

2 T.

Baking soda

1 t.

2 t.

1 T.

1 T. + 1 t.

1 T. + 2 t.

2 T.

Salt

1/2 t.

1 t.

1-1/2 t.

2 t.

2-1/2 t.

1 T.

Cinnamon

1 t.

2 t.

1 T.

1 T. + 1 t.

1 T. + 2 t.

2 T.

Miniature chocolate chips

1/2 C.

1 C.

1-1/2 C.

2 C.

2-1/2 C.

3 C.

Eggs

2

4

6

8

10

12

Oil

1/4 C.

1/2 C.

3/4 C.

1 C.

1-1/4 C.

1-1/2 C.

Applesauce

1/4 C.

1/2 C.

3/4 C.

1 C.

1-1/4 C.

1-1/2 C.

Sugar

1 C.

2 C.

3 C.

4 C.

5 C.

6 C.

Vanilla

1 t.

2 t.

1 T.

1 T. + 1 t.

1 T. + 2 t.

2 T.

Grated zucchini*

1 C.

2 C.

3 C.

4 C.

5 C.

6 C.


Assembly Directions: Combine flour, baking powder, baking soda, salt, cinnamon, and chocolate chips in separate bowl (or see baking mix instructions below). Beat eggs until frothy. Beat in oil, applesauce, sugar, and vanilla. Stir in zucchini. Stir in dry ingredients. Pour into greased 9×9 loaf pan. Wrap with moist cake wrap if desired. Bake for 40 minutes at 350° until a toothpick inserted in the center comes out clean (except for melted chocolate). Let stand 10 minutes. Remove from pan and cool on rack.

Freezing Directions: Wrap in plastic wrap, and seal in 1-gallon freezer bag. Label and freeze.

Serving Directions: Allow the bread to thaw. Slice and serve.

Comments:  *unpeeled; if frozen do not drain
For a healthier variation, use 1 cup white flour and 1 cup whole wheat flour. Either way, it will disappear before your eyes!
To use as a baking mix, combine the dry ingredients and store in a food saver bag or freezer bag. Label and store the mix. Make several at a time and store in separate bags. This makes it easy to bake a quick snack when the freezer is either too full for baked goods, or too empty because the goodies have all been eaten!

Nutritional Info:
Per Serving: 233 Calories; 8g Fat (28.9% calories from fat); 4g Protein; 39g Carbohydrate; 1g Dietary Fiber; 31mg Cholesterol; 250mg Sodium. Exchanges: 1 Grain (Starch); 1-1/2 Fat; 1-1/2 Other Carbohydrates.
Sep 012005
 

By Carol Santee, author of Freezer Lunches to Go

What’s the first thing that you think of when someone talks about having a sack lunch? The old stand by peanut butter and jelly comes to mind. What if lunch could be an exciting, fun and interesting part of your day? It can be with a little planning, preparation and a good system of foods that work for you and your family.

Get everyone involved in the process! Ask what they like to eat and what they don’t. Try to develop a basic list of things that can be sent for lunch. Don’t forget to look at what you eat for dinner. Sometimes these dishes can be repackaged for lunch. For example, the meatballs from last night’s spaghetti and meatball dinner make a great return as meatball sandwiches.

Kids love to help in the kitchen and this is the perfect activity to get them started. Even the youngest child can package food that is already prepared such as pre-peeled baby carrots, homemade cookies or granola bars. With your guidance, they can learn about good food choices.

Give them choices for side dishes. Keep a variety of fruits and vegetables on hand and let them choose their own sides. Make fruits and vegetables fun with simple homemade dips, purchased salad dressings or simple peanut butter spreads. Surprise them with a simple fruit smoothie packed in a thermos. The key is to make lunch fun.

Here are some simple do’s and don’ts to remember:


  • Do have a planning session with the members of you family concerning what you will be packing for their lunch. Make a list of foods they like to eat and incorporate them in to a menu system for the week. Planning ahead saves time and prevents confusion.
  • Do plan creative ways to repackage the foods that your family likes for lunch. For example, use tortilla wraps, pita pockets or hot dog buns in the place of regular bread or buns. Combine fruit in yogurt in a thermos to create a dessert “parfait”.
  • Don’t send foods that your family won’t eat! If trying a new recipe, test it out at home first before sending it for lunch.
  • Don’t let your sandwiches get soggy. Spread the peanut butter on both pieces of bread put the jelly as the middle layer. Use lettuce on sandwiches to keep the meat from getting the bread wet. If package a mayonnaise based sandwich such as egg or tuna salad, pack the salad in a small container away from the bread. Older kids like to make their own sandwiches.
  • Do let you family help make or package the foods for lunch. The more they are involved the more they will enjoy their lunch.
  • Do plan ahead for packing lunches. Have all the staples on hand that you need. Pack as much as you can the night before. This alleviates a lot of stress during the morning rush to get everyone out the door.
  • Do have the right equipment on hand to package lunch. Thermoses work well for hot foods. Insulated lunch boxes help control the temperature of their contents. Drink boxes can be frozen and used to keep sandwiches cold.
  • Do remember the basics of food safety – keep hot foods hot and cold foods cold. Keep your work surface, lunch box, and containers clean to prevent bacteria from developing.

September 2005 Chewin’ the News with Shelley

 2005, Chewin' the News  Comments Off on September 2005 Chewin’ the News with Shelley
Sep 012005
 

Cookin’ at the Keyboard with Shelley

Family-1September means back to school…even for me! This month marks the beginning of our ninth year of home schooling. Sarah, in black, is a junior; Lauren, on the left, is a freshman. The twins, Aundra and Anicia, are in the fourth grade and Megan, our 5-year-old, is proud to be a first grader!

Our weekly schedule is full to overflowing. My main focus this year is history, so the dining room table is covered with books, binders, timelines, and coloring pages. I’m also teaching the older girls “how to teach.” The twins take math from Sarah, and Lauren gives them their spelling lesson. Considering that the high school girls are out of the house part of every day for piano lessons or classes at the academy, my first priority has become scheduling (school doesn’t work if the teacher isn’t home!).

Every morning we meet around the breakfast table to review the schedule for the day. It’s much easier to get the girls up and moving if they know that a hot breakfast is waiting for them downstairs. I serve a variety of things, but eggs and muffins bring the biggest smiles. I don’t have room in my freezer for dozens of muffins and baked goods every month, so I’ve created another option. I make my own “baking mixes” to manage both my time and my freezer space.

I use the “cooking day/serving day” strategy discussed below in Software Suggestions. For any baked item (muffins, breads, etc) I combine all the dry ingredients for that recipe and seal in a food saver or freezer bag. After labeling, I toss them in the freezer (if there’s room), or I store them in a cool, dry place. Be sure to date the package.

When I’m fixing breakfast, it’s easy to grab the milk, eggs, oil, and a custom homemade baking mix. I always double (at least) every recipe so that I have enough leftover to put in the freezer for another day. It’s a deep satisfaction to know that my daughters will have memories of waking up to the aroma of fresh baked muffins, at least once in awhile.

In honor of back-to-school, here are two of our favorite after-school snack recipes. Best wishes to your family for a fun and productive school year! 

ChocolateChip-ZuchLoafChocolate Chip Zucchini Loaf

When the zucchini is literally overflowing the garden, we wash, grate, and freeze it. The original recipe didn’t call for chocolate chips, but they turn this snack into a real treat. If you replace half the white flour with whole wheat the kids will never know.


GlazAlPopSeedMuffinGlazed Almond Poppy Seed Mini-Muffins

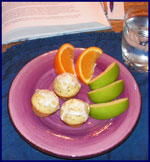
This is a special reward for a good day of school. Since these muffins aren’t high on my “healthy snack” list, I use the mini-muffin pan. I recommend glazing them after they’ve thawed, not before freezing. Add some hot tea and “dress up” clothes and you’ve made a memory!


Software Suggestions

“Cooking Day” vs. “Serving Day”

When freezing meals, I have several goals in mind. Primarily, I want to save time, save money, conserve freezer space, serve delicious food, and make it painless to put a meal on the table (I don’t ask for much, do I?) All five of these goals can be accomplished by cooking only part of a recipe.

“Homemade Chili” is a prime example. After frying the ground beef and onion, I stir in all six of the seasonings and freeze in a food saver bag. Time is saved because I prepare multiple quantities of the recipe while the time-consuming task of chopping onion, frying meat, hunting for seasonings, and washing the pans and utensils need to be done only once. Money is saved because the canned tomatoes and kidney beans aren’t purchased until I serve the meal, or until they’re on sale at the store. Freezer space is conserved because I’m storing only the meat, not the tomatoes and beans. My chili is delicious because I’ve cooked the portion of the recipe that, in my opinion, freezes the best. Finally, it’s easy to put the meal on the table; the cooked ground beef thaws quickly and the cans of tomatoes and beans are simple to add.

Believe it or not, it gets even better! Advantage Cooking actually helps me keep track of what I call a S.A.N.E recipe (Some Assembly Needed Eventually). For any ingredient in a recipe, set the “use on” field to indicate whether this particular ingredient is a “cooking day” or “serving day” item. Serving day ingredients are marked with an asterisk* on the printed recipe. I like to use the Move Ingredient buttons to position the “cooking day” ingredients at the top of the recipe and the “serving day” ingredients below.

In addition, three options are available for the Grocery Report. For any group of recipes selected, the grocery list can include:

  1. all ingredients,
  2. “cooking day” ingredients only, or
  3. “serving day” ingredients only.


I use the first option if I want to grocery shop once and make sure that every ingredient will be in the house when I need it. When money is a consideration, I buy the “cooking day” ingredients only, in order to cut down on cost.

To make sure you have all the serving day ingredients on hand, you have two options. Either use the “serving day” option for the grocery report, or print the Recipe Inventory Report. It’s the most convenient because it lists the serving day ingredients for every recipe selected for a cooking day. Print a report and see how easy it is to use!


Click here to download a free trial version of the software!

Closing Comments from Shelley

I manage my kitchen in different ways, based on the season of the year and the season of life. No matter which “season” you find yourself in, I hope I’ve given you some ideas on how to make your kitchen more efficient, for the benefit of your health and your family. Cook on!


         Shelley

September 2005 Chewin’ the News with Carol

 2005, Chewin' the News  Comments Off on September 2005 Chewin’ the News with Carol
Sep 012005
 

carol2007

Kitchen Fun with Carol

Hi everybody! It’s back to school time at our house. My twin boys are starting high school this year so we have been getting them prepared for the big day and the added responsibilities that high school brings. My daughter is back home from her summer job for a few weeks. She is preparing to leave for The Ohio State University (Go Bucks!) to study nursing. It’s been great having her back home for a couple of weeks! It’s fun to watch the interaction between her and her brothers. And it is interesting with three teenagers in the house that eat constantly all day long! Not only do I have to plan for lunch and dinner but I also have to have lots of snacks and breakfast foods on hand to full up my hungry teenagers.

Our current favorite breakfast food is Breakfast McBiscuits. I made my first batch a couple weeks ago using English muffins, turkey sausage and eggs. I keep cheese on hand so the kids can add it themselves later if they want it. For my first batch I used Tammy’s suggestion from the message boards to cook the eggs. She bakes the eggs in a jelly roll pan and then cuts them into squares for the sandwiches. This is so simple and easy. When I made my second batch (a double batch this time!) I tried cooking the eggs in a microwavable muffin pan that had 9 muffin cups. This was fast, easy and they came out round just like McDonald’s. I bought my turkey sausage in one pound chubs. I split each chub into 8 portions, used my hamburger press to form the patties, and cooked the patties on my large electric griddle. They assembled very quickly using this method. To avoid the problem of a soggy sandwich, I do not freeze them fully assembled. I place the unopened muffin, sausage and egg in a sandwich bag and then I place multiple bags inside a gallon freezer bag. When you are ready to eat them, grab a sandwich and microwave it 15 seconds so that the muffin can be opened. Toast the muffin in the toaster and microwave the egg and sausage on a plate until they are hot. If you want to add cheese, add it during the last 15 seconds of microwaving.

We have lots of other recipes that we serve for breakfast. Another new favorite is Tara’s Favorite Muffins with chocolate chips. I make the mini muffin version of this recipe. They are wonderful! We also make waffles using the Master Baking MixBreakfast BurritosPeanut Butter MuffinsGranola Bars, and French Toast Sticks from the Freezer Cooking for Daycare Providers and Busy Parents ebook sampler.

For lunches, I always go with a seasonal rotating menu. Variety helps keep everyone happy. For example, when serving a sandwich sometimes I serve them on pita pockets instead of bread and with fresh spinach instead of lettuce. This makes it different and fun. Here’s a sample of a menu that I use. We repeat it 3 times and then adjust the menu for the next season.


Monday

Tuesday

Wednesday

Thursday

Friday

Week 1

Turkey and Noodles

Sausage and Rice

Taco Pockets

Turkey Sandwich

Tuna Salad Sandwich

Week 2

Hamburger Soup

Chicken Salad Sandwich

Ham Sandwich

Montreal Chicken Sandwich

Pork BBQ

Week 3

Chicken Pockets 

Turkey Sandwich

Meatball Sandwich

Pasta with Ham

*Shredded Roast Beef Sandwich

Week 4

Bowtie Soup 

Ham Sandwich

Loaded Baked Potato Soup

Turkey and Cheese Pockets

Peanut Butter and Jelly

* I use the Beef and Noodles recipe from the Healthy Freezer Cooking ebook or you could use the Crock-Pot Beef Sandwiches from The Freezer Cooking Manual.

Some of our other favorite recipes for lunch include Pizza Pockets, Hamburger Mulligan and Pepperoni Sticks from the Freezer Lunches to Go ebook, French Toast Sticks from the Freezer Cooking for Daycare Providers and Busy Parents ebook sampler, Mac and Cheese (homemade or boxed), and Meatloaf Sandwich (I cook mine before I freeze it!). I also occasionally pack hotdogs or and left over soups or chili.

One of our favorite recipes for lunches are homemade pockets. There are so many different combinations of ingredients that you can use to make the filling. We usually pick four different types to make for each menu rotation. That gives us one meal of pockets per week. Never made pockets before? Here are some tips to get you started.


  1. For the bread you can use purchased or homemade bread dough, store bought crescent rolls, or any other homemade breading. We make our own dough to save money. The Super Easy Best Ever Crescent Rolls recipe or the Crescent Roll recipe from the Freezer Lunches to Go ebook are great for pockets.
  2. Pick filling combinations that your family likes. Each pocket uses about 1/4 cup of filling so for each batch of twelve you will need 3 cups. Here are some ideas to try:
    • Turkey, ham and cheese
    • Chicken, broccoli and cheddar
    • Miniature meatballs, mozzarella and spaghetti sauce
    • BBQ beef
    • Beef or Chicken, Mexican cheese, peppers and onion
    • Shredded beef or chicken with cheddar cheese
    • Chicken, peppers, broccoli and Alfredo sauce
    • Philly steak, cheese, onions and peppers
  3. If your filling has a sauce, do not get the sauce on the edges and do not overstuff the pockets. If you do, the pockets may not seal and their contents will ooze out during cooking. There’s nothing sadder than a pocket that has lost it’s filling!
  4. Make sure you cool the pockets completely before freezing. Warm pockets generate ice crystals in the freezer. That makes the pockets wet when you defrost them. If this happens, warm them up in the oven instead of the microwave to dry them out.


Pockets are a fun way to serve lunch! Be creative and create your own combination of flavors. For some more helpful information on packing lunches, read Do’s and Don’ts of Packed Lunches and my ebook Freezer Lunches To Go. Good luck this school year and enjoy this month’s bonus recipes!

Bonus Recipes

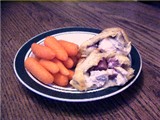
ChickenCordonBleuPockets160Chicken Cordon Bleu Pockets

We love pockets so I am always trying to create new flavor combinations to pack for lunch. This recipe was inspired by one of our favorite dinners, Chicken Cordon Bleu. For us, it’s one of those special occasion meals that I only serve once in a while because of the prep work involved in assembling the meal. It has a great combination of chicken, ham, cheese and a wonderful sauce. This pocket recipe reminds of the flavors without all the work!


DoubleChocolateMuffins160Double Chocolate Muffins

Whenever we go grocery shopping we pass right through the bakery section of the store and you know how tempting that can be. Our local store has a two sided cart that contains lots of different muffins and they all look great! My kids are always asking to purchase some of the chocolate chocolate chip muffins. I decided to create a recipe of my own to use instead. These are light, fluffy and smell so good coming out of the oven. I have these available for breakfast and for the kids to eat after school. You’ll be surprised how quickly a dozen will vanish!


Recipe of the Month Contest Winner

Recipe of the Month… Chicken Taco Rice

Our winner this month is Rachel from Gloucester, VA, with her recipe for Chicken Taco Rice. This rice is very versatile and can be used in many ways. It’s great plain with cheese melted on top. It can be used as a filling for Chicken Burritos. You can also use it to make Taco Salad or Nachos. Freeze it in individual servings for after school snacks.
Let’s meet Rachel:

I am a stay-at-home-mom to one preschooler. I am committed to making healthy meals, but I hate the actual cooking, so I enjoy being able to get all the cooking done for the month and have it over with! My husband, who is self-employed, appreciates the financial savings that come with such well-planned meals. The Freezer Cooking Manual is quite a gem, being the only freezer cookbook I could find that included instructions for creating my own cooking plan using the foods we already eat. My interests include whole foods cooking and nutrition, scrapbooking, reading, working on my website, and research. (I’m an information junkie!)

Click here to view/print the September Recipe of the Month.

Freezer Cook of the Month Contest Winner

Our winner this month is Diane with her story about how she helps others cooking the 30 Day Gourmet way.

Diane says:

I purchased your manual several years ago after seeing you on Home and Family (I have your video, too. Love it.). I’d just like to thank you for all your hard work. This system has saved me so much stress. I cook all summer and put about 120 entrees in my freezer, so only have to “supplement cook” during the school year when things are crazy (I have two active teenagers and our family is very involved in both the Christian school where I work and they attend, and our church where I co-lead our “Heartbeat” ministry – meals for women in “crisis”). This past year especially my freezer meals were a lifesaver since I began making meals for my shut-in mother and father-in-law after they became incapacitated. I was so thankful to have “real food” that they would eat and have it ready to bring to them after a long day at school. Your manual, worksheets and system are the best out there. I always have something to bring to our “Heartbeat” new moms, patients in recovery, etc. I can’t thank you enough to helping me in this ministry I really feel God has called me to. God bless you, and all your helpers.
Blessings!

Thanks Diane! Less stress is a wonderful thing! We’re glad that you are able to help others in their time of need.

Closing Comments from Carol

I hope you enjoy the recipes and the lunch planning tips! I’ve got a pocket sandwich assembly day to plan. Before I go, there was a posting on the message boards that I would like to mention.

Gina asks:

Do very many of you actually send warm things in a thermos to school? It would allow a lot of variety. I just worried about it spoiling. Please advise.

Well, Gina, I am in my fifth year of packing lunches and I have been sending warmed foods the entire time. Not once have we had a problem with spoilage. The key is to make sure the Thermos is hot and the food that goes into it is hot as well. This means you need to pre-warm the Thermos by putting hot water in it 5 to 10 minutes before you put the hot food into it. For more information on packing a safe lunch, click here to visit the Partnership for Food Safety Education website.

Next month we’ll focus on Autumn recipes such as soup, slow cooker, and bread recipes.

Do you have any recipes that you would like to share? I’d love to try and share them with everyone. You can post your recipes on the 30 Day Gourmet Facebook® fan page or click here to send me an email. Or do you have any other topics that you would like me to cover? Click here to send me an email. I enjoy hearing from you!

Have fun in your kitchen!

Carol

Chicken Taco Rice

 Low Fat, Poultry, Recipes, Under 350 Calories  Comments Off on Chicken Taco Rice
Sep 012005
 
Share This Recipe

Our winner this month is Rachel from Gloucester, VA, with her recipe for Chicken Taco Rice. This rice is very versatile and can be used in many ways. It’s great plain with cheese melted on top. It can be used as a filling for Chicken Burritos. You can also use it to make Taco Salad or Nachos. Freeze it in individual servings for after school snacks.
Click here to go to a Printer Friendly Page Click here to go to a Printer Friendly Page
Advantage Cooking owners click here to download this recipe.

Recipes

1

2

3

4

5

6

Servings

8

16

24

32

40

48

Ingredients
Cooked, shredded chicken

2 C.

4 C.

6 C.

8 C.

10 C.

12 C.

Chicken broth

3 C.

6 C.

9 C.

12 C.

15 C.

18 C.

Tomato sauce

8 oz.

16 oz.

24 oz.

32 oz.

40 oz.

48 oz.

Taco seasoning mix

1 packet

2 packets

3 packets

4 packets

5 packets

6 packets

Brown rice, uncooked

1-1/2 C.

3 C.

4-1/2 C.

6 C.

7-1/2 C.

9 C.

On Hand Ingredients
Shredded cheddar cheese

1/2 C.

1 C.

1-1/2 C.

2 C.

2-1/2 C.

3 C.

Optional Ingredients
Tortilla chips, flour tortillas, tomatoes, lettuce, salsa, etc.


Assembly Directions:
Mix everything in a large saucepan. Bring to a boil. Cover, reduce heat and simmer until rice is done (about 40-50 minutes). Remove from heat and let stand 5 minutes. Fluff with a fork.

Freezing Directions:
Allow rice mixture to cool. Place in appropriate sized containers. Seal, label and freeze.

Serving Directions:
Thaw in the refrigerator. Reheat in microwave until warm. You can also reheat it in a saucepan if you add a little bit of water before heating. Sprinkle cheese on top and serve with tortilla chips.

Comments:
This is a great after school snack. Use it to make quick nachos or a filling for tacos.

Nutritional Info:
Optional ingredients not included in the analysis.
Per Serving: 254 Calories; 5g Fat (19.7% calories from fat); 18g Protein; 32g Carbohydrate; 1g Dietary Fiber; 37mg Cholesterol; 821mg Sodium.
Exchanges: 2 Grain (Starch); 2 Lean Meat; 1/2 Vegetable; 1/2 Fat.

Blackened Chicken Rub

 Low Fat, Poultry, Recipes, Under 10g Carbs, Under 350 Calories  Comments Off on Blackened Chicken Rub
Aug 012005
 
Share This Recipe

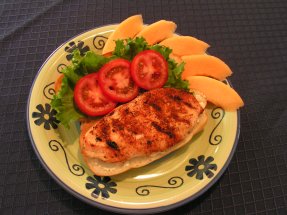
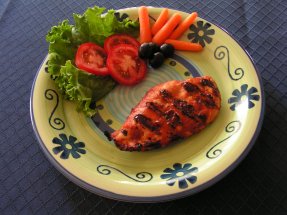
Shelley: We like to use this seasoning mix for grilled chicken sandwiches, which has become our recipe of choice to serve to company this summer. Butter and toast the sandwich rolls on the grill. Everyone will rant and rave!

blackchicken
Click here to go to a Printer Friendly Page Click here to go to a Printer Friendly Page
Advantage Cooking owners click here to download this recipe.

Recipes

1

2

3

4

5

6

Servings

6

12

18

24

30

36

Ingredients
Paprika

2 t.

1 T. + 1 t.

2 T.

2 T. + 2 t.

3 T. + 1 t.

1/4 C.

Garlic powder

1 t.

2 t.

1 T.

1 T. + 1 t.

1 T. + 2 t.

2 T.

Onion powder

1 t.

2 t.

1 T.

1 T. + 1 t.

1 T. + 2 t.

2 T.

White pepper

1/2 t.

1 t.

1-1/2 t.

2 t.

2-1/2 t.

1 T.

Black pepper

1/2 t.

1 t.

1-1/2 t.

2 t.

2-1/2 t.

1 T.

Salt

1/2 t.

1 t.

1-1/2 t.

2 t.

2-1/2 t.

1 T.

Dried oregano

1/2 t.

1 t.

1-1/2 t.

2 t.

2-1/2 t.

1 T.

Dried thyme

1/2 t.

1 t.

1-1/2 t.

2 t.

2-1/2 t.

1 T.

Cayenne pepper

1/4 t.

1/2 t.

3/4 t.

1 t.

1-1/4 t.

1-1/2 t.

Chicken breast, boneless

1-1/2 lbs.

3 lbs.

4-1/2 lbs.

6 lbs.

7-1/2 lbs.

9 lbs.

Assembly Directions:
Combine spice rub ingredients in a mixing bowl.

Freezing Directions:
Place chicken breast in freezer bag. Place the spice rub in rigid container or freezer bag. Seal, label and freeze.

Serving Directions:
Thaw chicken in refrigerator. Sprinkle spice mixture on chicken pieces before barbecuing. Store remaining spice mixture for another meal.

Nutritional Info:
Per Serving: 141 Calories; 3g Fat (20.5% calories from fat); 26g Protein; 2g Carbohydrate; trace Dietary Fiber; 69mg Cholesterol; 239mg Sodium.
Exchanges: 3-1/2 Lean Meat.

August 2005 Chewin’ the News with Carol

 2005, Chewin' the News  Comments Off on August 2005 Chewin’ the News with Carol
Aug 012005
 

Kitchen Fun with Carol

carol2007Hi everybody! I don’t know if it’s hot and humid where you are but it has been a scorcher here this summer. We have had weeks of temperatures in the nineties with extremely high humidity thanks to hurricane Dennis.

I always try to plan ahead for the summer months when I put together my summer menu. I avoid meals that will heat up the kitchen. That means we usually do a lot of grilling, cooking with a slow cooker or microwave, or cooking meals that are quick and with very little cooking time.

I usually organize the menu by the day of the week. Saturday and Sunday meals are quick and easy so that we can get in and out of the house for church and family activities. Monday is a slow cooker day. This gives me time to catch up with chores around the house after a busy weekend. Tuesday is a grill day. Wednesday is Mexican with tacos, burritos and fajitas. Thursday is Chinese stir-fries or soups cooked in the slow cooker. Friday is family night. If it’s cool, the kids usually want homemade pizza or calzones. If it’s hot we cook something special on the grill like grill packets or some marinated chicken and grill fries. Some of our favorite recipes include Meats in MarinadeSwiss SteakElegant Chicken in MarinadeDelicious Pot RoastMeatball SubsMontreal Chicken Sandwiches, Grilled Chicken Salad, Pork BBQ, Chili cooked in the slow cooker, Taco Salad and Sloppy Joes.

We are year round grillers. We have been known to light up the grill in the dead of winter with six inches of snow on top of the grill! We have accumulated our fair share of grill recipes over the years. Some are favorites from friends and family. Others are ones that we have created on our own. Some can be frozen and others cannot. We love trying out new recipes or trying to adapt existing recipes to be cooked on the grill.

Last year while shopping for a Father’s Day gift for my Dad, I came across an expandable grilling tray that is used for cooking vegetables on the grill. It expands to fit the depth of your grill. We love using it. You can use it to grill potatoes, vegetables or even cook bags of frozen French Fries. How convenient is that!

One of our favorite new recipes this summer is grilled zucchini. You cut 3 small zucchini into 1/4 inch slices. Cut up 1 green pepper into 1/2 inch chunks. Cut up 1/2 of an onion into 1/4 inch chunks. Mix it all together with 1/3 cup of light Italian dressing and 1 teaspoon of Italian seasoning. Grill on a vegetable grilling tray or a cookie sheet at medium heat or about 350 degrees until the veggies start to brown and are crisp tender. This is a wonderful side dish!

This issue of Chewin the News brings you two new grill recipes including some tips on grilling potatoes or French Fries. Read more about it below in the Bonus Recipes section.

Bonus Recipes

Grilled Chicken Parmesan

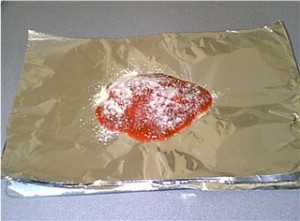
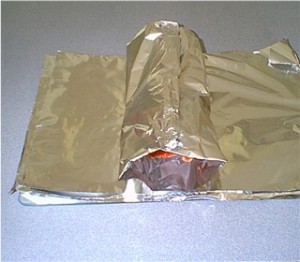
I remember seeing a commercial for Reynolds Wrap aluminum foil. In the commercial they created grill packets. They placed the food inside the wrap and folded it to seal it. This allows you to cook your meat, sauce and vegetables all at the same time on the grill. This idea is great for freezer cooking as well! You can prepare the grill packets ahead of time and freeze them. When you want to grill, just take them out of the freezer and let them thaw completely. Heat up the grill to the appropriate temp and you are ready to make a great meal!

My husband loves Chicken Parmesan but I don’t like to heat up the oven for 45 minutes in the summer. Grill packets became our solution to the problem. It’s easy to create your own grill packet. Tear off a piece of foil that is 18 inches long. Layer your recipe in order of cooking time. Meat usually takes the longest amount of time to cook so start with the meat on the bottom. Add any toppings and sauce.

Once you have all the ingredients layered, it’s time to make the packet. Bring the short sides of the aluminum foil together and fold over twice. Center the fold in the middle of the packet. Now fold over the ends to completely seal the whole packet. The packets can be cooked immediately or frozen for later use.

packetstep1-small   packetstep2-small


potato-smallGrill Fries Seasoning Mix

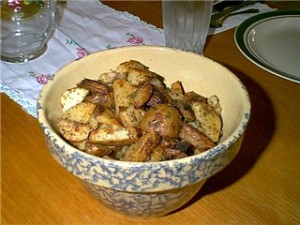
We wanted a way to cook potatoes and French fries in the summer besides using the microwave. We love those seasoned fries that you get at restaurants so we created our own seasoning mix. You can use this either on regular potatoes or on plain frozen French fries. We grill them using a vegetable grilling tray. I have also used a regular a cookie sheet. The secret is to make sure that you flip the potatoes or fries over every couple of minutes so that they don’t burn.


Recipe of the Month Contest Winner

Recipe of the Month… April’s Chicken Marinade

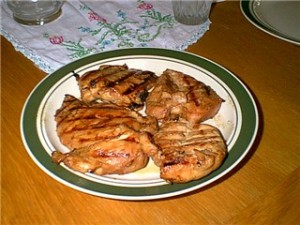
aprilchicken-smallOur winner this month is April from Beaverton, OR, with her recipe for April’s Chicken Marinade. This recipe uses honey. I have never frozen honey in a marinade before. Most information on honey talks about the quality of the honey after freezing. It tends to make baked goods mushy because it breaks down. This is not an issue with marinade and it worked great for us!
I am always looking for a great marinade. There’s nothing simpler on cooking day than putting a marinade together, adding the meat and then freezing. It’s a wonderful thing! We tend to eat a lot of chicken in the summer and this recipe tastes great! My kids even asked when we would be having it again. I just love it when that happens! I would also suggest trying it with pork chops.

Let’s meet April:

I am a stay-at-home mother of my three-month-old baby girl, Allison. Before her birth, I was a high school English teacher with an hour-long commute. My husband and I have been doing 30-day-gourmet for a couple of years. Every time we make a meal that we know freezes well, we make a huge batch and freeze a bunch of it in entree size Gladware containers. The individual servings work great for us, because we can just grab one out of the freezer to take to work for lunch (much healthier than frozen meals from the grocery store, and tastier too), and it doesn’t take long to build up a variety of meals. On nights when neither of us feel like cooking “from scratch,” we just grab meals out of the freezer. This keeps us out of the fast-food restaurants. This poultry marinade is great tasting, simple to make, and doesn’t include expensive ingredients. I found it on a hand-out that I received in a high school foods class from the Oregon Turkey Improvement Association, 13 years ago. I used it a lot when I was still a single first-year teacher with no money. Enjoy!

Click here to view/print the August Recipe of the Month.

Freezer Cook of the Month Contest Winner

Our winner this month is Theresa from Houston, TX, with her great story about the “five second rule” and freezer cooking!

Theresa says:

The new “newsletter”(s) are great! It was so great to get the one from Carol and then from Nanci so close together. The fact that my sister, a friend and I just had a marathon cooking day on Saturday probably influences my excitement. It was my friend’s first time cooking the 30 Day Gourmet way and my sister’s first time in 8 years! We made 94 batches of entrees, breads, muffins, soups, sandwiches and of course, desserts! I started at 6 AM finishing my make ahead items (browned beef and fat free white sauce) and we finished around 9:30 PM. Our final recipe was the Chicken Pockets and since we had been working so diligently and hadn’t stopped to eat dinner (lunch was pizza delivered to our door), we were eagerly anticipating the timer going off to signal the first tray of them being done. In my overly eager state, I opened the oven door (the upper of a double oven) and pulled out the pan and apparently those chickens had a rebirth and flew right off the pan onto the floor!!!! Unfortunately the 5 second rule didn’t apply due the day’s worth of build up on the floor (uncooked rice, cornflake crumbs, etc.). We were so hungry we really wrestled with the thought of digging into the steamy pile of 12 crescent rolls filled with the cream cheese enrobed chicken … BUT couldn’t get past the hairs and rice sticking to it all. So, we waited 10 more minutes and enjoyed the second batch:) When it was all over, we felt like we did after walking a half marathon back in January, but we are in that afterglow of awe at our full freezers! The new newsletters keep me inspired and act as a 30DG Rolaids (relief for the “I’m so tired of browning, cutting, mixing, stirring, labeling, storing, I don’t want to do this anytime soon” feeling I had at 10:30 PM Saturday night). Thanks for doing a great job as usual !!!!!!

Thanks Theresa! We’re glad you are enjoying the new newsletter format and are encouraged by them.

Closing Comments from Carol

I hope you enjoy the recipes and the grilling tips! Next month we’ll talk about back to school lunch and after school snack recipes.

Do you have any recipes that you would like to share? I’d love to try and share them with everyone. You can post your recipes on the 30 Day Gourmet Facebook® fan page or click here to send me an email. Or do you have any other topics that you would like me to cover? Click here to send me an email. I enjoy hearing from you!

Have fun in your kitchen!

Carol

April’s Chicken Marinade

 Low Fat, Poultry, Recipes, Under 10g Carbs, Under 350 Calories  Comments Off on April’s Chicken Marinade
Aug 012005
 
Share This Recipe

Our winner this month is April from Beaverton, OR, with her recipe for April’s Chicken Marinade. This recipe uses honey. I have never frozen honey in a marinade before. Most information on honey talks about the quality of the honey after freezing. It tends to make baked goods mushy because it breaks down. This is not an issue with marinade and it worked great for us!

aprilchicken-small
Click here to go to a Printer Friendly Page Click here to go to a Printer Friendly Page
Advantage Cooking owners click here to download this recipe.

Recipes

1

2

3

4

5

6

Servings

6

12

18

24

30

36

Makes

1-1/4 C.

2-1/2 C.

3-3/4 C.

5 C.

6-1/4 C.

7-1/2 C.

Ingredients
Boneless, skinless chicken breast halves

6

12

18

24

30

36

Vegetable oil

1/2 C.

1 C.

1-1/2 C.

2 C.

2-1/2 C.

3 C.

Soy sauce

1/2 C.

1 C.

1-1/2 C.

2 C.

2-1/2 C.

3 C.

Honey

2 T.

1/4 C.

1/4 C. + 2 T.

1/2 C.

1/2 C. + 2 T.

3/4 C.

Grated fresh ginger OR Ground ginger

1 t. OR 1/4 t.

2 t. OR 1/2 t.

1 T. OR 3/4 t.

1 T. + 1 t. OR 1 t.

1 T. + 2 t. OR 1-1/4 t.

2 T. OR 1-1/2 t.

Dry mustard

2 t.

1 T. + 1 t.

2 T.

2 T. + 2 t.

3 T. + 1 t.

4 T.

Minced garlic

1 t.

2 t.

1 T.

1 T. + 1 t.

1 T. + 2 t.

2 T.


Assembly Directions:
Combine all marinade ingredients. Place the chicken pieces in 1-gallon freezer bag or rigid container. Pour marinade over the meat.

Freezing Directions:
Seal, label and freeze.

Serving Directions:
Thaw in refrigerator or in microwave. Grill or cook chicken until the meat is no longer pink inside and the juices run clear. Discard marinade.

Carol’s Comments:
I am always looking for a great marinade. There’s nothing simpler on cooking day than putting a marinade together, adding the meat and then freezing. It’s a wonderful thing! We tend to eat a lot of chicken in the summer and this recipe tastes great! My kids even asked when we would be having it again. I just love it when that happens! I would also suggest trying it with pork chops.

Nutritional Info:
Oil has been removed from the nutritional analysis.
Per Serving: 167 Calories; 2g Fat (9.0% calories from fat); 29g Protein; 8g Carbohydrate; trace Dietary Fiber; 68mg Cholesterol; 1449mg Sodium.
Exchanges: 4 Lean Meat; 1/2 Vegetable; 1/2 Other Carbohydrates.

August 2005 Chewin’ the News with Shelley

 2005, Chewin' the News  Comments Off on August 2005 Chewin’ the News with Shelley
Aug 012005
 

Cookin’ at the Keyboard with Shelley

ShelleyWhen I started freezer cooking eight years ago, I began by cooking enough meals for one month at a time. It wasn’t long until I started to double the recipe quantities, stocking the freezer for two months instead of one. With a little extra planning and only one extra day in the kitchen, we’ve been able to freezer cook every four months. We plan a cooking session in early February (after we’ve recovered from Christmas), June (stocking the freezer with lots of marinades for the barbecue), and October (to get us through the busy holiday season).

One summer I had selected several chicken marinades and multiplied each by a quantity of four (one for June, July, August, and September). After assembling individual recipes of each marinade in separate freezer bags, I added my chicken pieces to each bag and anticipated a hassle-free summer at the backyard barbecue. Everything went as planned until some unexpected company arrived in late August. I went to my freezer and found that I had one bag of Teriyaki Chicken, one bag of Spicy Grilled Chicken, and one bag of Debbie’s Chicken in Marinade…but not enough of anything to serve my guests. The result was a quick trip to the grocery store for me!

I learned my lesson that summer. Now I freeze my marinades separately from the meat. It’s easy to find 1-cup and 2-cup containers on sale and they store conveniently in the freezer door. I specify the container needed for each marinade recipe in the Advantage Cooking software, and then use the Container Report to anticipate the number of containers I need to have on hand.

Using this method, I can spontaneously react to the carefree days of summer, mixing and matching meats and marinades. Here are three new ideas for the grill that we’ve enjoyed this summer.
spicygrilledchickenSpicy Grilled Chicken
Ready to try something new? This marinade is a little different because of the strong, spicy flavor. The older our daughters get, the more they like it.


blackchicken

Blackened Chicken Rub

We like to use this seasoning mix for grilled chicken sandwiches, which has become our recipe of choice to serve to company this summer. Butter and toast the sandwich rolls on the grill. Everyone will rant and rave!


hamburgerMontreal Burgers

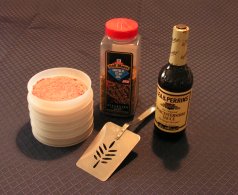
Grab a stack of burgers and throw them on the grill. Sprinkle with Worcestershire sauce and Montreal Steak Seasoning. For a stronger flavor, repeat on the other side after turning. It doesn’t get any better, or easier, than this!

Our family gave a big “thumbs up” to April’s Chicken Marinade and the Grill Fries Seasoning Mix that Carol shared in her newsletter earlier this month. We are planning a “back-to-school” mini-cooking day next weekend and are anxious to try some of Nanci’s snack and lunch recipes. Her cost analysis has given me added incentive to do some extra baking before school starts! Thanks, Nanci!

Software Suggestions

Scaling Recipes

I’ve received a request for the Advantage Cooking software to print recipes in “column” format, similar to the Freezer Cooking Manual. It is possible to use the software to generate the scaled quantities for any recipe entered. Here’s the process.

Unless I’m trying a meal for the first time, I always cook multiple quantities of a recipe. Depending on the nature of the recipe, I will assemble the ingredients in one of two ways.

The first method is used when the recipe ingredients are difficult to divide into individual meals. Marinades are the best example. Instead of combining four times the quantity of one recipe in a bowl and then trying to separate the “layers” when I’m done, I’ll use four different bowls (or freezer bags) and assemble one recipe, four times. In this case, I don’t need to multiply the recipe ingredients while I’m cooking; the original recipe has all the information I need. The critical step is to make sure I buy the correct amount of each ingredient! When planning for my Cooking Day, I must be sure to enter a quantity of “4” for this particular “Cooking Day Recipe” before generating a Grocery Report.

A good example of the second method of assembly would be meatballs. I don’t want four different bowls; I want one bowl with four times the recipe. To print a recipe with the ingredients already calculated, use the “Scale” option in the Recipe Manager. Select the desired recipe and click the “Scale” button. When the scaling window appears, enter the desired multiplication factor (“4” in this case), check the “Copy Recipe” option, and click “Scale.” A new recipe will be added using the same recipe name, followed by the quantity. All the ingredients are automatically multiplied by the scale factor! Print this new recipe and use it, instead of the single version, when assembling the recipe. Please note: when planning for the cooking day, be careful when selecting the “Cooking Day Recipes.” If you select the single version recipe, enter a quantity of “4”. If you select the scaled version of the recipe, enter a quantity of “1”. Either method will calculate the correct amount of ingredients on the Grocery Report. (An easy mistake would be to select the scaled version of the recipe, enter a quantity of four, and come home ready to make 16 recipes of meatballs. Oops!)

You will notice that scaling a recipe can result in some unusual amounts and measures of ingredients. Use the “Change Measure” button at the bottom of the window to quickly convert to equal, but more easily used, measures (e.g. 12 tablespoons = 3/4 cup).


Click here to download a free trial version of the software!

Closing Comments from Shelley

I was surprised when a friend of mine recently said to me, “I haven’t been able to freezer cook for awhile, but I think of you every time I grocery shop.” Reading the puzzled look on my face, she went on to explain that she uses the Advantage Cooking software to create her grocery list every week. Tammy also mentioned in her July newsletter how helpful the grocery report can be. Whether or not it’s time to focus on your kitchen and restock your freezer, take a few minutes this week and enter or import a new recipe or two. You’ll be laying a foundation that you can build on tomorrow.
Enjoy the rest of your summer and I’ll see you back here next month!


         Shelley

Spicy Grilled Chicken

 Low Fat, Poultry, Recipes, Under 10g Carbs, Under 350 Calories  Comments Off on Spicy Grilled Chicken
Aug 012005
 
Share This Recipe

Shelley: Ready to try something new? This marinade is a little different because of the strong, spicy flavor. The older our daughters get, the more they like it.

spicygrilledchicken
Click here to go to a Printer Friendly Page Click here to go to a Printer Friendly Page
Advantage Cooking owners click here to download this recipe.

Recipes

1

2

3

4

5

6

Servings

6

12

18

24

30

36

Ingredients
Chili sauce

1 C.

2 C.

3 C.

4 C.

5 C.

6 C.

Red wine vinegar

1/2 C.

1 C.

1-1/2 C.

2 C.

2-1/2 C.

3 C.

Horseradish

1 T.

2 T.

3 T.

1/4 C.

1/4 C. + 1 T.

1/4 C. + 2 T.

Garlic powder

1/4 t.

1/2 t.

3/4 t.

1 t.

1-1/4 t.

1-1/2 t.

Salt

1/2 t.

1 t.

1-1/2 t.

2 t.

2-1/2 t.

1 T.

Chicken breast; bonless, skinless

1-1/2 lbs.

3 lbs.

4-1/2 lbs.

6 lbs.

7-1/2 lbs.

9 lbs.


Assembly Directions:
Combine marinade ingredients in a mixing bowl.

Freezing Directions:
Place chicken breast in freezer bag. Place marinade in plastic container. Seal, label and freeze.

Serving Directions:
Thaw chicken and marinade in the refrigerator. Marinate chicken in 1/2 of sauce for 5 minutes. Place chicken on grill and discard marinade from bowl. Grill or broil chicken, turning and basting frequently with the remaining sauce.

Comments:
If using bone-in chicken, precooking in the microwave will save time.

Nutritional Info:
Per Serving: 146 Calories; 3g Fat (18.7% calories from fat); 26g Protein; 4g Carbohydrate; 1g Dietary Fiber; 69mg Cholesterol; 251mg Sodium.
Exchanges: 3-1/2 Lean Meat.